Guide/SendApp Agent/Campaigns
Creating a WhatsApp campaign
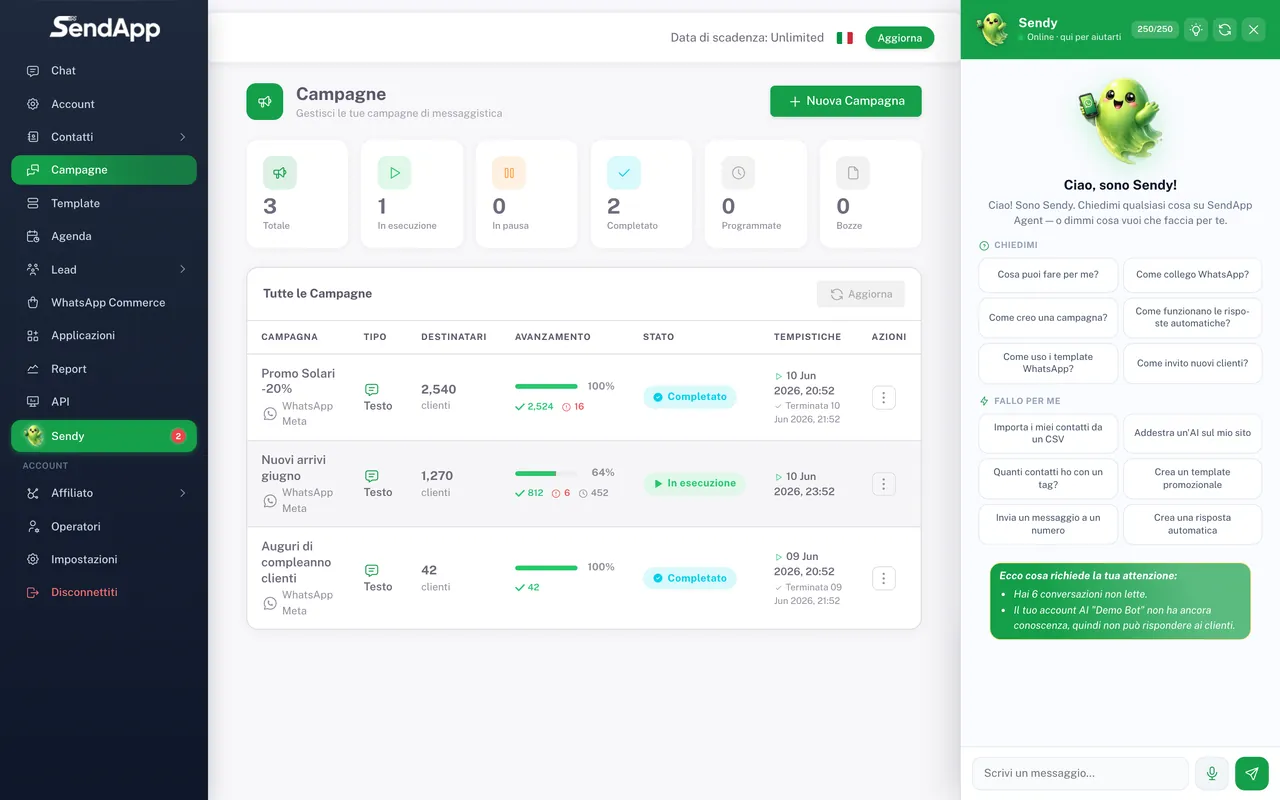
Campaigns let you send the same message to many people at once — promotions, news, announcements. In SendApp Agent you create a campaign in a few steps, carefully choose the segment, and read the results: delivered, read, replies.
Updated on June 16, 2026 · 8 min read
Before you start
- A connected WhatsApp channel
- Contacts in the address book with tags
- For marketing: official API and an approved template
For promotional campaigns, use the official API (or SendApp Official) with approved templates. Sending in bulk from the number connected via QR exposes you to the risk of a block: that channel should only be used for transactional/operational messages.
The steps to create a campaign
- 1
Open Campaigns → New campaign
From the side menu, go to Campaigns and create a new campaign.
- 2
Give the campaign a name
An internal name to find it in the reports (e.g. “June sale”).
- 3
Choose the recipients
Select the segment by tag (e.g. all the “customers” in “Naples”). You see how many contacts will receive it before sending.
- 4
Compose the message
Write the text, add media (image/video/PDF) and buttons (link or quick reply). On the official API, choose an approved template.
- 5
Schedule or send now
Set the send date/time and, where available, the time windows. Or send immediately.
- 6
Confirm
The campaign goes into the queue and starts at the scheduled time.
Recipients: choosing the right segment
Recipients are chosen by tag and fields (see “Contacts, tags, and custom fields”). Only send to the relevant segment: relevant messages = fewer unsubscribes, fewer reports, a safer number.
Message: media and buttons
- Text
- The body of the message. You can personalize it with the contact's fields (e.g. name).
- Media
- An image, video, or document at the top of the message. It boosts attention, but adds weight to delivery times.
- Buttons
- Action buttons: a link to a page (e.g. catalog) or quick replies the customer taps to respond.
- Template (official API)
- To message first you need a Meta-approved template, in the correct category (Marketing/Utility/Authentication).
Scheduling and limits
- Schedule the send at sensible times for your audience (avoid nighttime and intrusive hours).
- Large campaigns are sent in batches to avoid overload and respect the limits.
- On new numbers it's best to start with low volumes and grow gradually.
Reading the reports
Once a campaign is running, you see the numbers in real time: sent, delivered, read, replies, and failed. From here you understand what worked and you can resend to the failed ones only.
- Sent / Delivered
- How many messages went out and how many arrived. A wide gap signals invalid numbers or delivery problems.
- Read
- How many opened the message. It's the main interest indicator.
- Replies
- Who replied: the warmest contacts to focus your follow-up on.
- Failed
- Undelivered messages. You can resend to just these without re-sending to everyone.
Common mistakes
- Template stuck on a single check
- Often the payment method is missing on the official number: templates aren't delivered. Add a card in the Business Manager.
- Many failures
- Numbers without a country code or invalid. Clean up the address book and re-import with the correct codes.
- Low read rate
- Segment too broad or message not relevant enough. Narrow the target and personalize.
Ready to put it into practice?
Open SendApp and follow the steps in this guide. Need help? Support is one message away.