
The function of Automatic Unsubscription on Sendapp Desktop It allows you to offer your customers a simple and transparent way to unsubscribe from your promotional campaigns. Follow this guide to configure and make the most of this feature and manage unsubscribers.
1. Enable Automatic Unsubscription
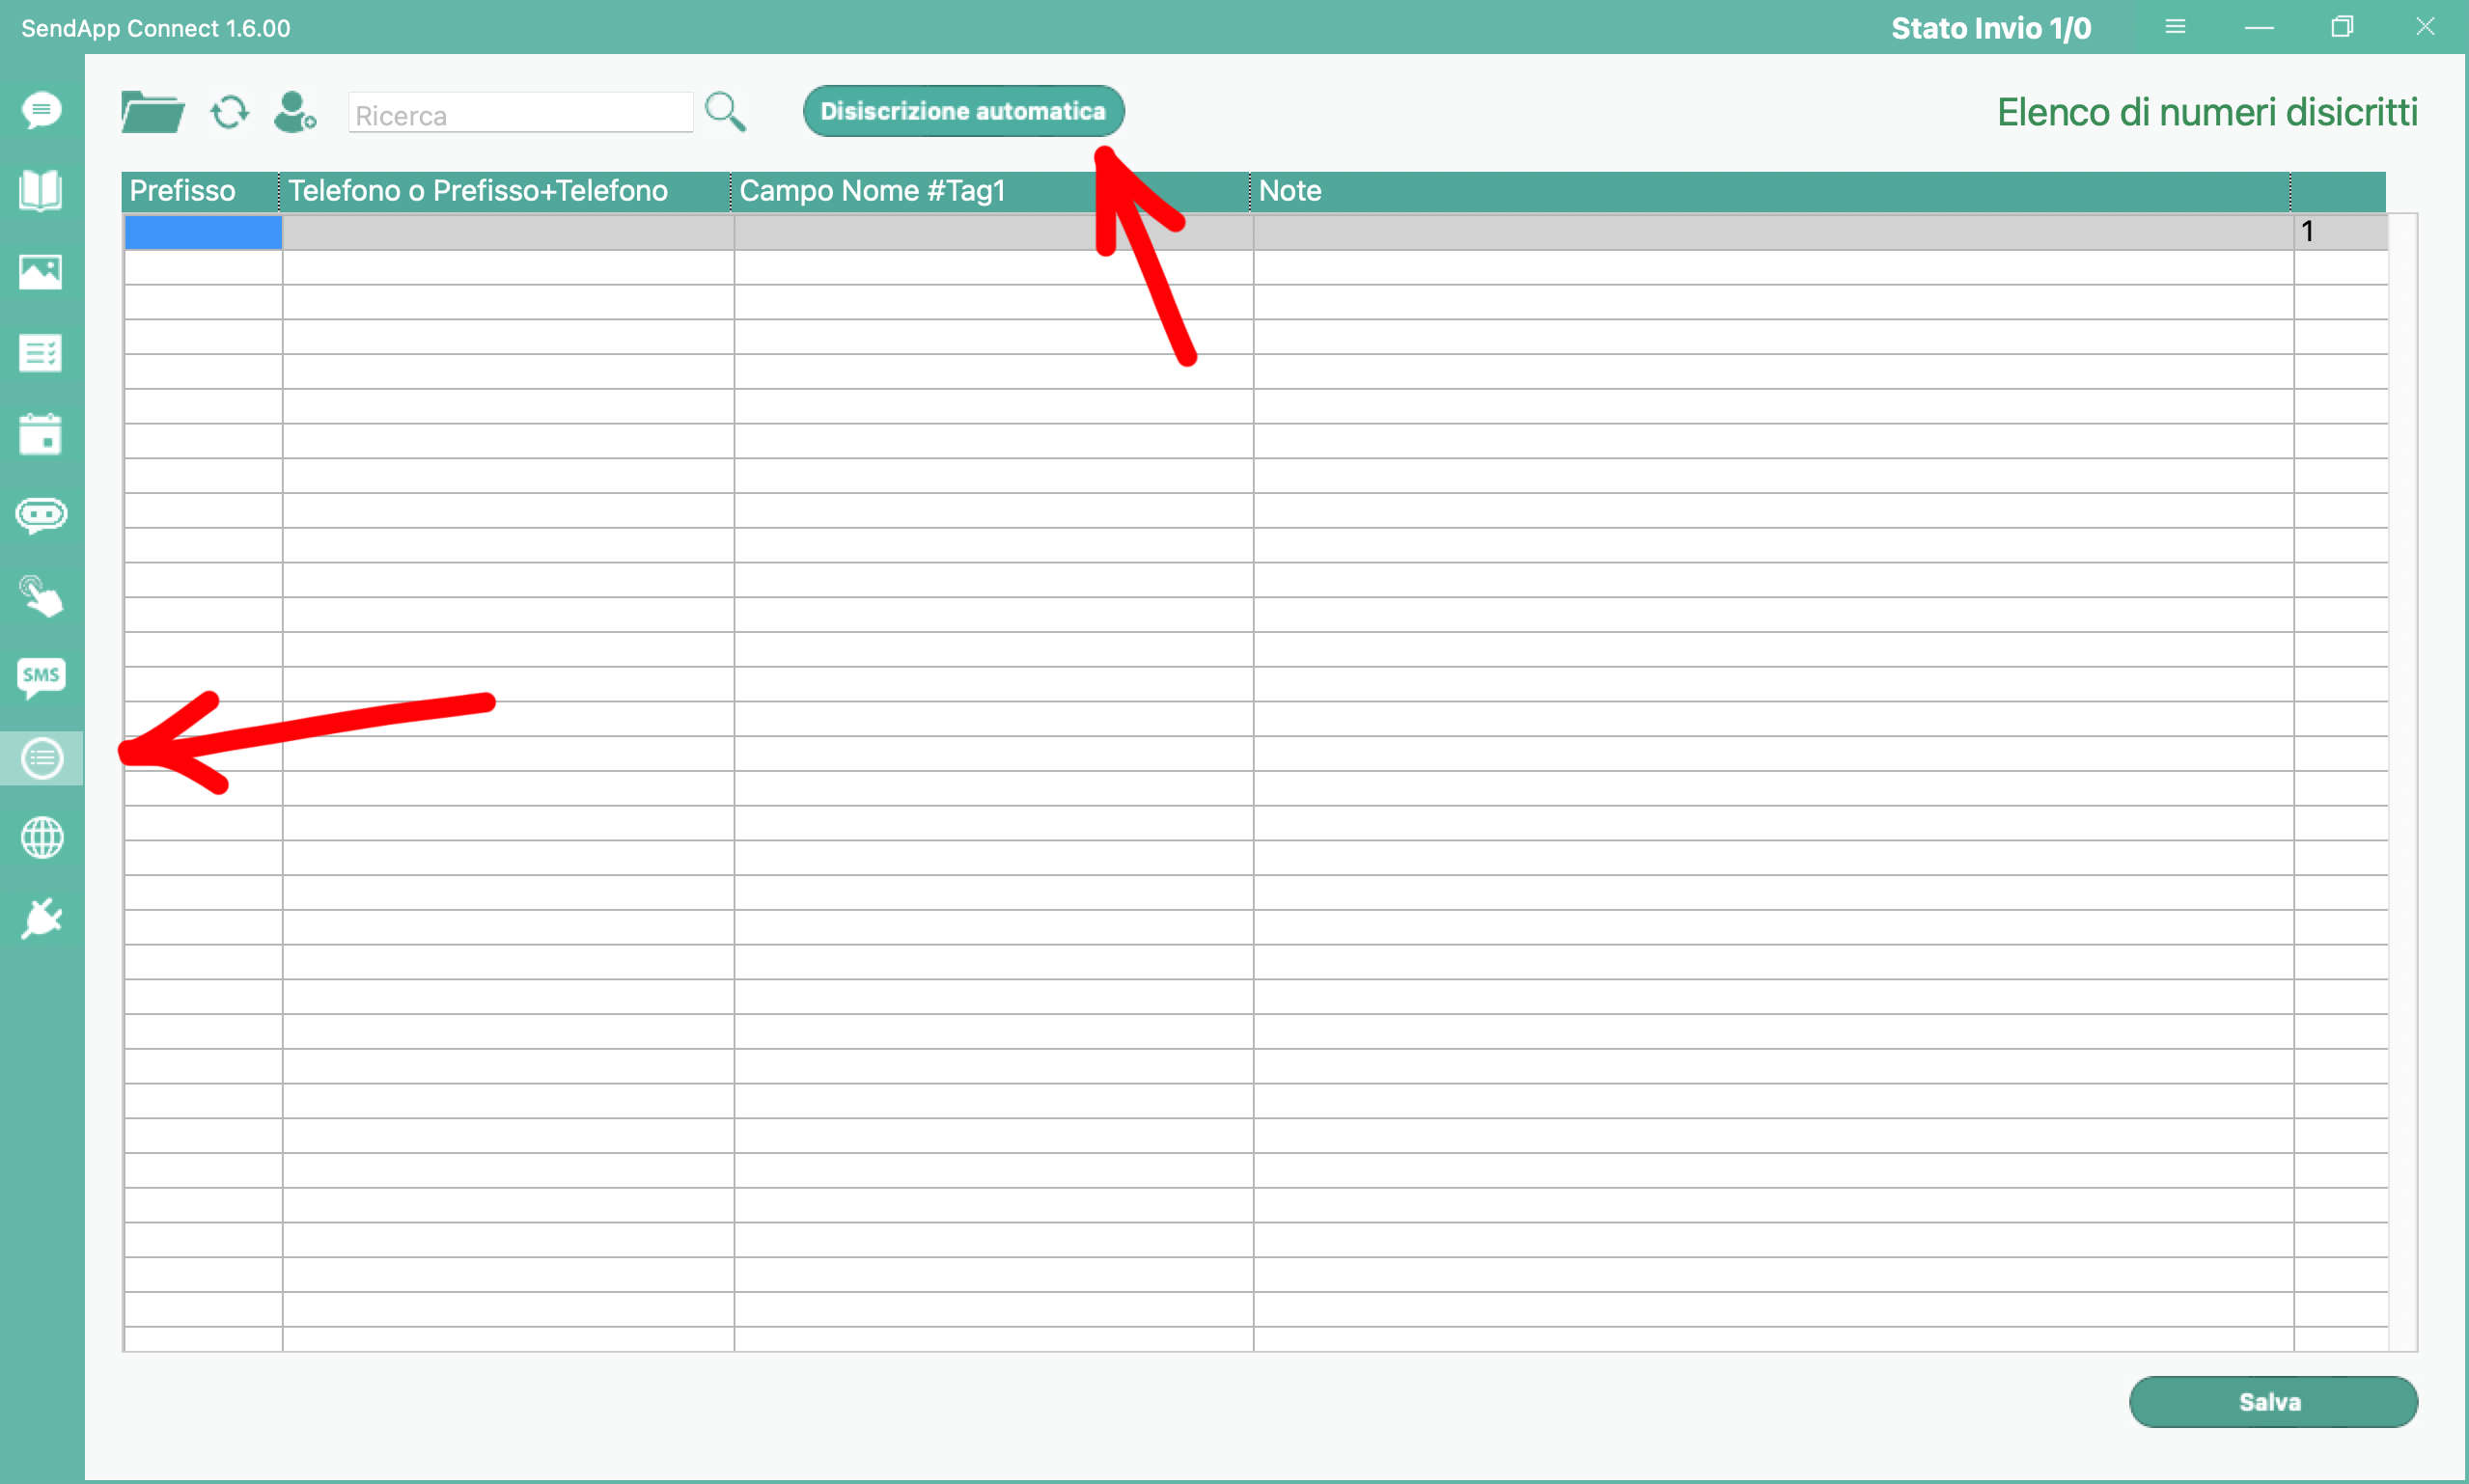
• Log in to Sendapp Desktop.
• Click on the ninth icon from the top (Unsubscribe).
• To the right of the search field, you will find the button Automatic Unsubscription.
• Click on Automatic Unsubscription: a window will open with two main fields.
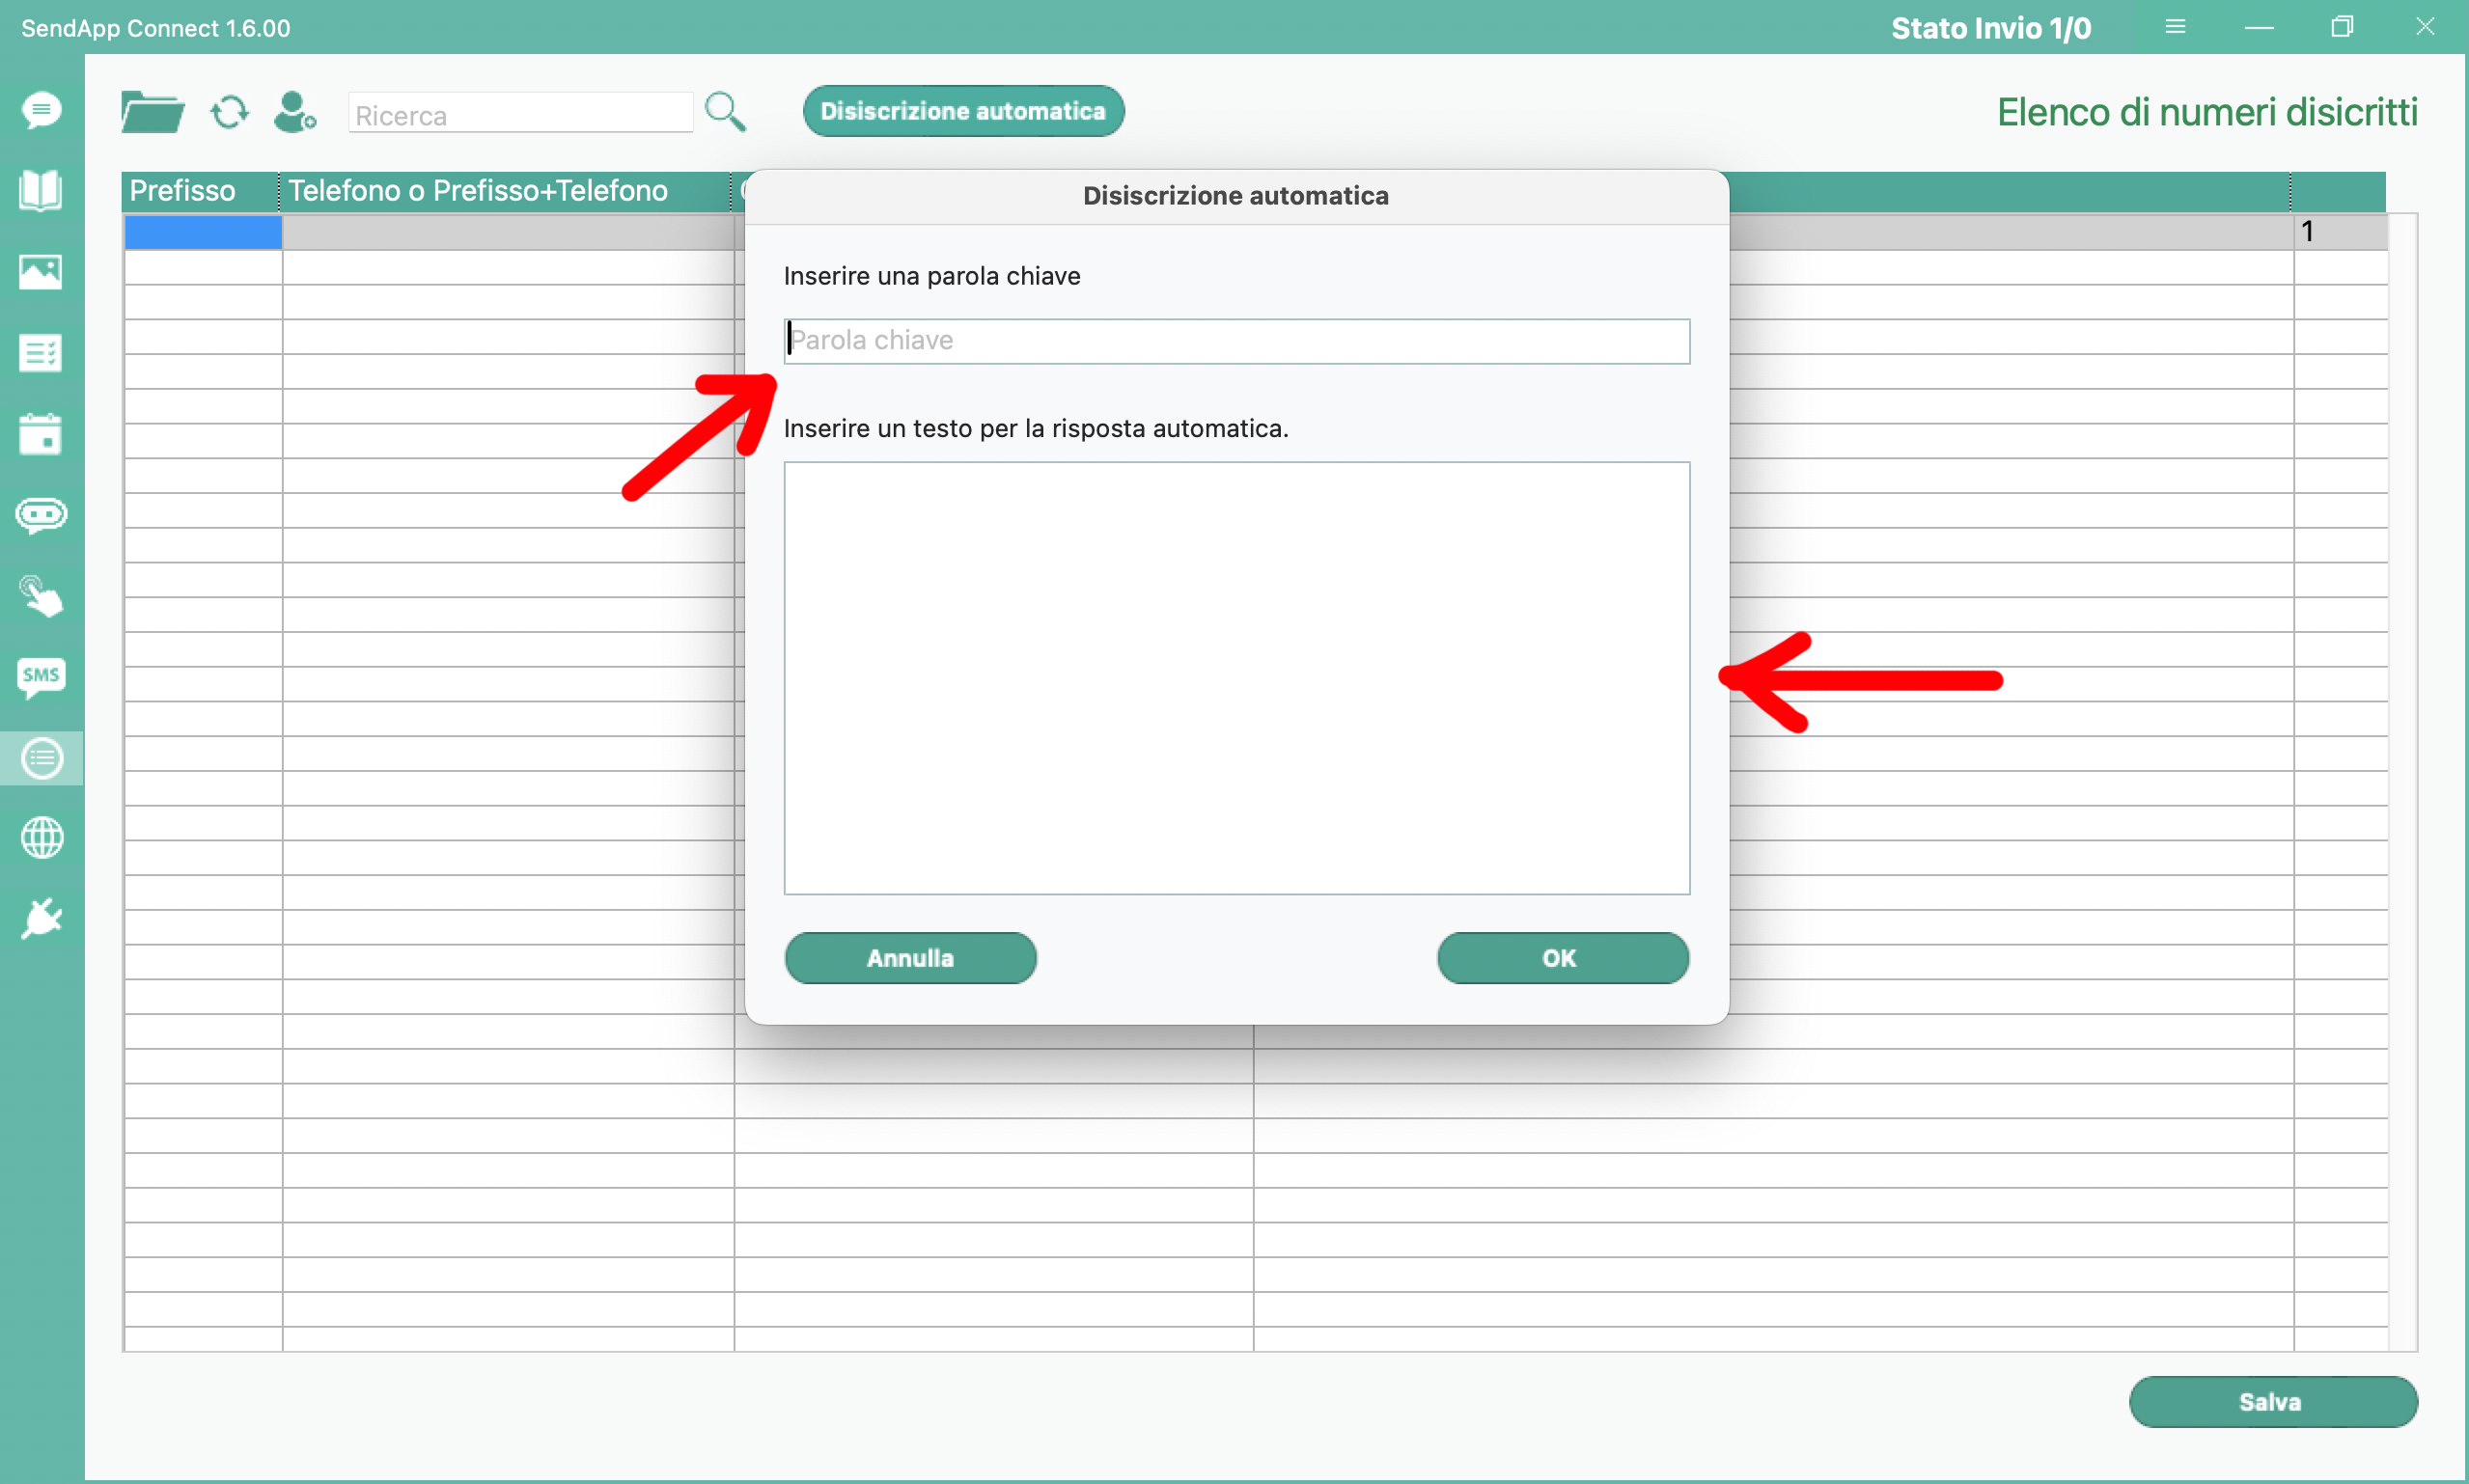
2. Configure Unsubscribe Messages
•Enter the keyword:
• In this field, write the word that customers will have to send in the chat to unsubscribe.
• Example: unsubscribe me.
•Automatic reply:
• Enter the confirmation message here that will be automatically sent to the customer after unsubscribing.
• Example: Unsubscription was successful.

3. Tips for Use in Promotional Campaigns
To make the process transparent and comply with GDPR regulations, we recommend including an unsubscribe message in your promotional campaigns. Here's an example to add to the end of your messages:
If you no longer wish to receive promotional messages, please write “unsubscribe”.
This way, your customers will know how to unsubscribe easily and without complications.
4. Manage Unsubscribed Contacts
Once a customer submits the unsubscribe keyword, they will automatically be removed from your active campaign address book. This feature allows you to maintain organized and compliant contact management.
With the Automatic Unsubscription, Sendapp Desktop helps you ensure respectful and professional interactions with your customers, improving their experience and increasing trust in your services.
Activate this feature today to offer an increasingly transparent and personalized service!