
Configure
Designed for small and medium-sized businesses,
to revolutionize customer communication.
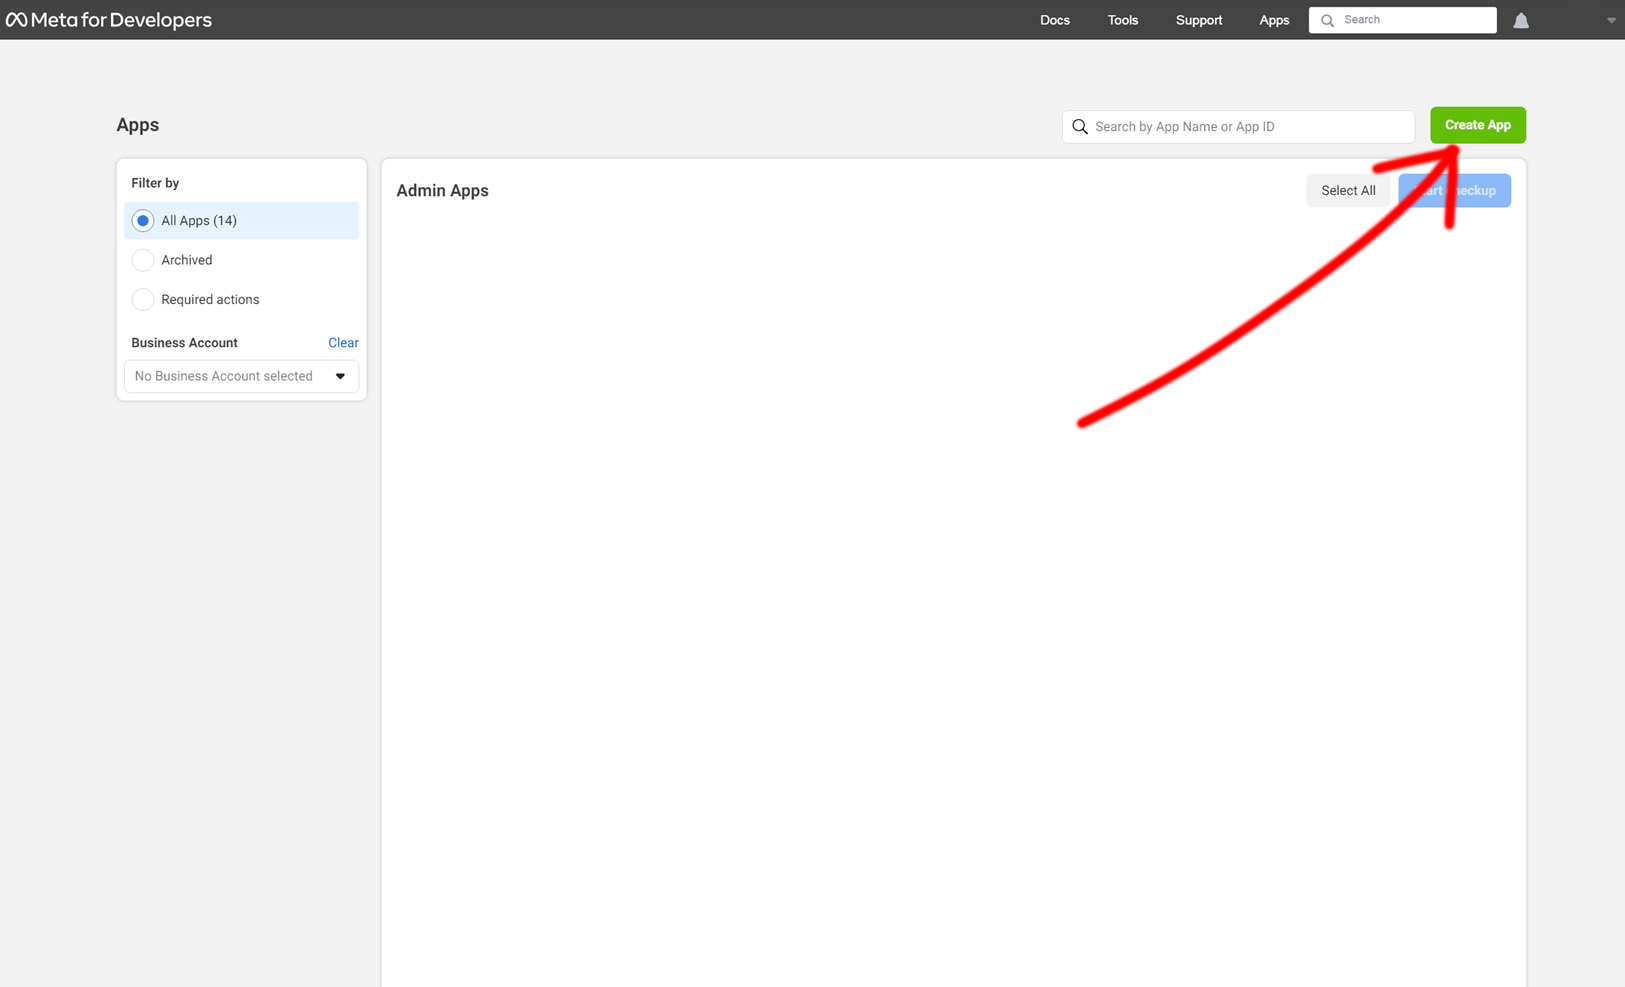
How to Create a Facebook App
- Log in or register on Facebook
- Then go to the page Apps
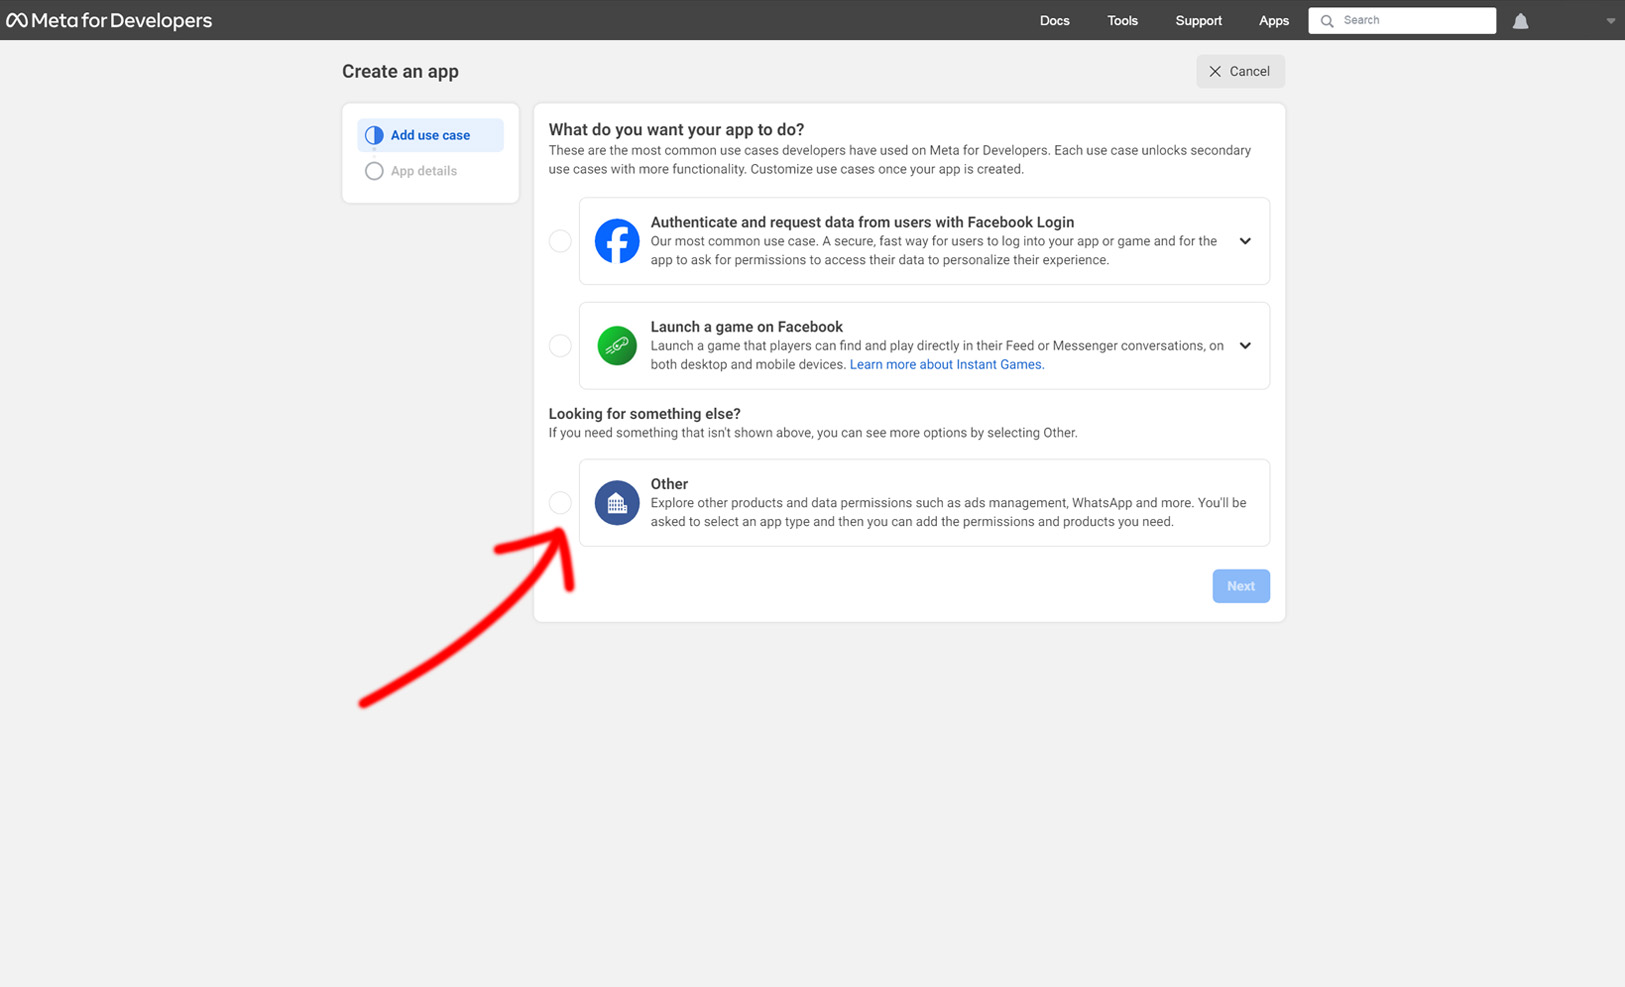
- Click on Create an App
- Select Other
- Then click on next
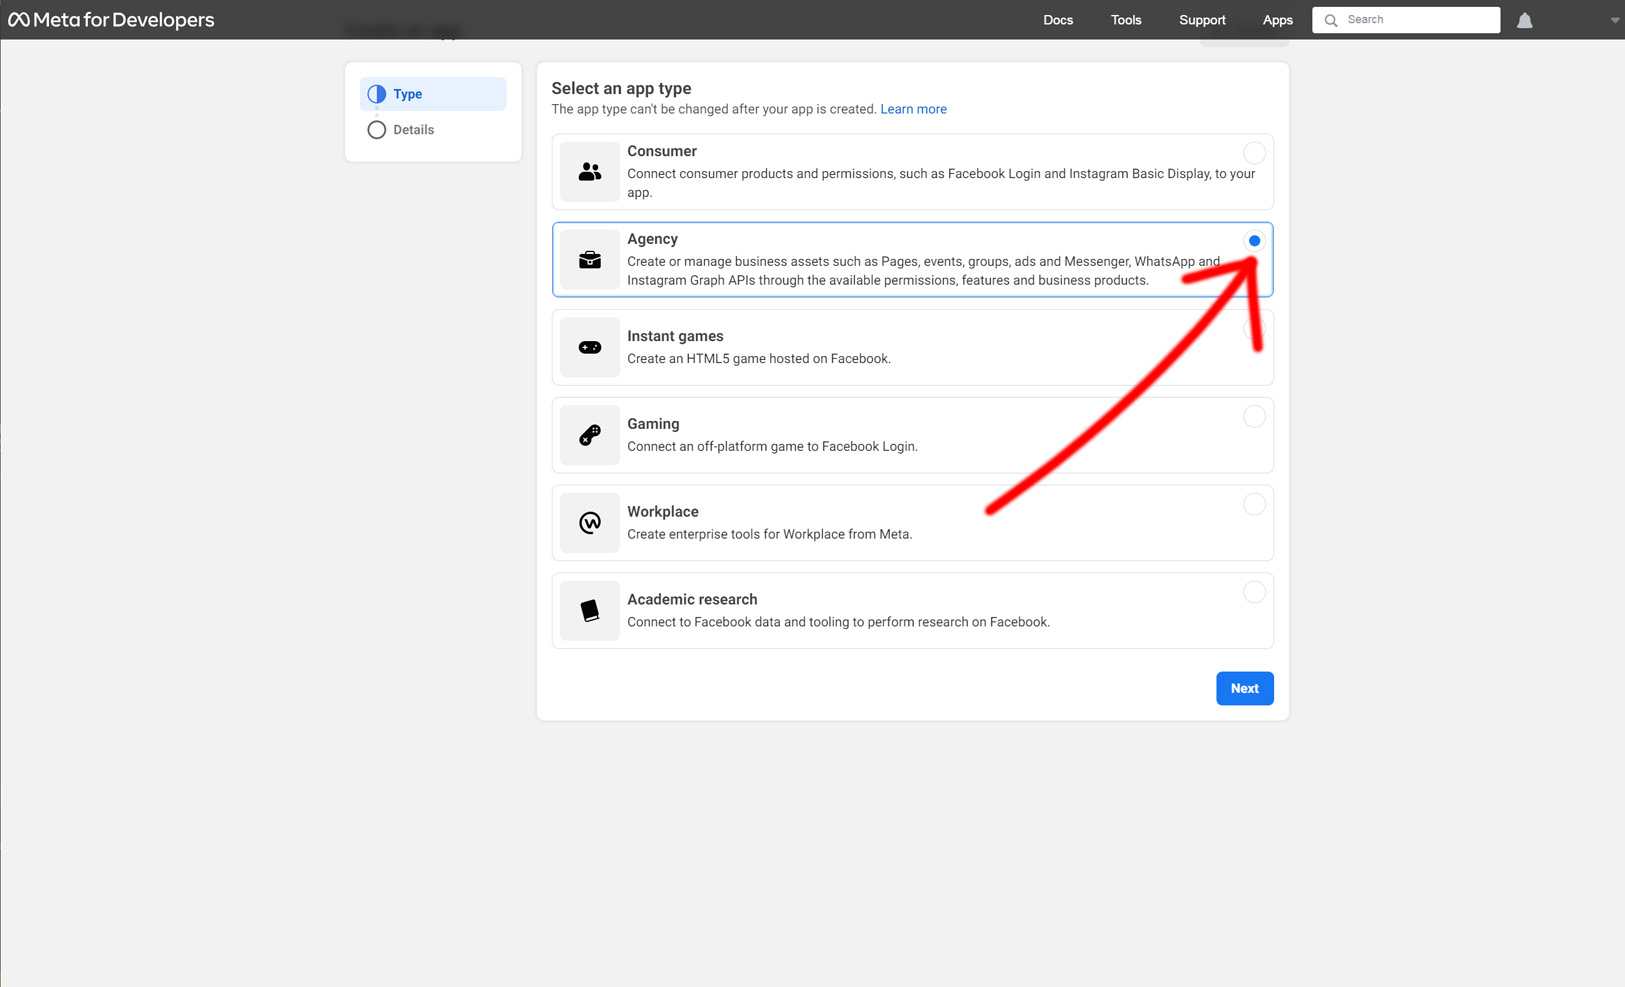
- Select Agency
- Then click on next
- Then enter all the required information
- And click on Create App

How to Set Up WhatsApp in an App
- In the App you need to configure the product WhatsApp

- Select the information requested by Facebook and click on continues

- After clicking continue, Facebook will send a SMS with an OTP code to enter
- After entering the OTP code click on continue
How to create a permanent token
- After configuring your WhatsApp product, to create a permanent token, go to the page Business Facebook
- Click on System Users in the side menu
- Select the administrator account and click Generate a new token

- After clicking on the Generate a token button, a new window will open where you have to select the App you created previously
- In the token expiration section select “never”
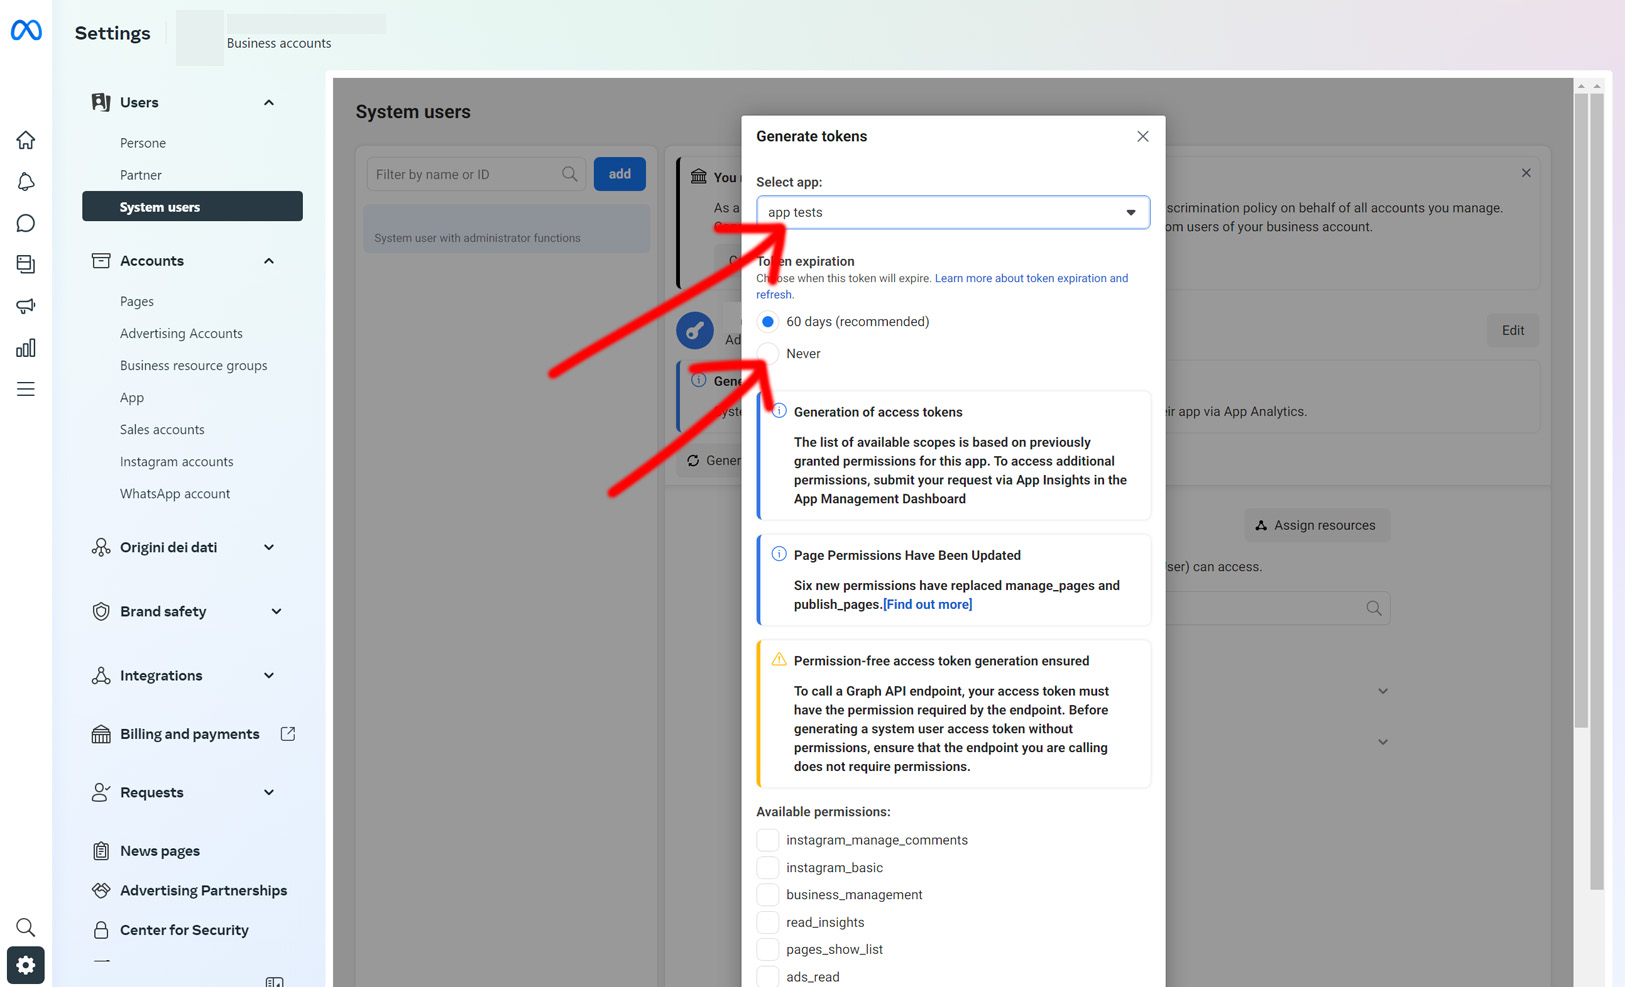
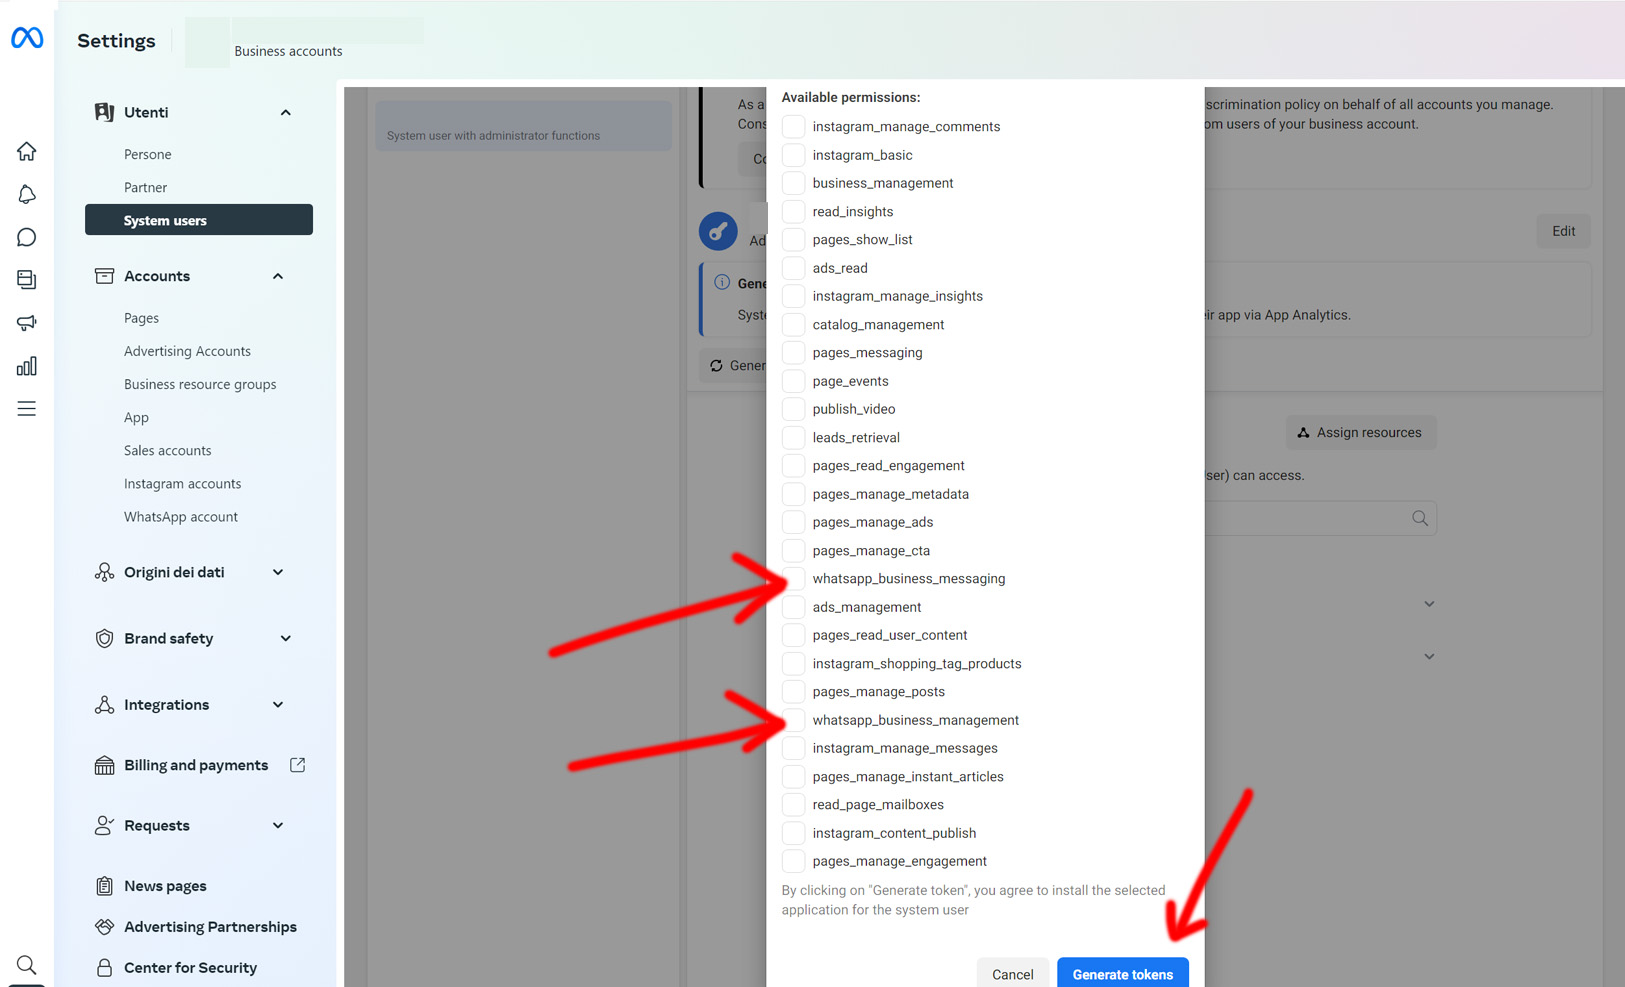
- In the permissions section, select only the permissions that refer to the WhatsApp product
- After selecting them, click on Generate Token
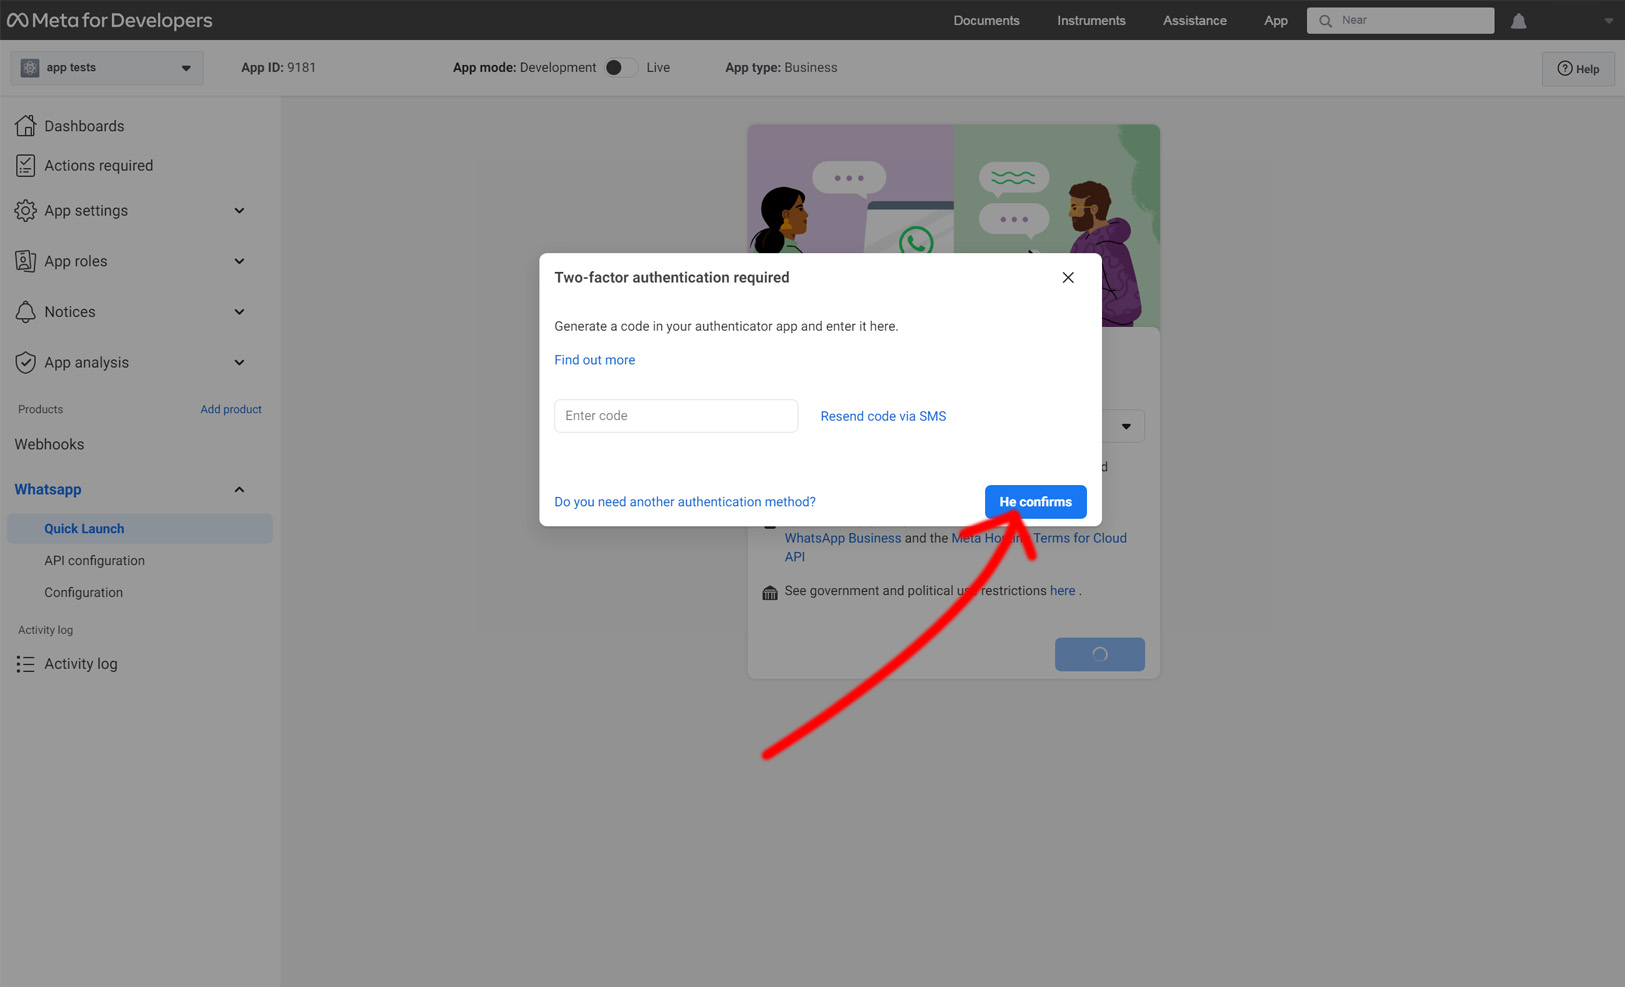
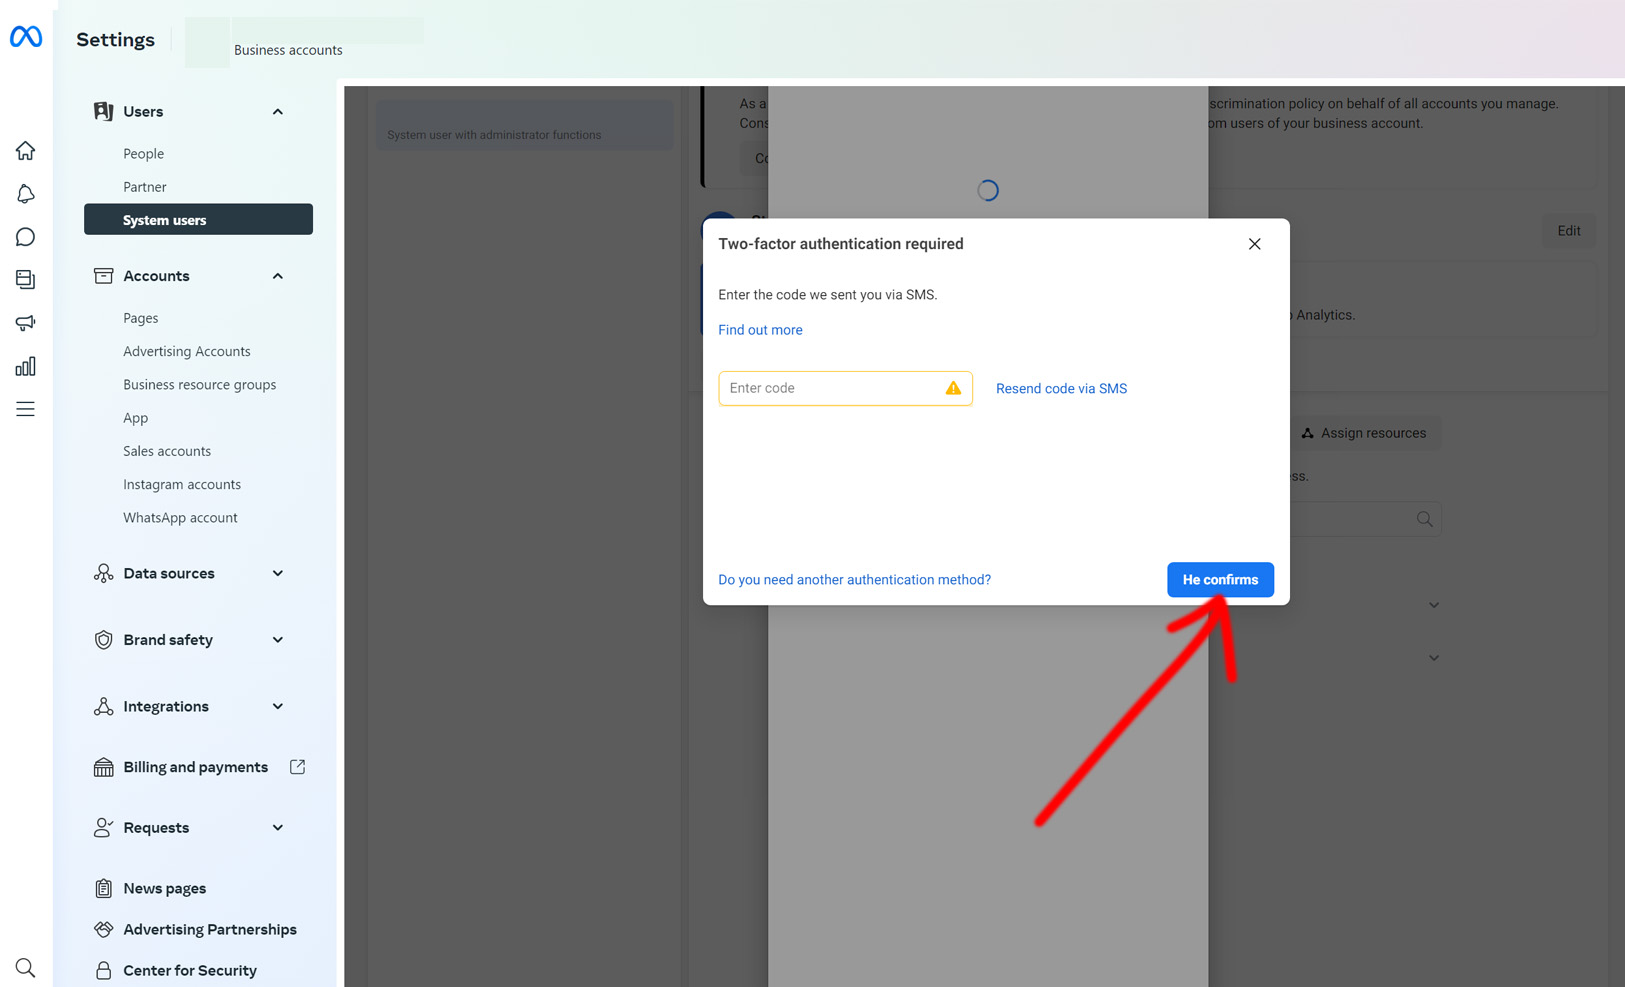
- After clicking Generate Token, Facebook will send a SMS with an OTP code to enter
- After entering the OTP code click on he confirms
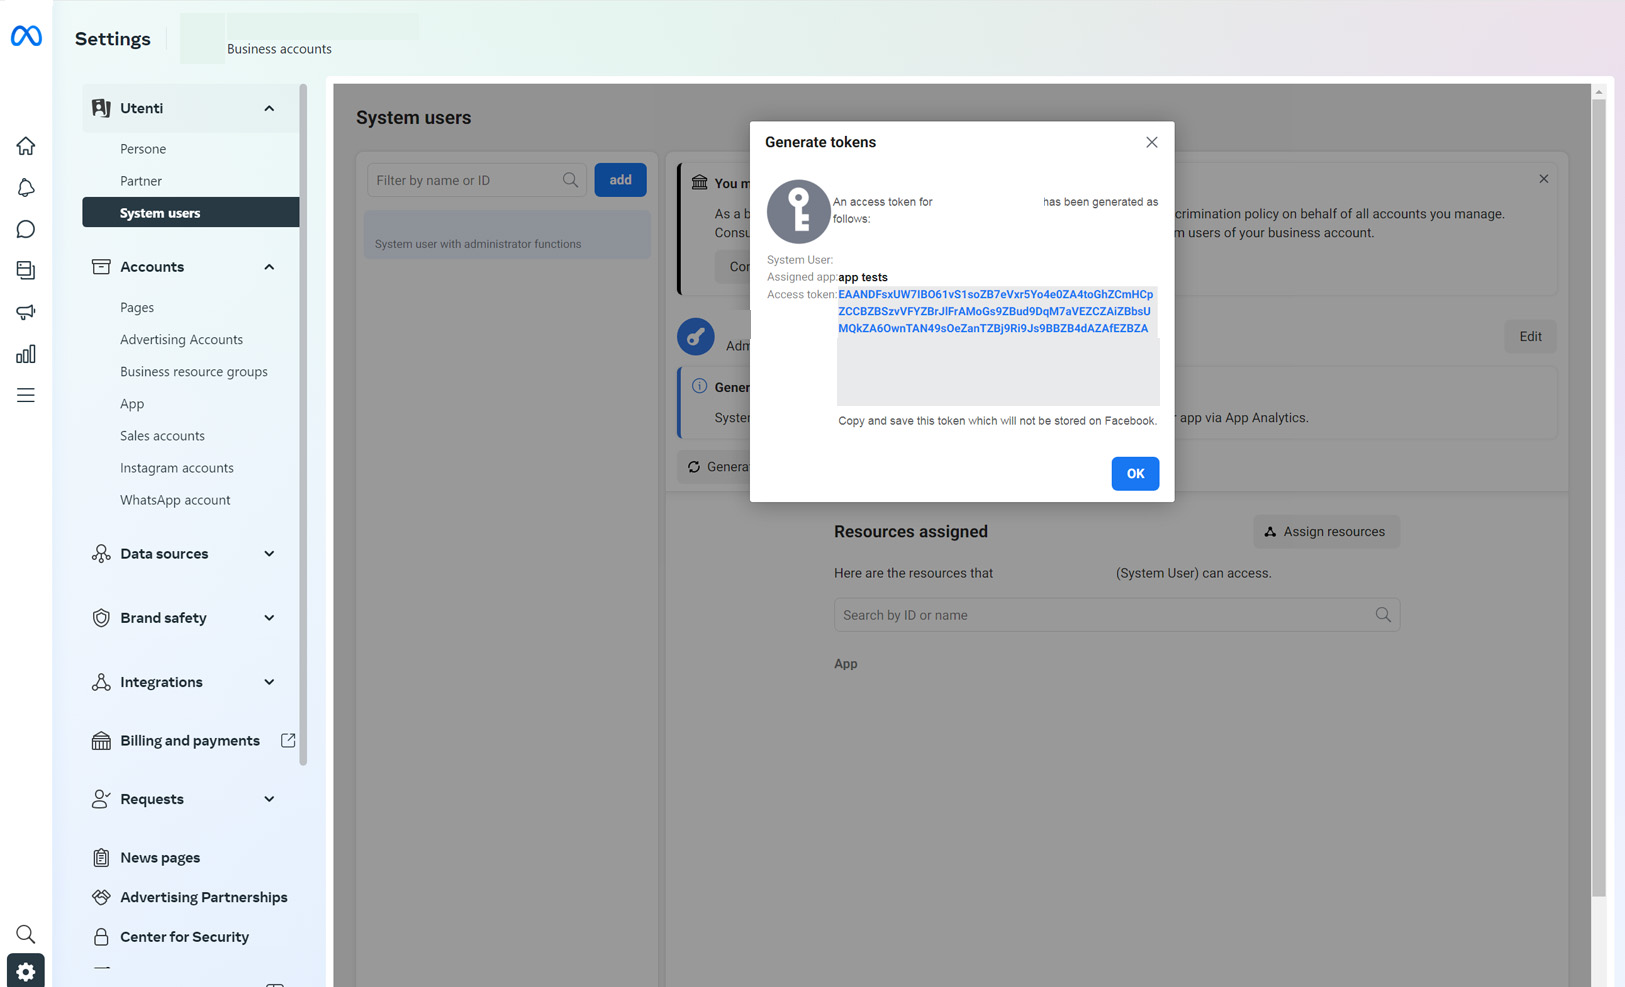
- After clicking continue, a page will appear with the permanent token to copy and save (the token, if lost, will be irrecoverable).
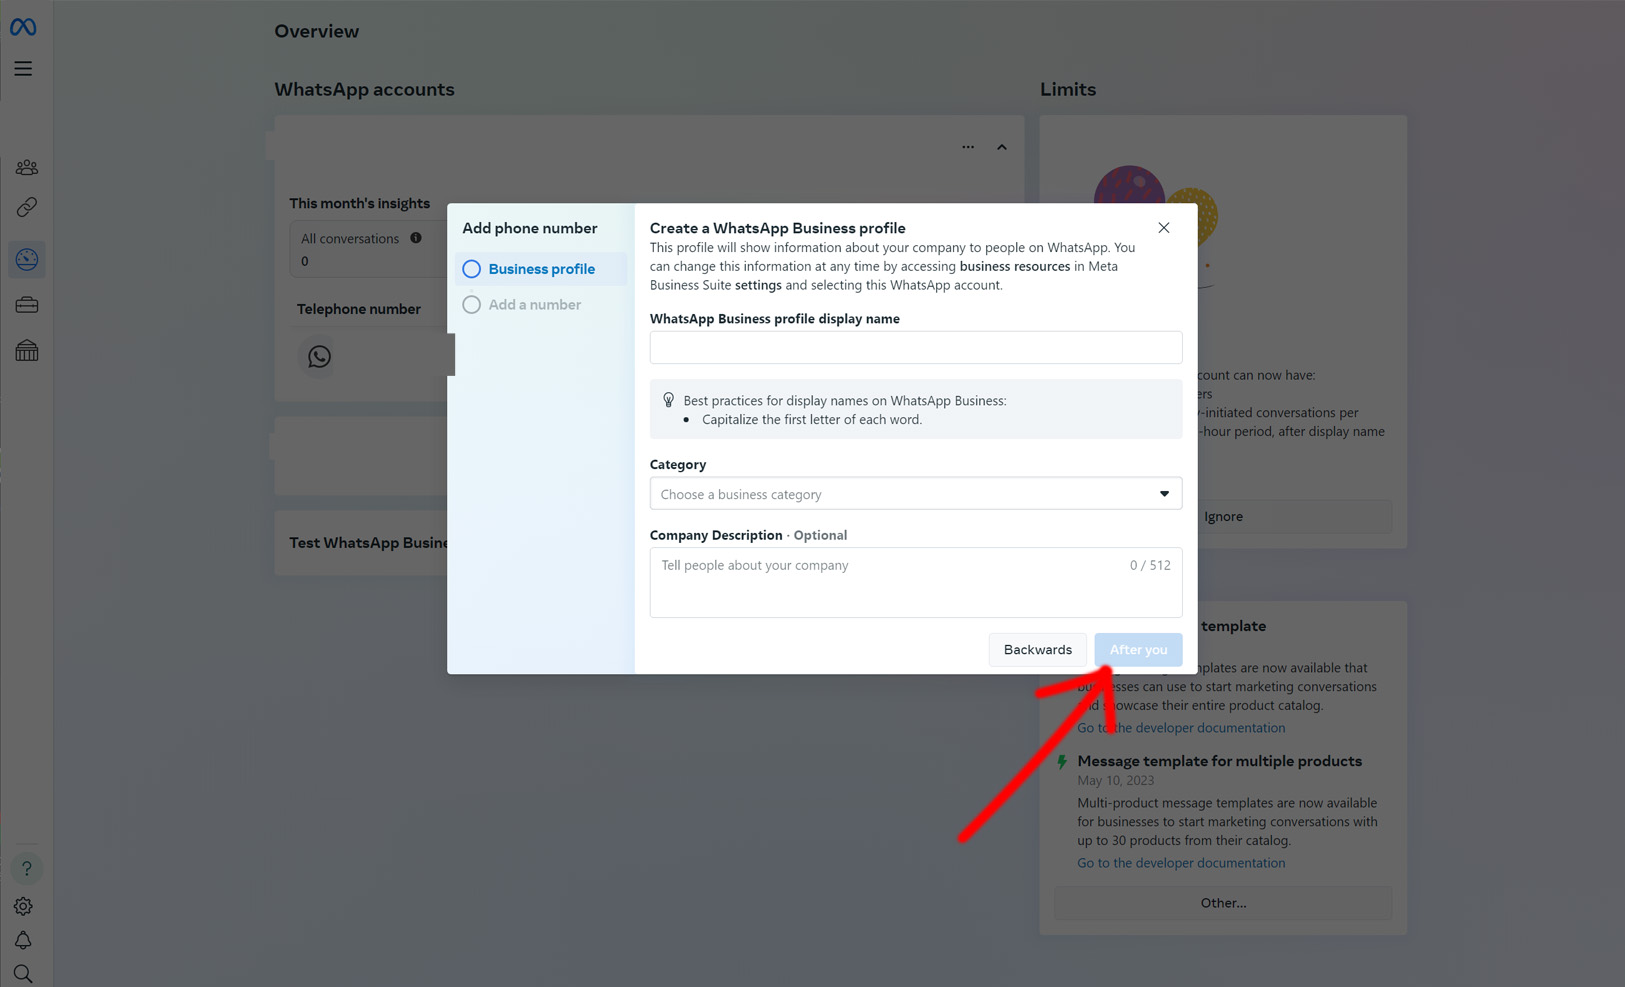
How to set up a phone number on Facebook
- Go to the page Business Facebook Phone Numbers
- Click on the button Add phone number

- Afterwards, a page will open where you will have to enter all the required information.
- Once you have entered all the information, click on next.
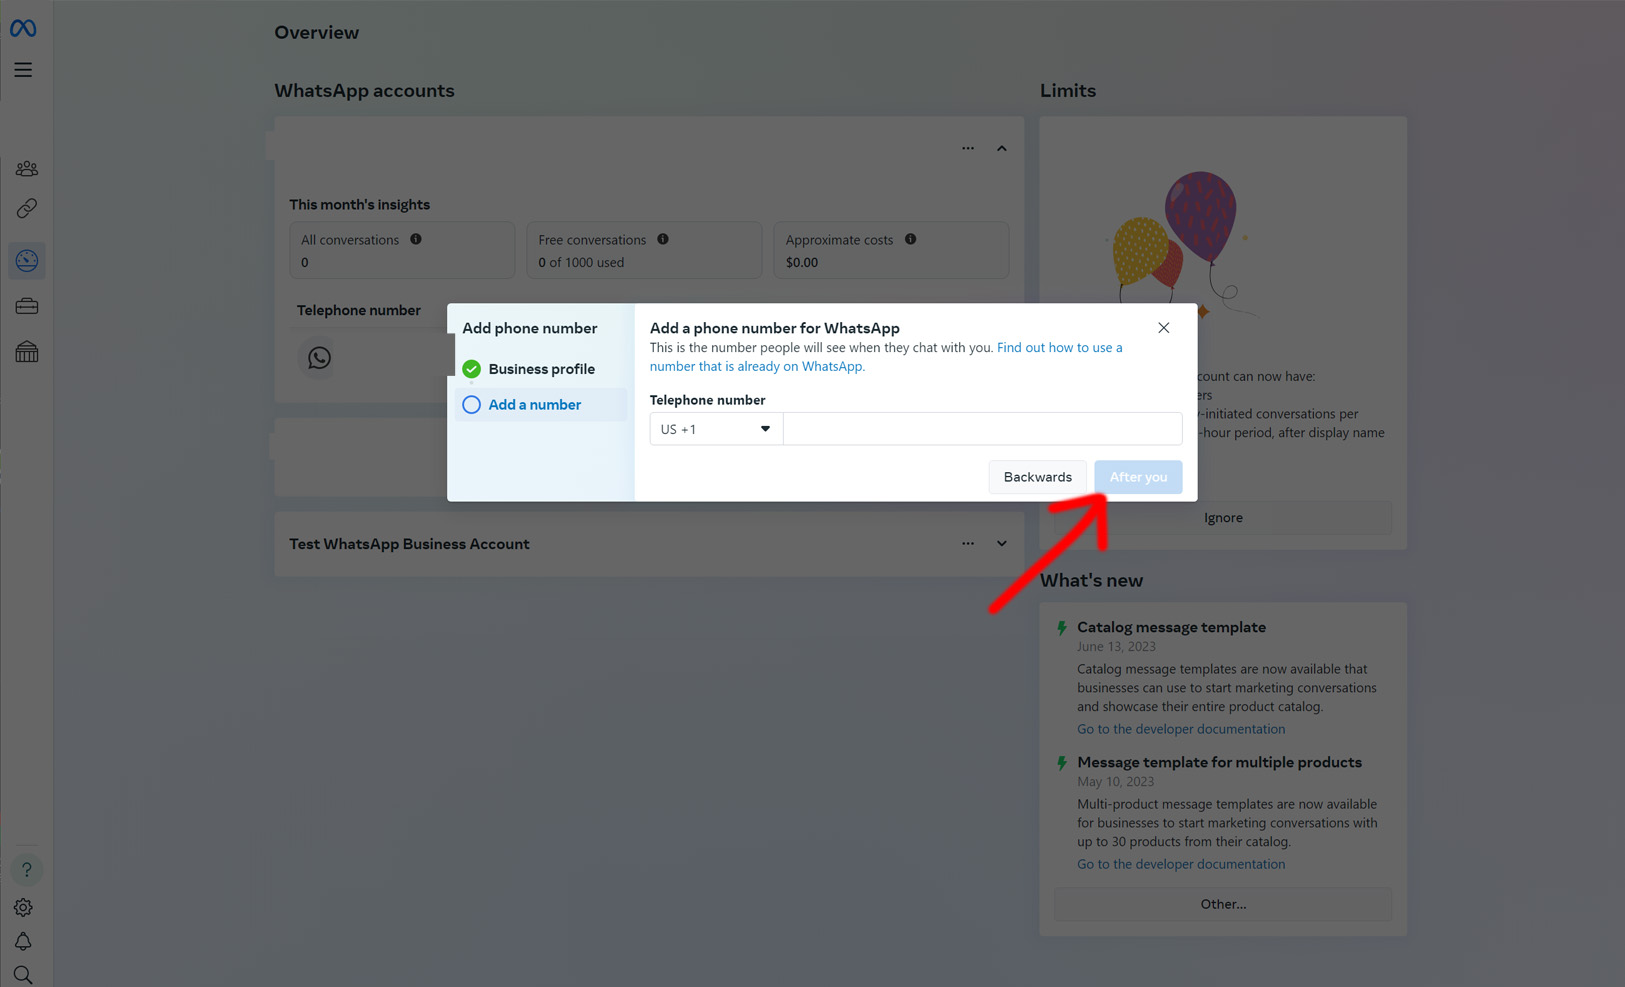
- Next you will need to enter the telephone number and select the prefix relating to the number
- After entering everything, click on next
- Now go to your page App
- And go to the section API Configuration
- Select the phone number in the relevant field if it is not already selected and click on verify
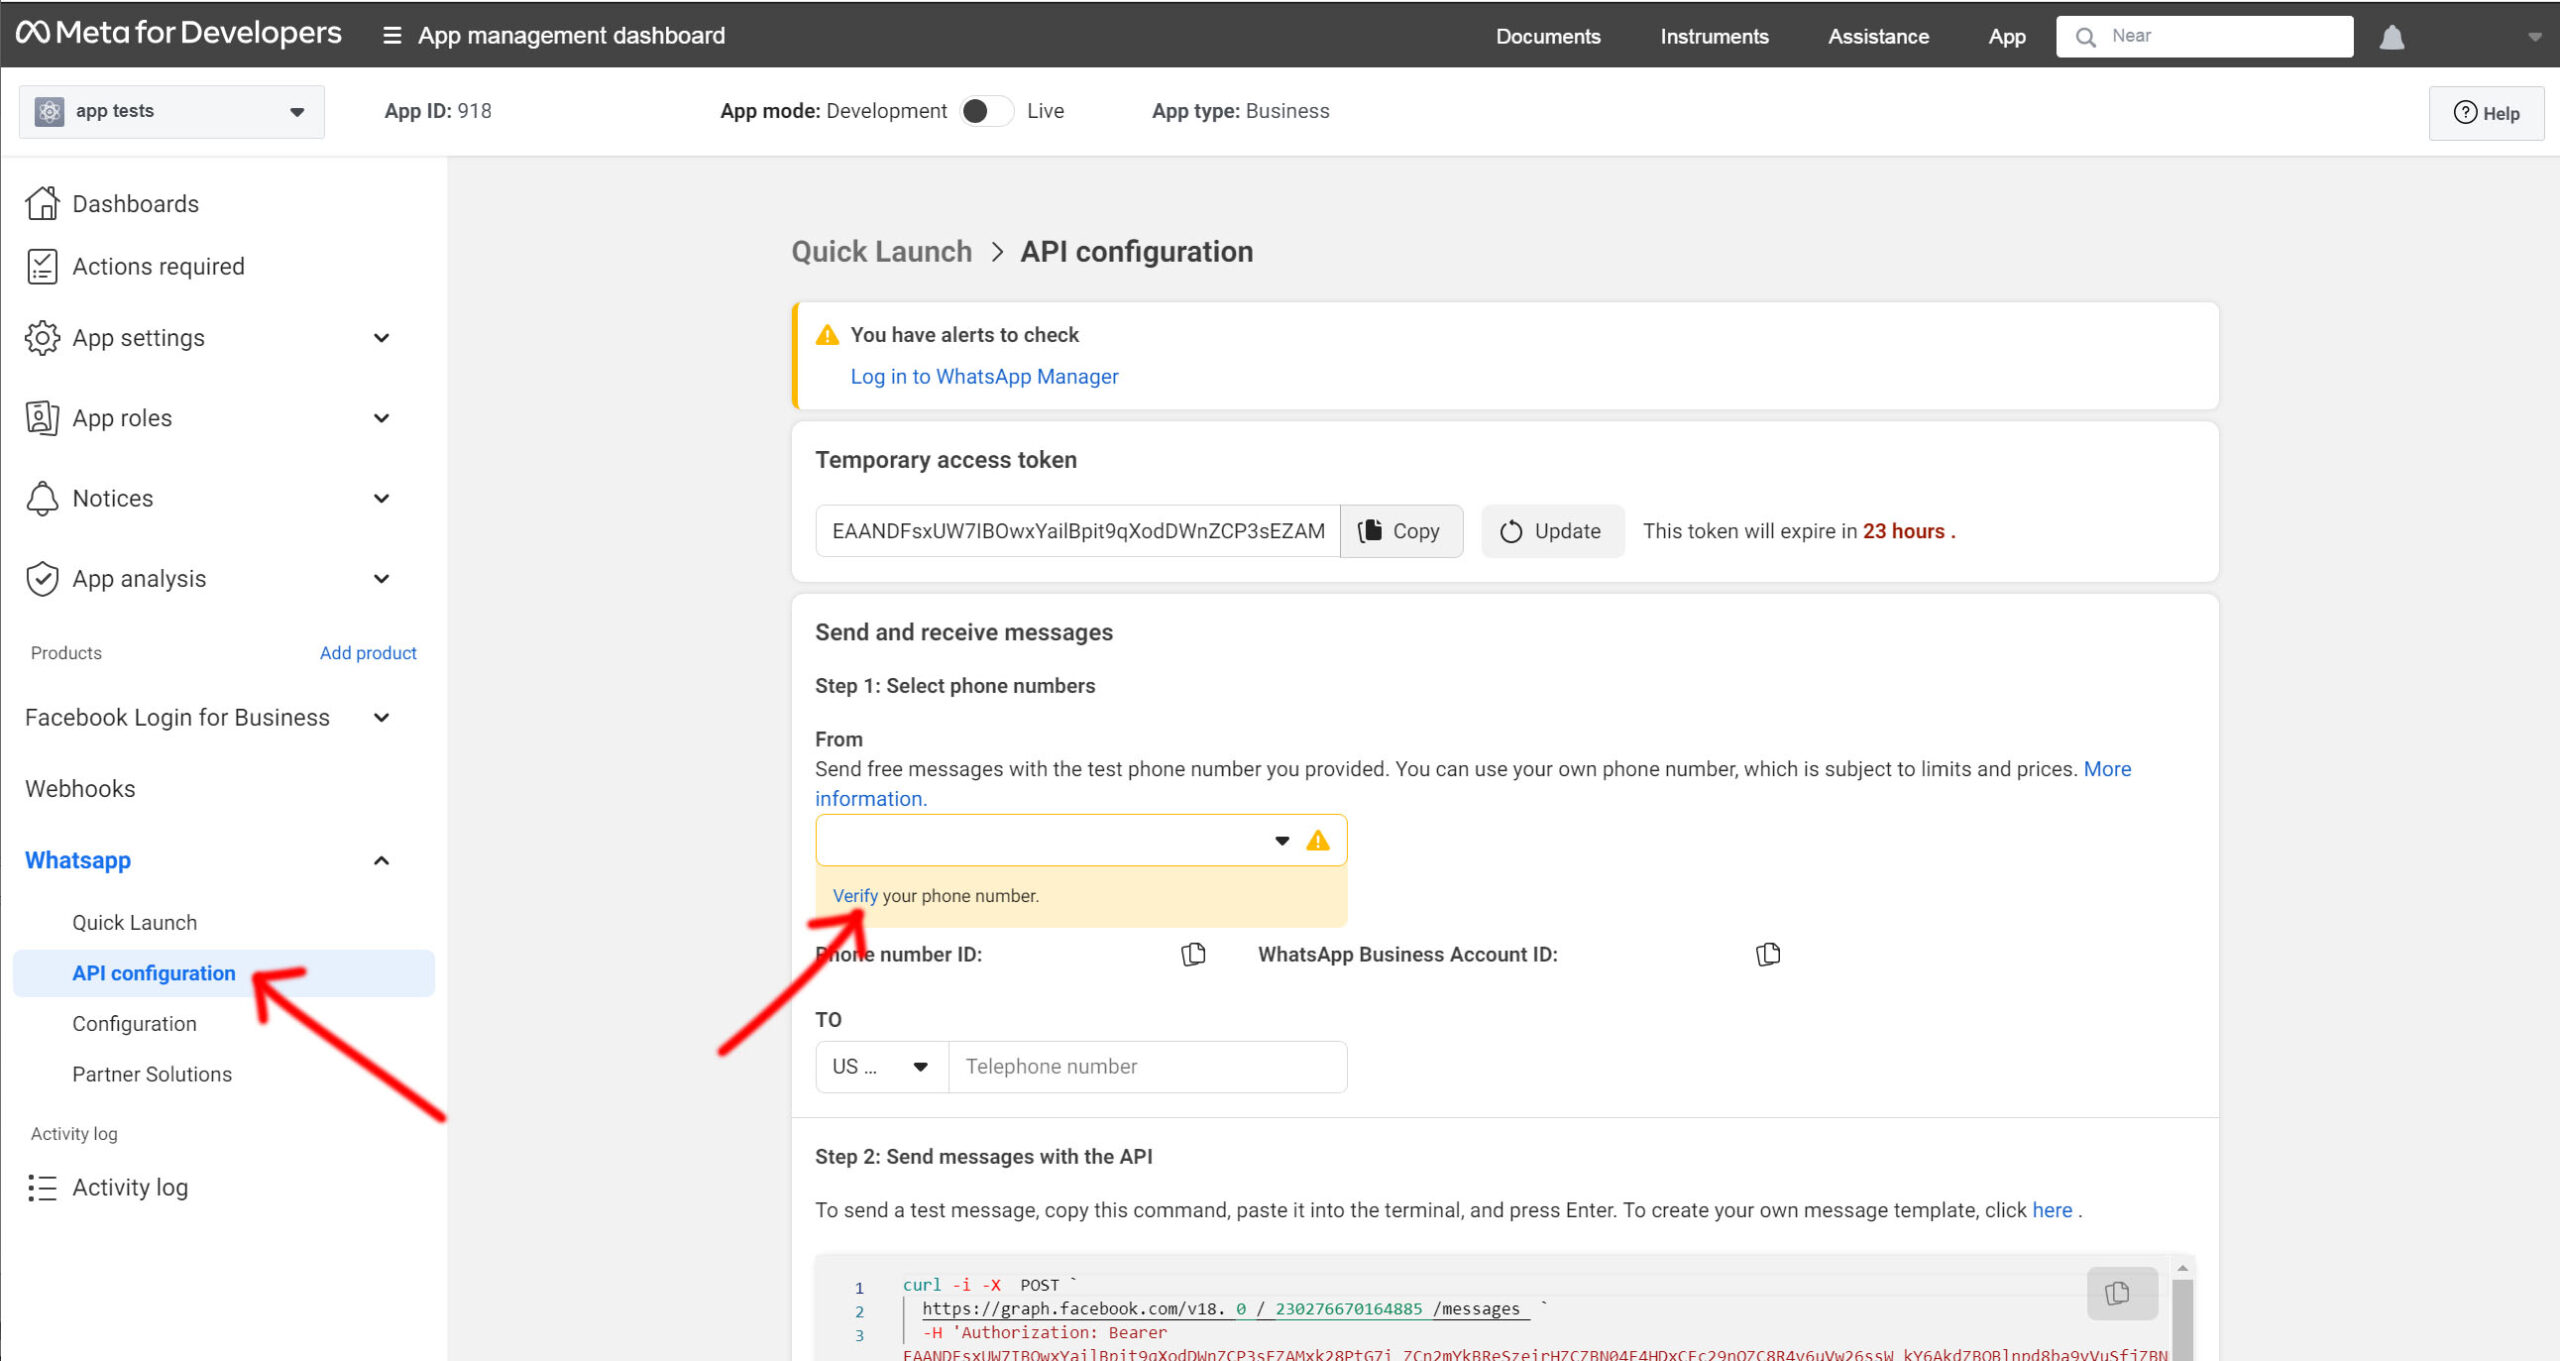
- Afterwards a page will open where you will have to choose the method to receive the WhatsApp OTP code
- After clicking next and receiving the OTP code, enter the OTP code and click next
- Now the number is active and working with the relevant credentials Phone Number ID
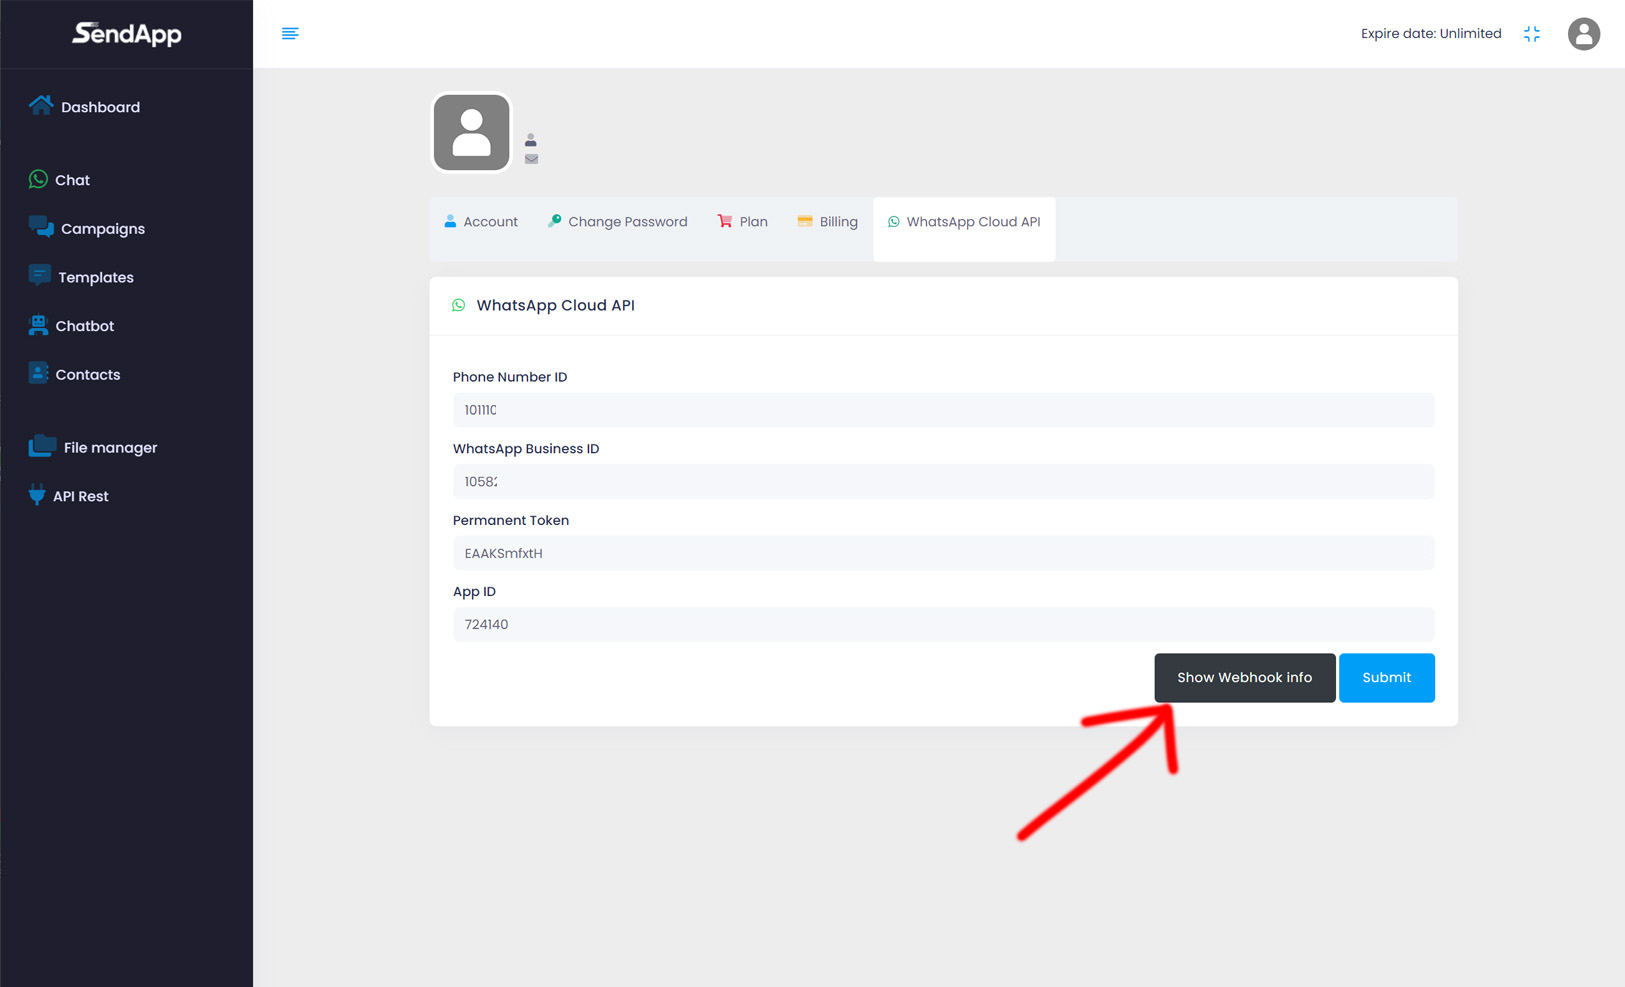
How to configure APIs in SendApp Cloud API Meta
- In your Facebook App in the section Products->WhatsApp
- Click on API Configuration
- Select your previously registered number and copy the parameters Phone Number ID And WhatsApp Business account ID
- Also copy the App ID

- Next go to the SendApp settings
- Enter all the copied data and the previously created permanent token
- After entering all the data click on send

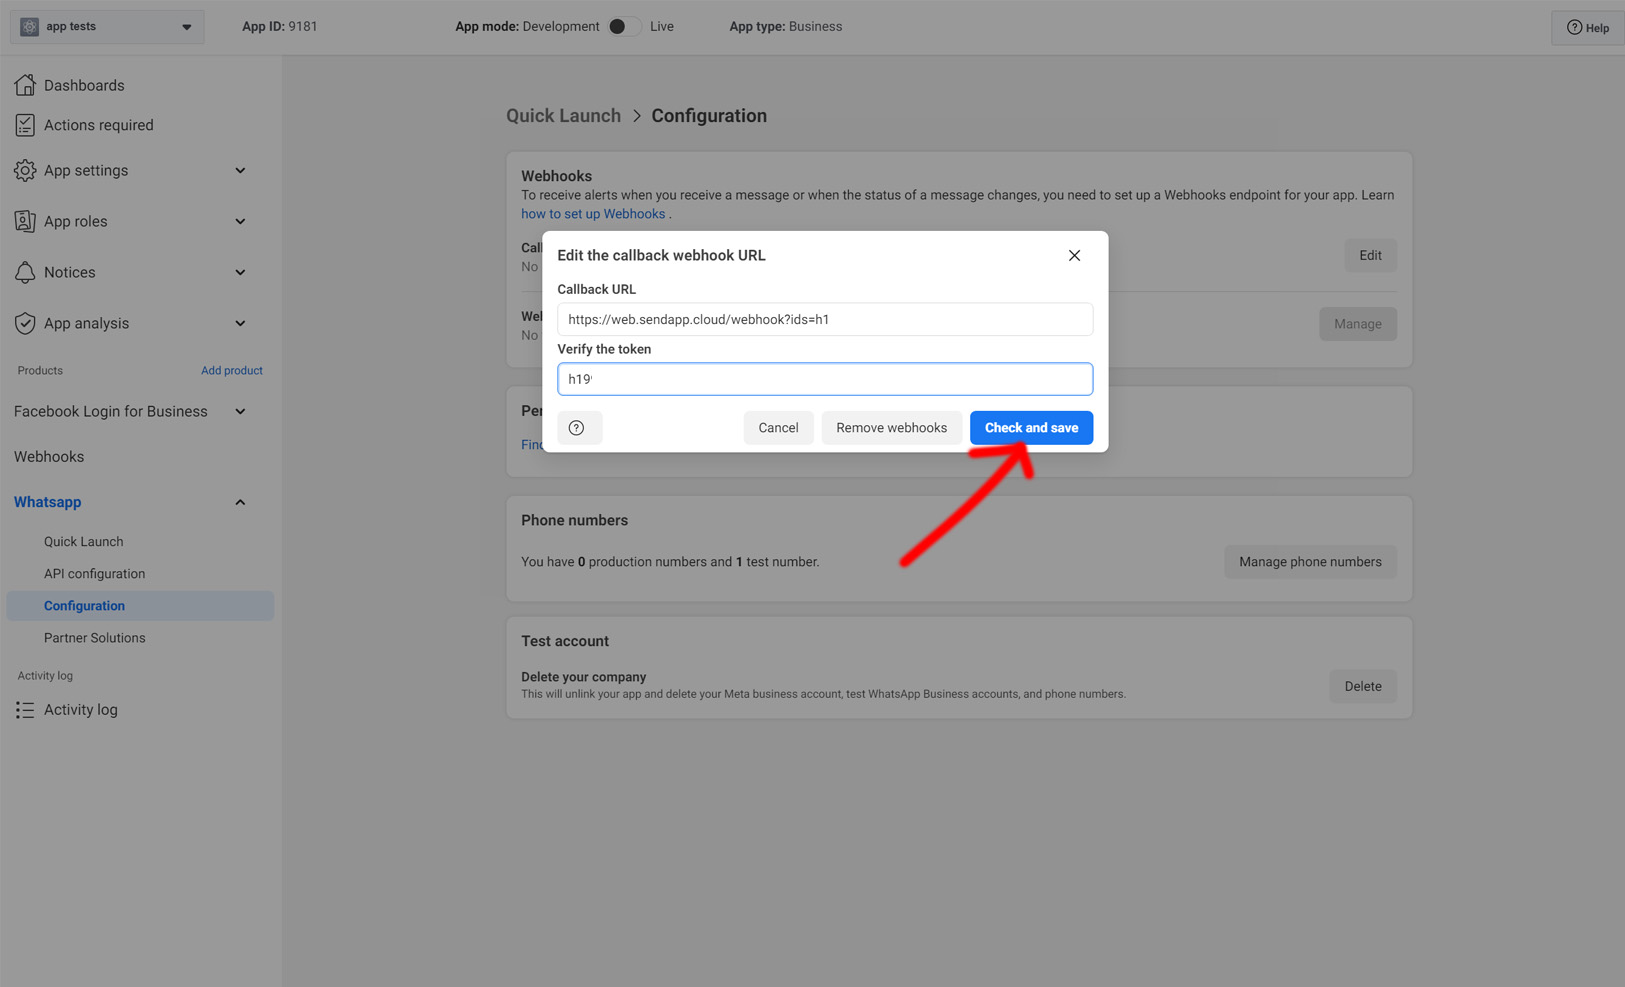
How to Configure Webhook in SendApp Cloud API Meta
- Go to the SendApp settings
- Click the “Show Webhook Info” button
- Copy the URL and verify token

- After copying everything
- Go to your App and in the WhatsApp section click on configuration
- And where you see the "Edit" button next to the text that refers to the Webhook, click it

- Afterwards, a page will open where you have to insert all the data copied previously into the respective fields
- After entering the data, click on save
- After configuring the webhook without receiving any errors
- Still on the same page, click on “Manage” in the Webhook Fields section
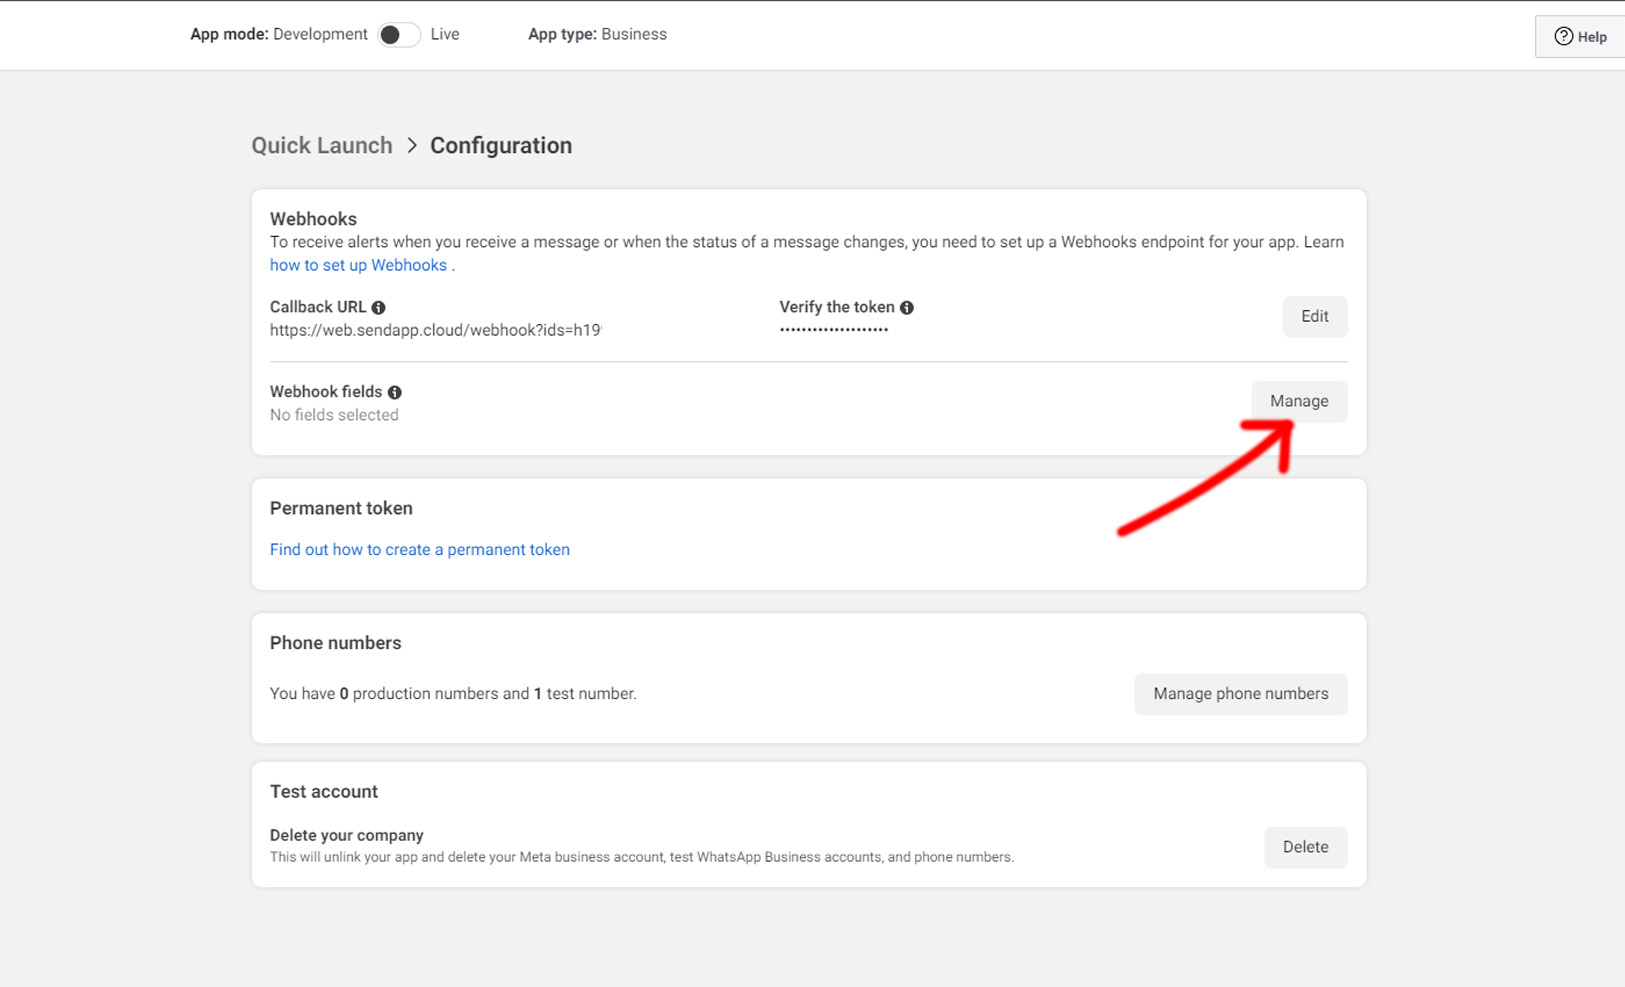
- After that a page will open and you only have to select the “messages” field
