How to import the address book
- Connect your WhatsApp account with SendApp.
How to import the address book
How to import the address book
2. Click the Address Book icon (second icon from above, on the left)
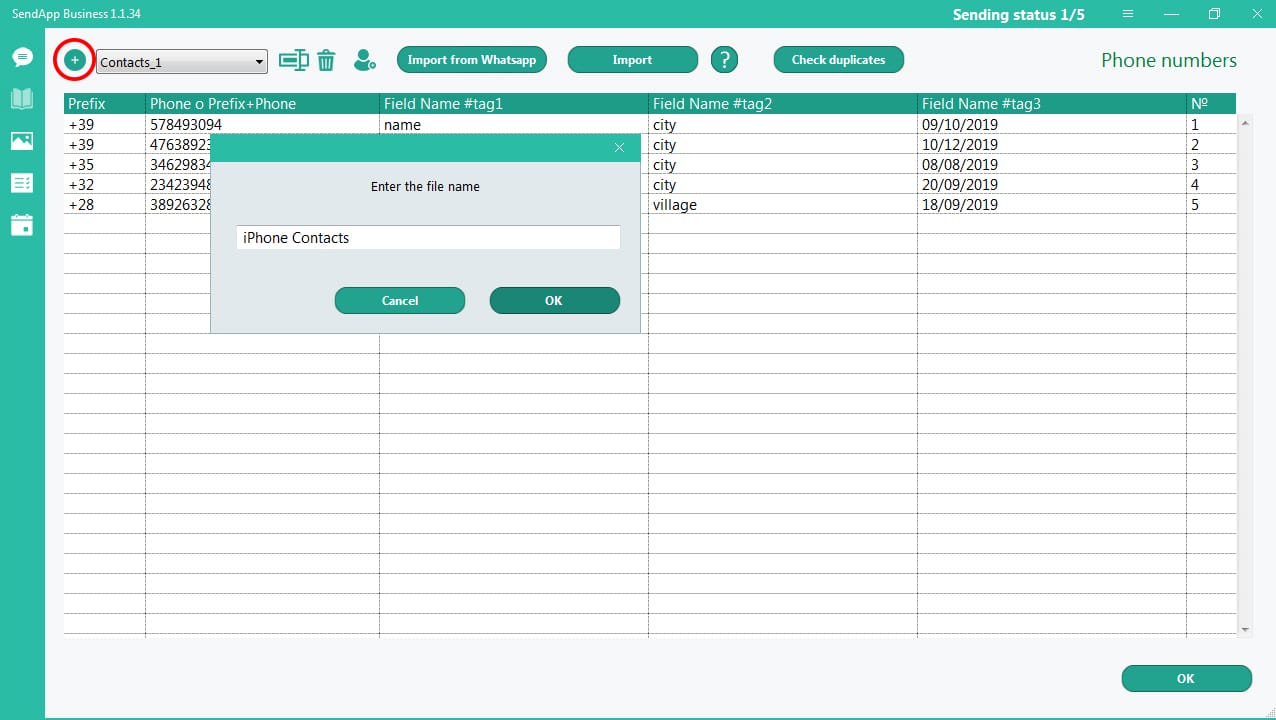
3. Create a new folder – click + (icon top left)
To import WhatsApp contacts into SendApp:
How to import contacts into .csv
1. Create CSV files
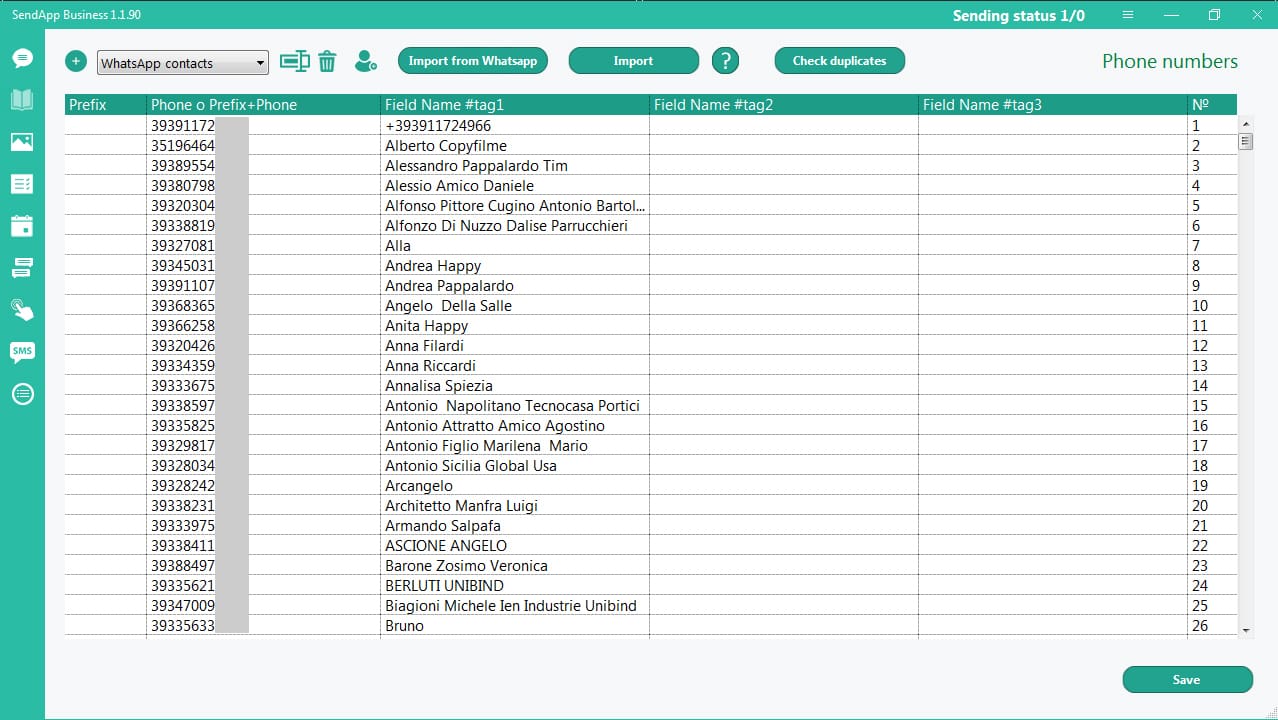
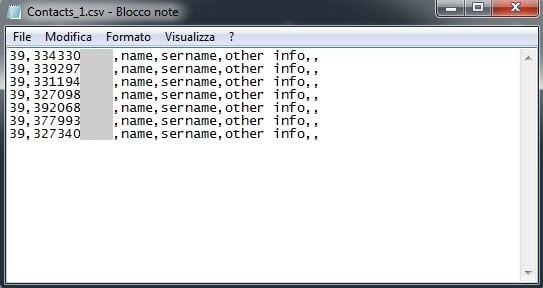
To send the custom message the CSV file must include:
All fields must be separated by commas.
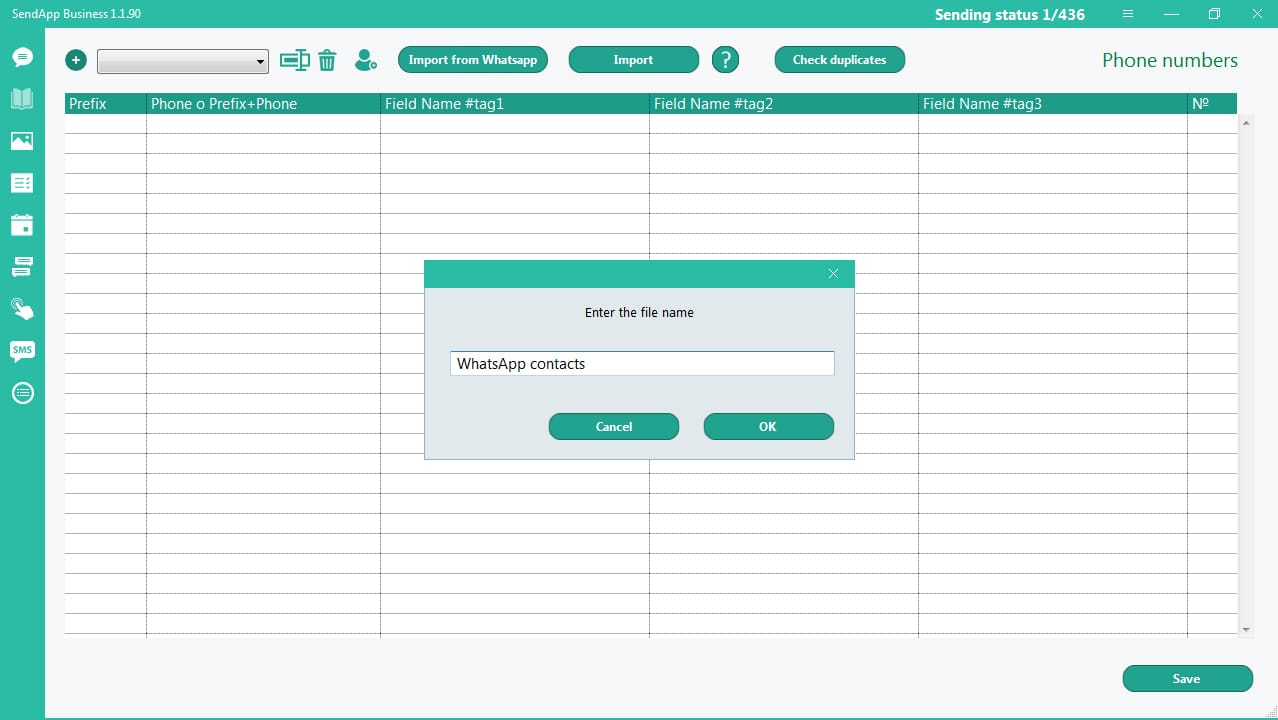
2. Select/create a folder
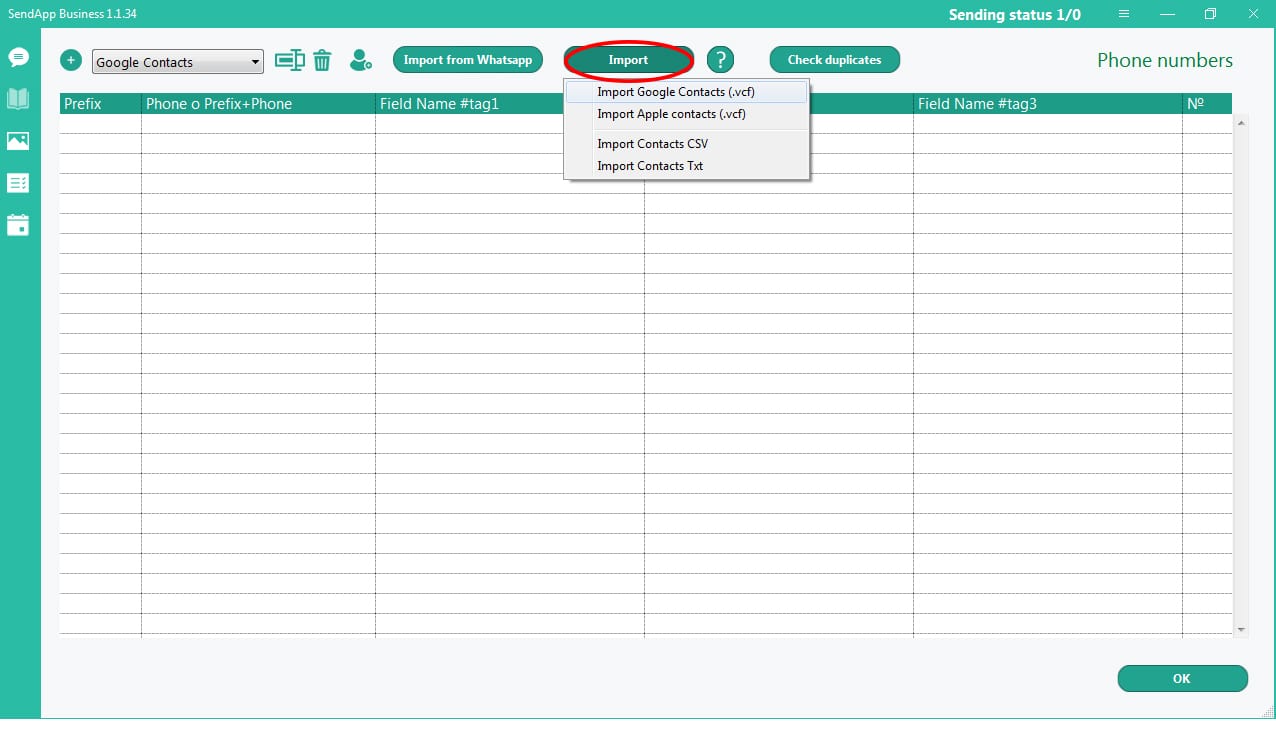
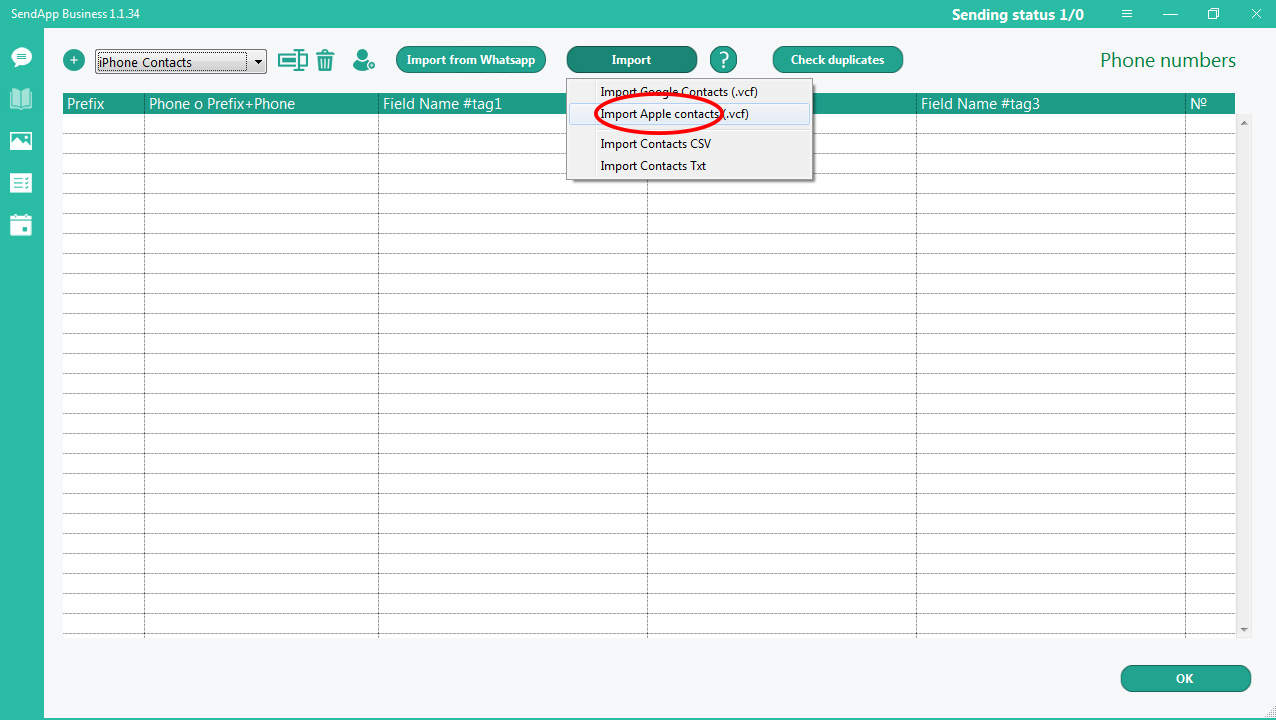
3. Click the “Import” button
4. Select “Import contacts CSV”
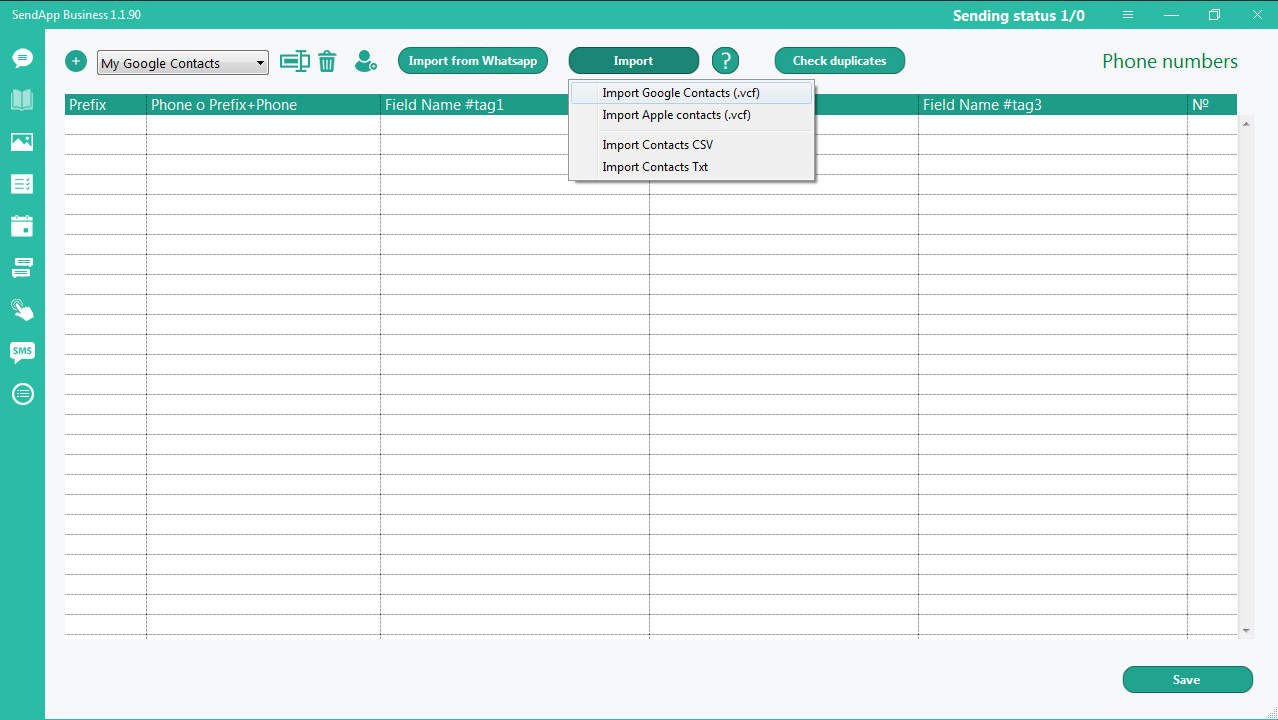
All information is added in the various fields that allow you to create a personalized message with name, surname and other information.
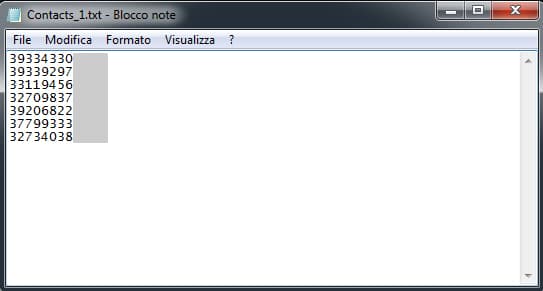
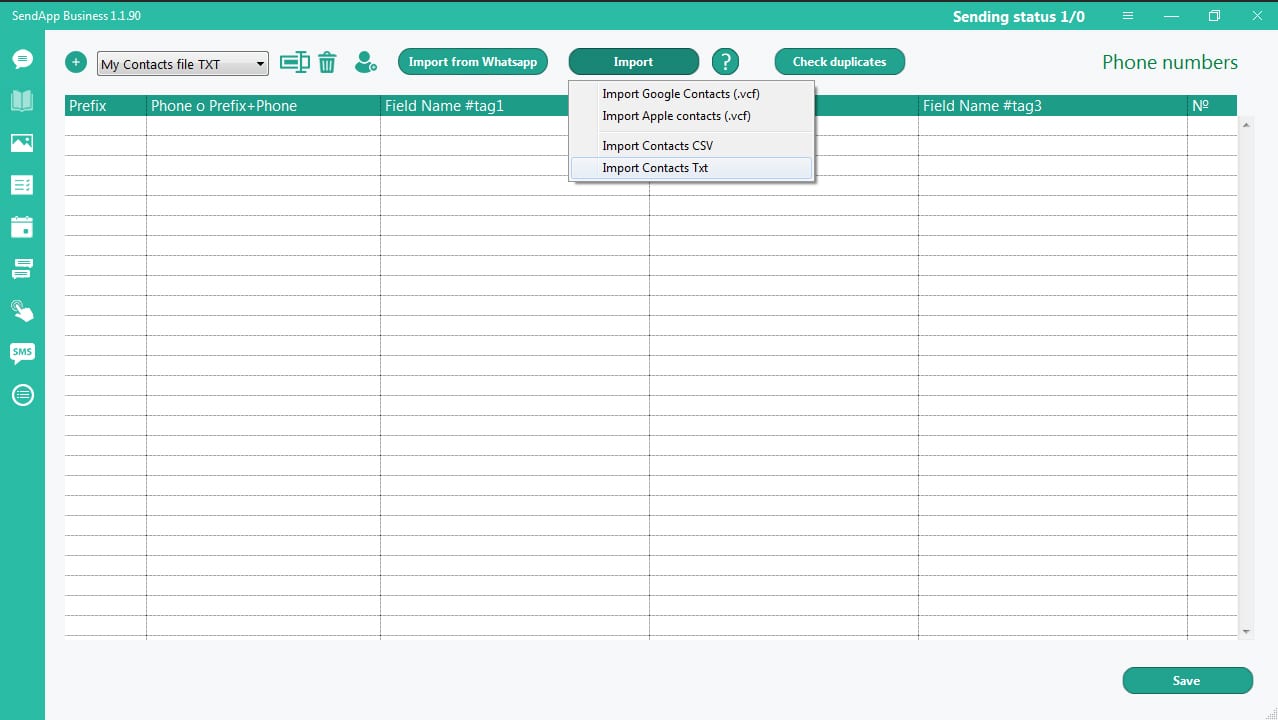
How to import contacts into .txt
1. Create TXT files
2. Select/create a folder
3. Click the “Import” button
4. Select “Import contacts TXT”
Attention:
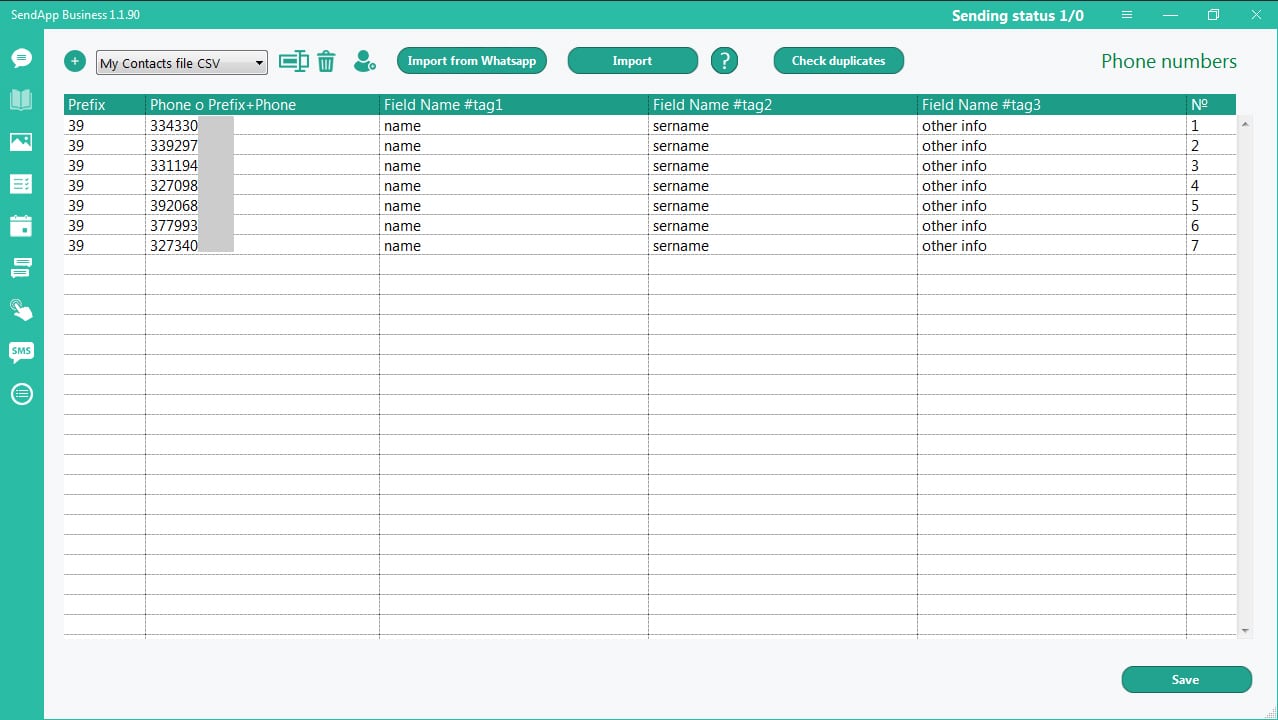
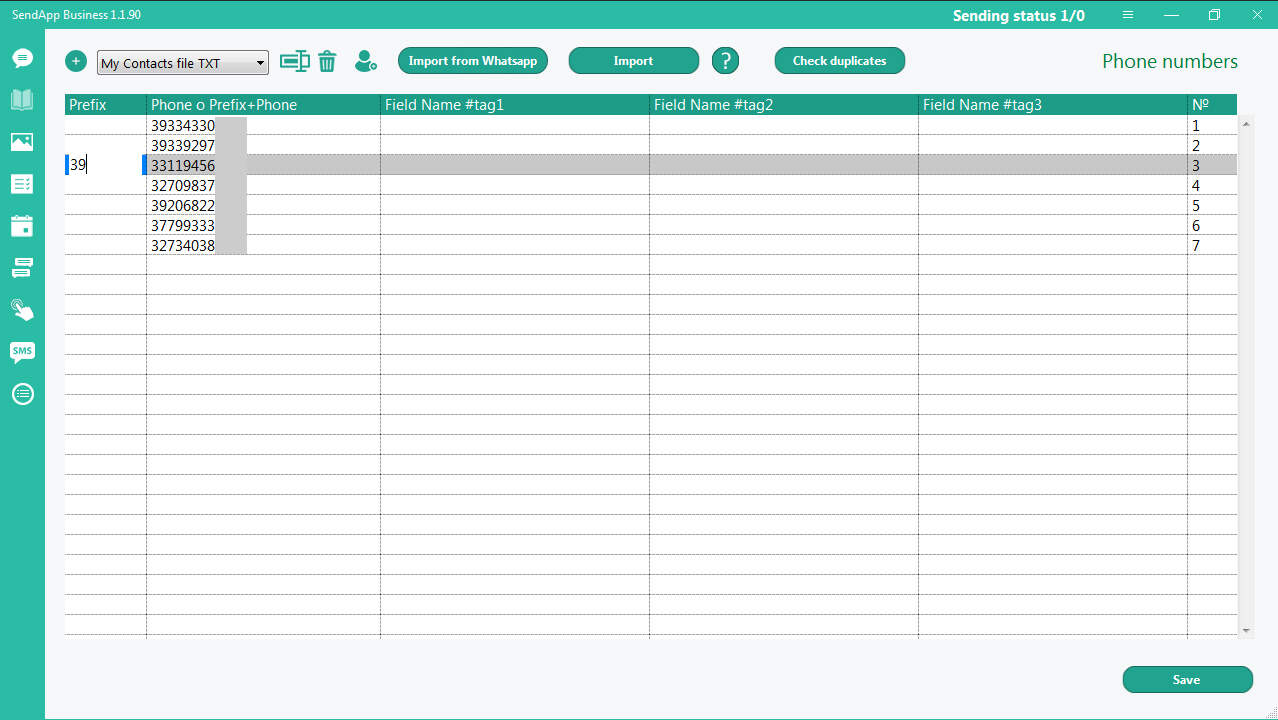
To send the message to the imported numbers you must make sure that the numbers include the prefix.
If the prefix is not there – double-click either in the Prefix field, or in front of the number and enter the prefix manually.
To send the personalized message you need to manually add the information in the fields: # tag 1; #tag 2; #tag 3
For example: double click on the line in #tag 1 and type (or pair and paste) the recipient name.
When the address book is ready, click the Save button.
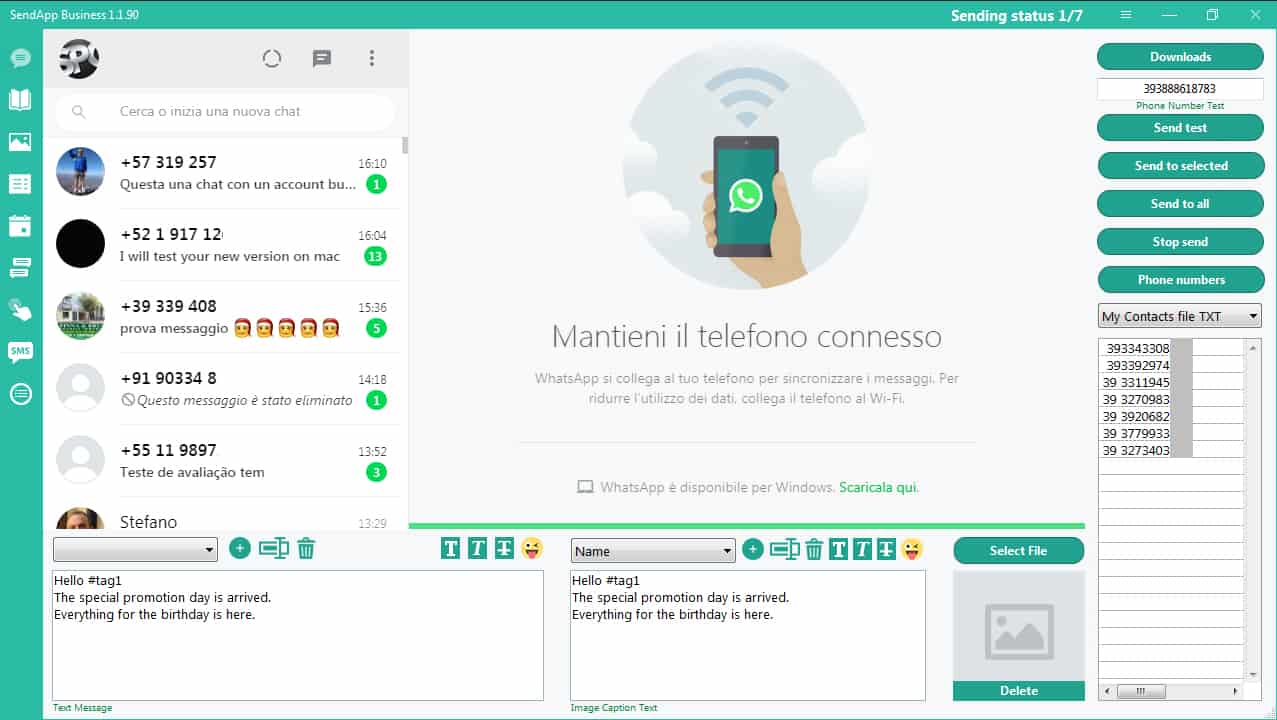
To send a message, use the buttons at the top right.
How to Import Google Contacts
SendApp:
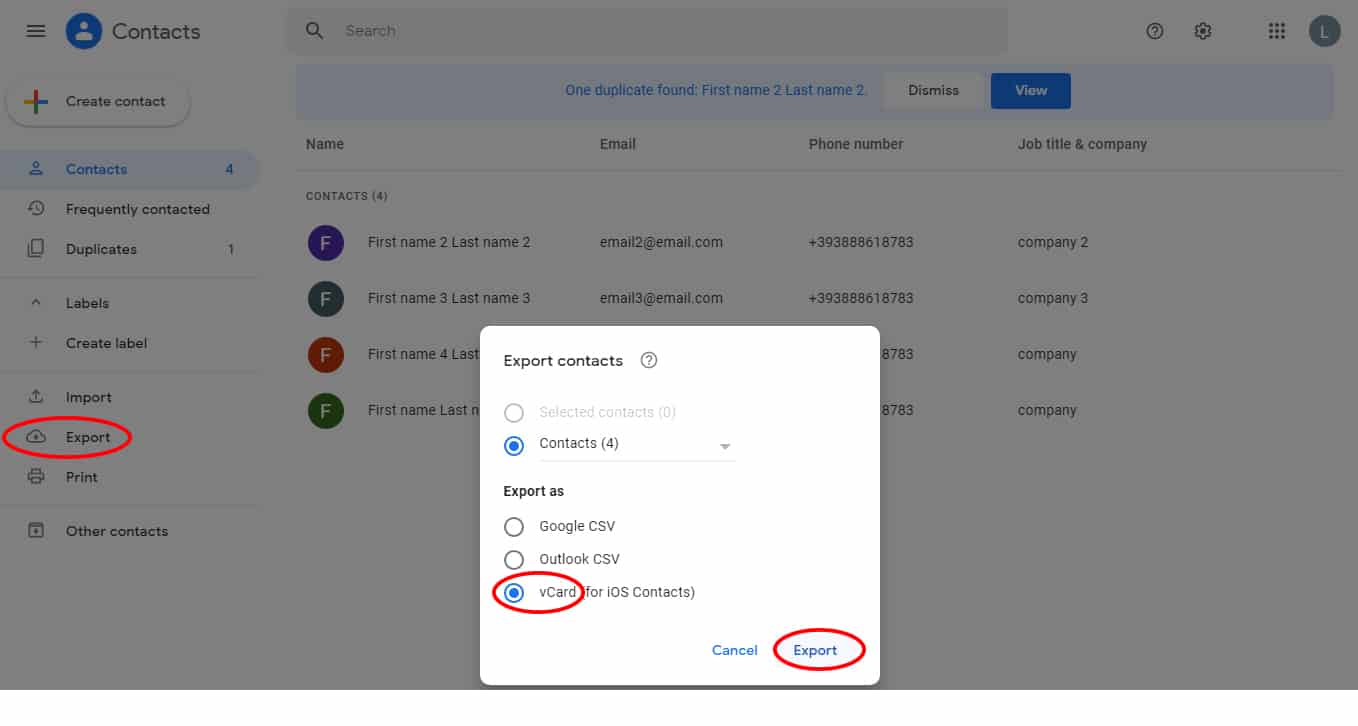
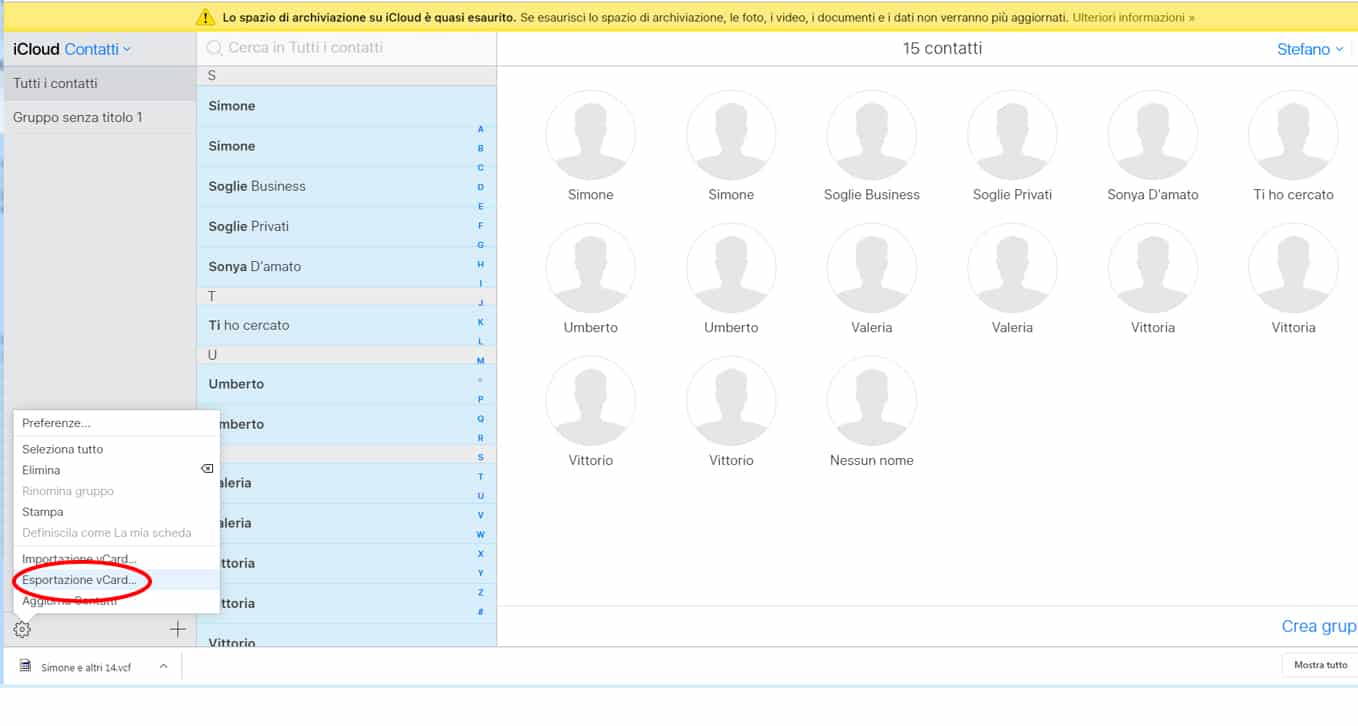
Go – iCloud Contacts
Select all or some contacts by holding down Shift on the keyboard
Menu – Action – Export vCard
SendApp:
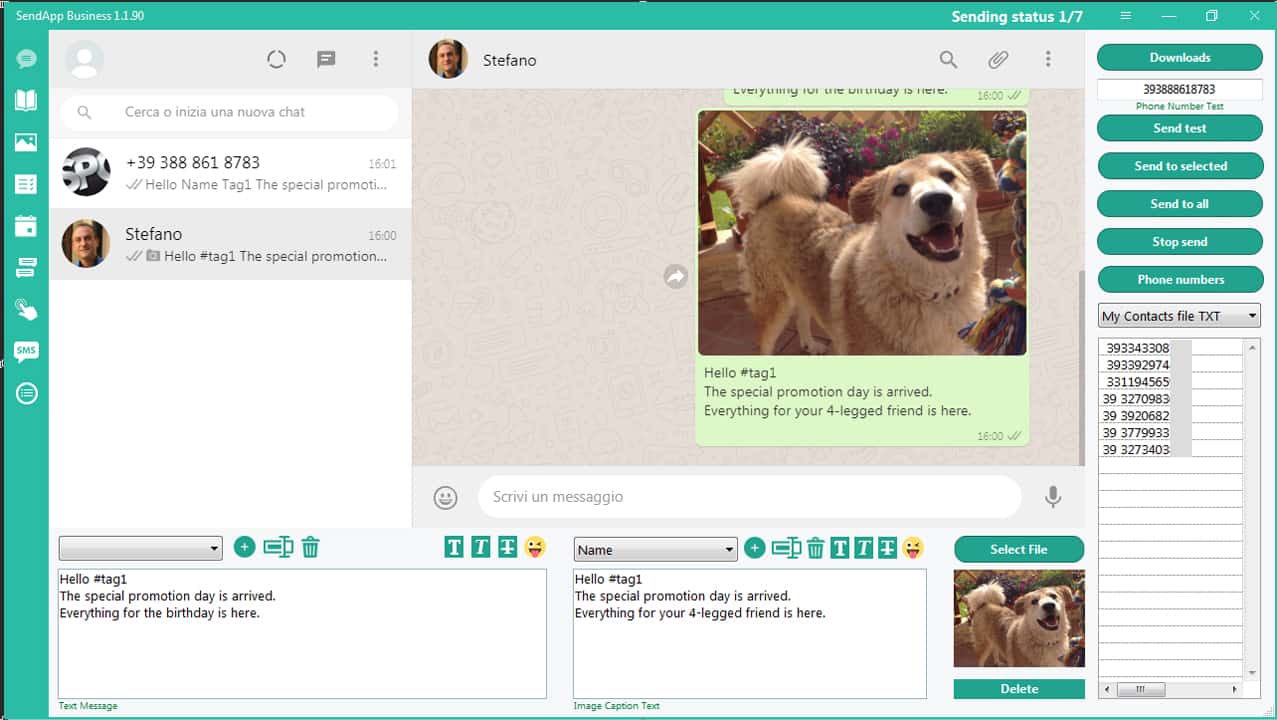
In the box (first on the left) write the text or pair and paste the text.
To personalize your message, use #tag 1; #tag 2; and ##tag 3, according to the information in these tags.
The message is ready.
If you need to save the message, click the + icon (above the first box on the left) and write the title / name of the message.
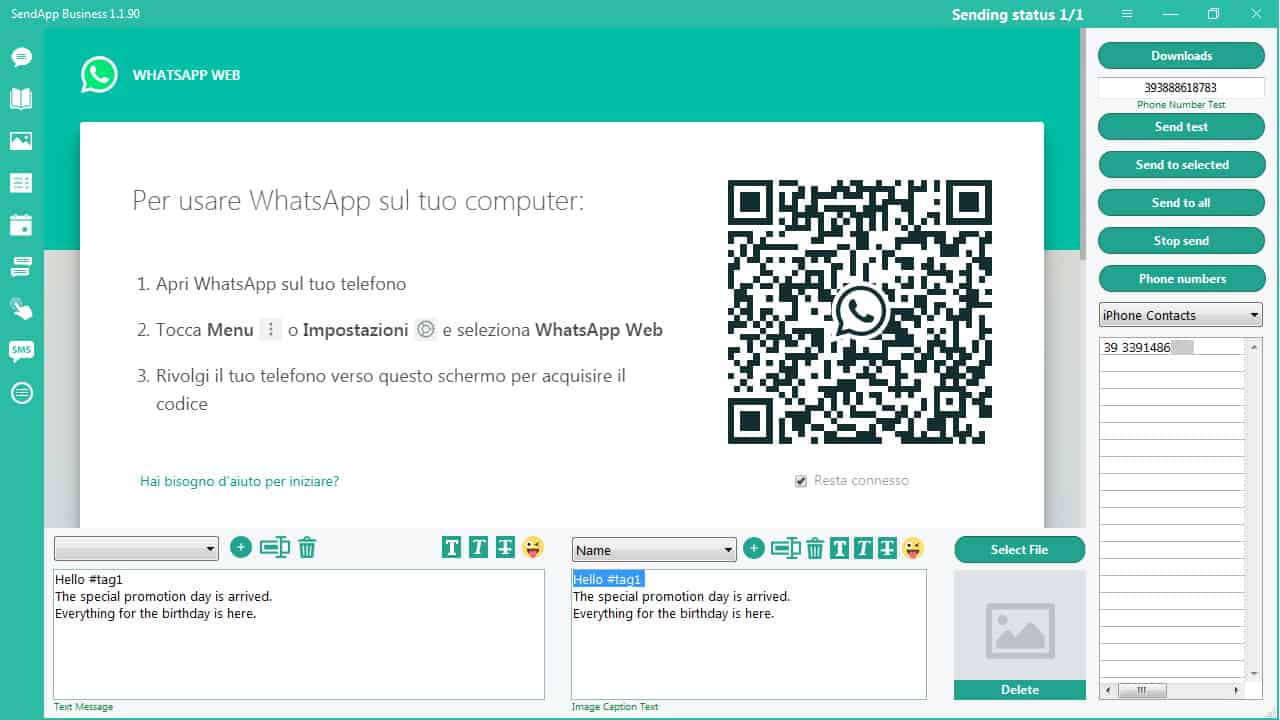
Click Select File (button above the image space) – add an image from your library.
If you need to attach a caption to the image, you must create a message in the central box:
if you need to save the caption text:
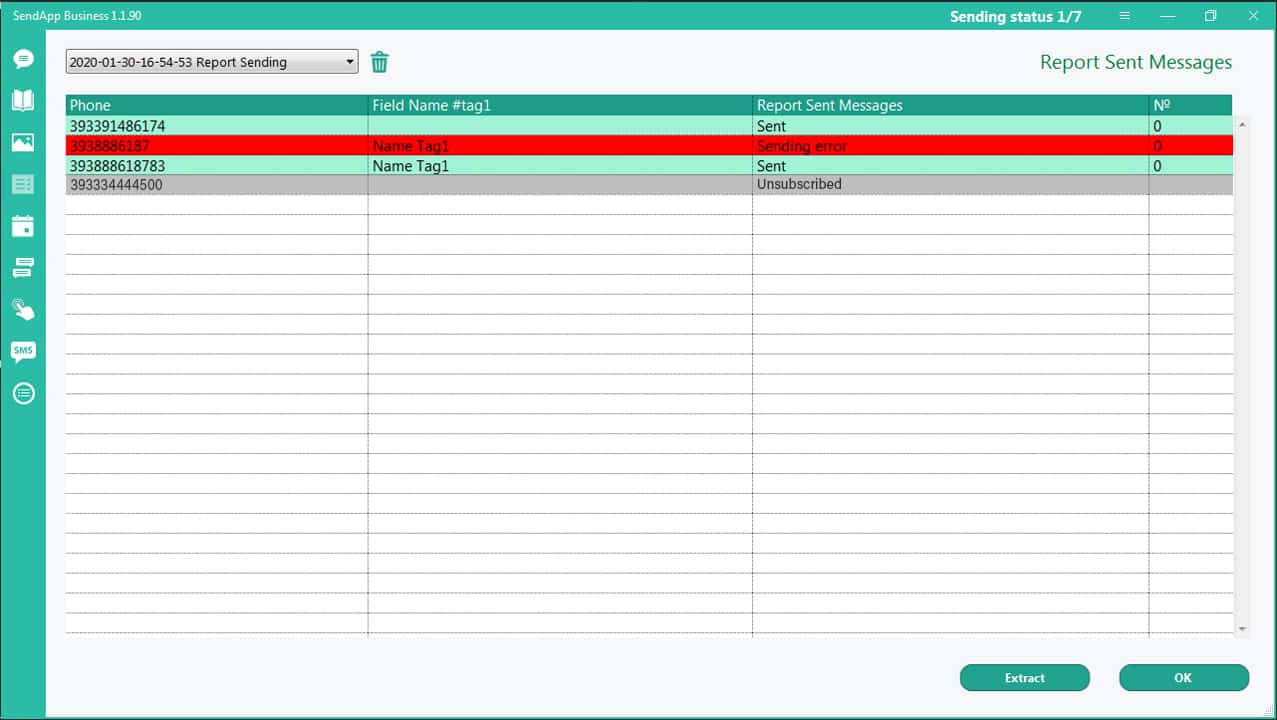
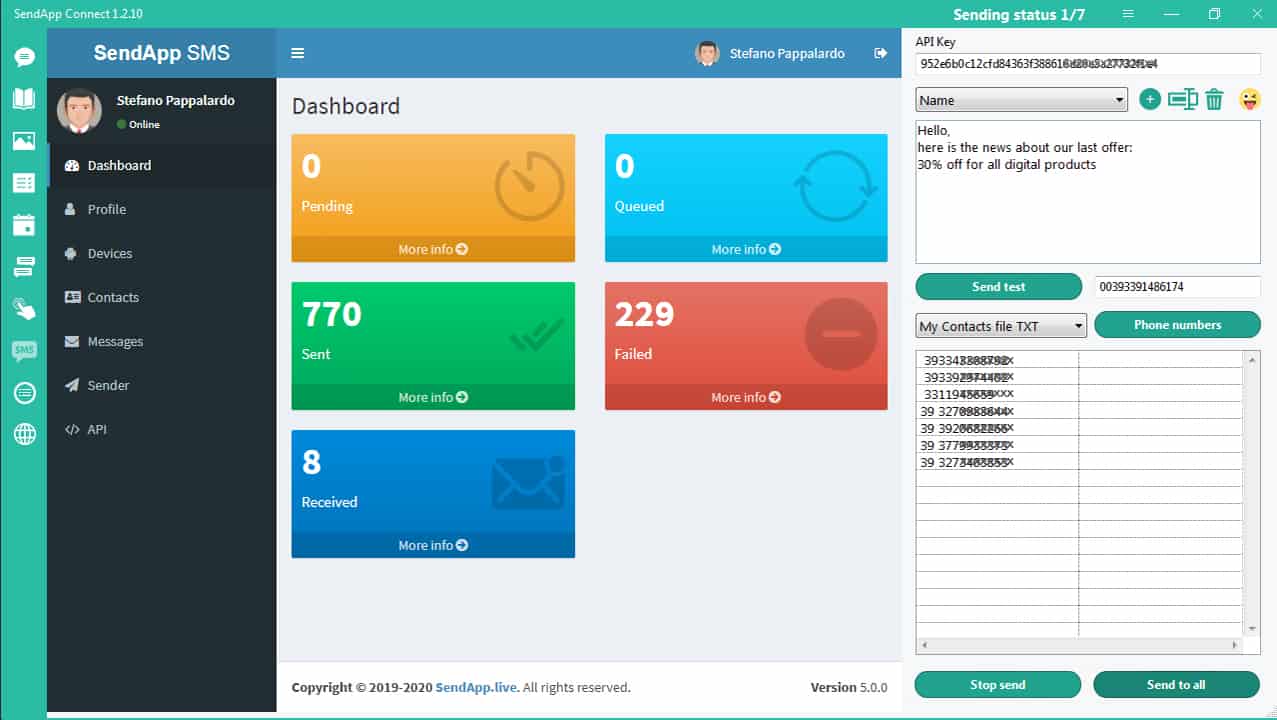
Section: Report Sending messages
After sending the message you can get the sending report:
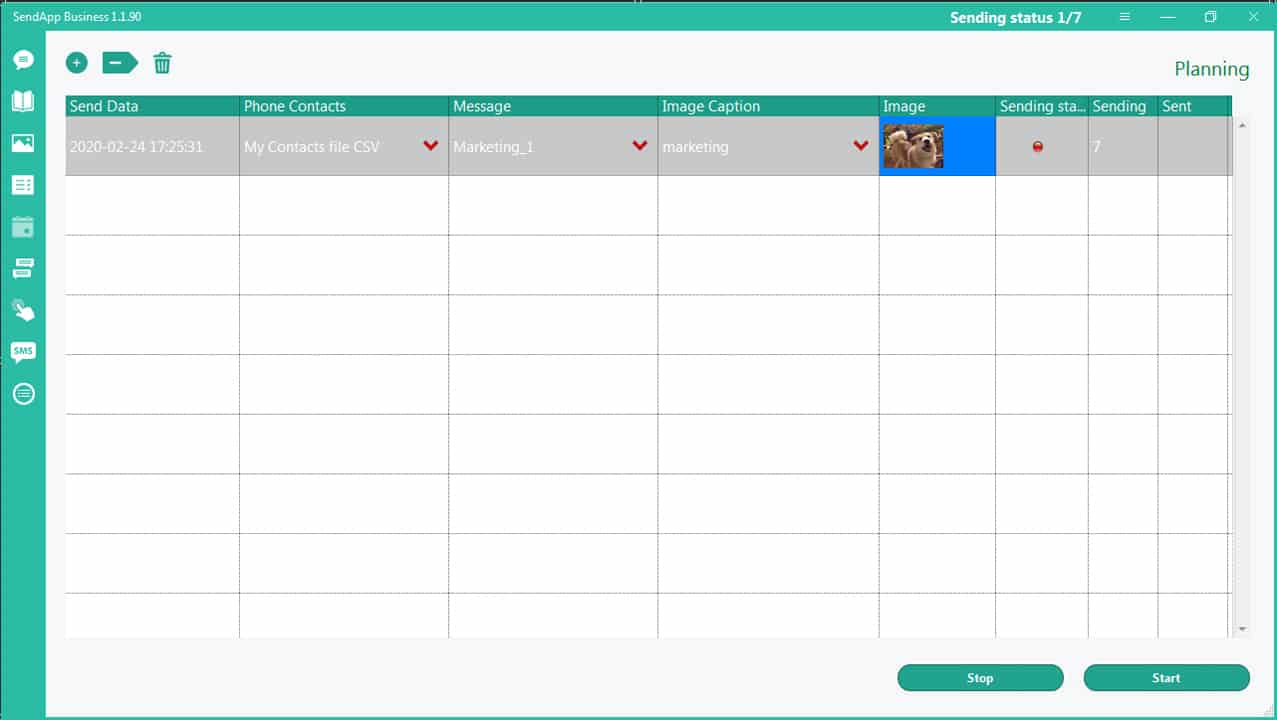
Planning Section.
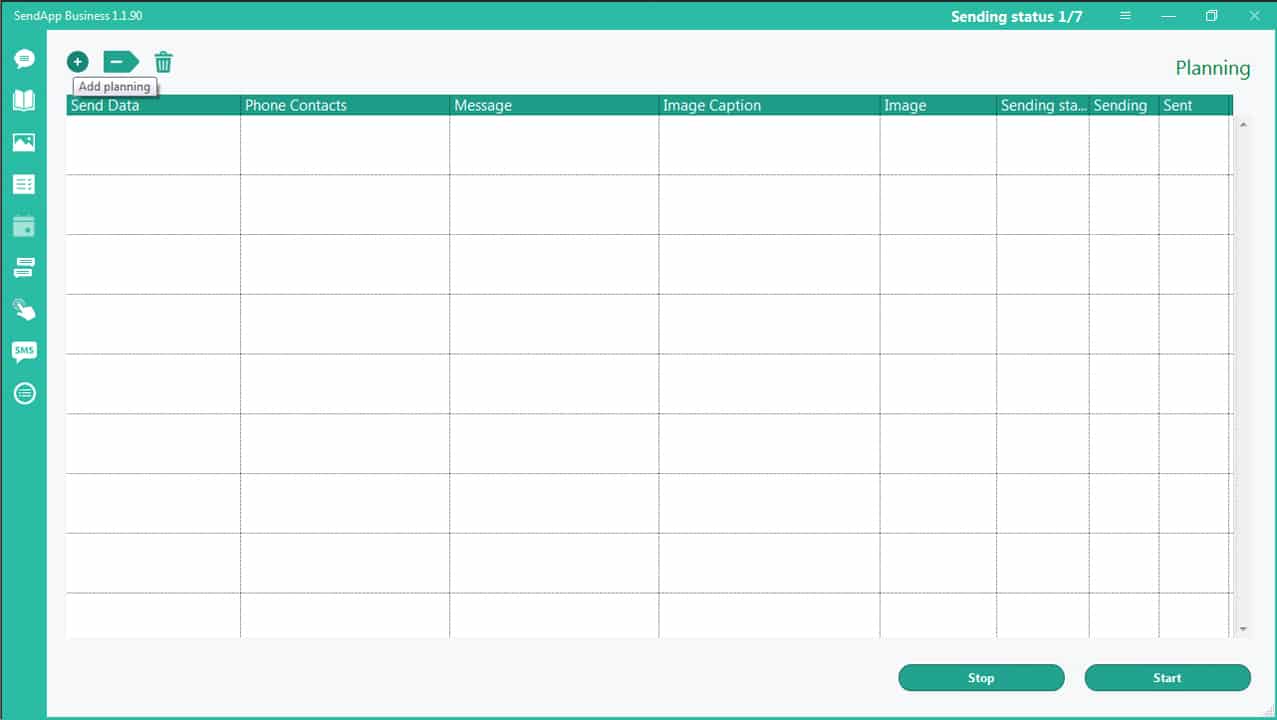
Click the + icon (top left): Add Planning
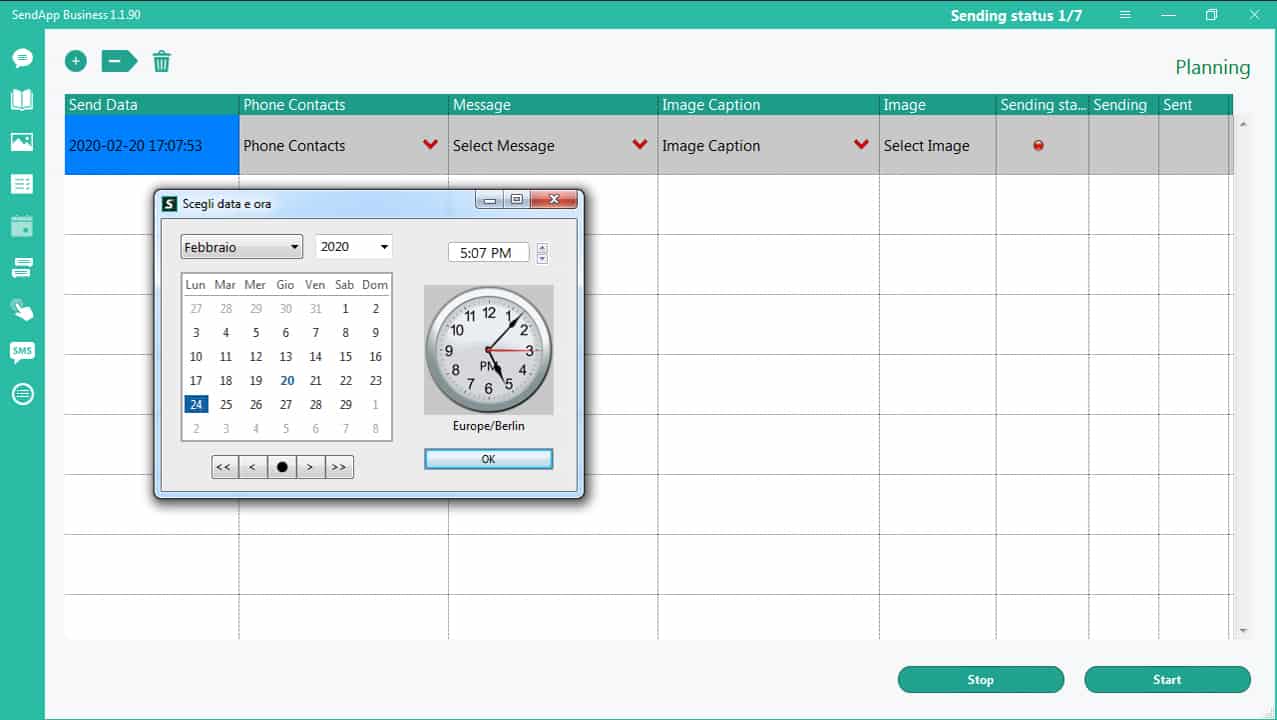
Double click on the date – set the date and time for sending.
Click on the appropriate space and select your contact list, message, (if applicable), caption, and image.
Confirm by clicking the Start button.
Warning: to send on the set date and time, the SendApp application must be open on the day set for sending.
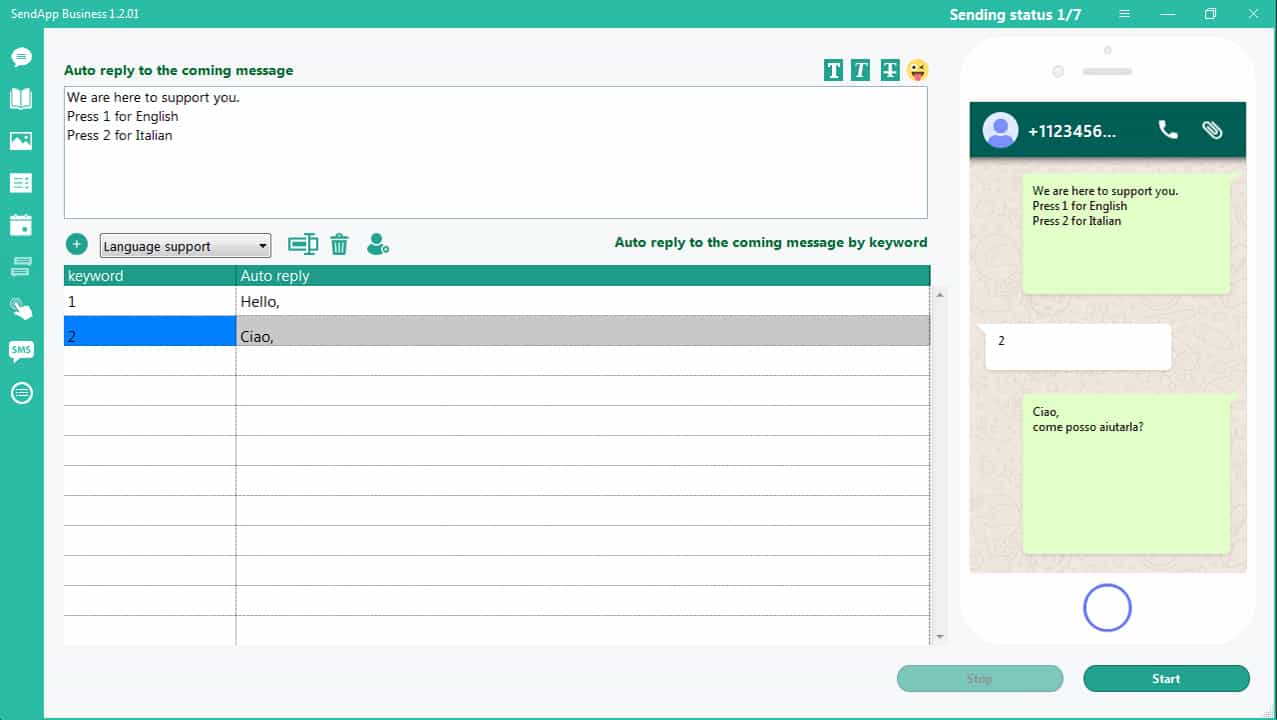
Auto Reply Section.
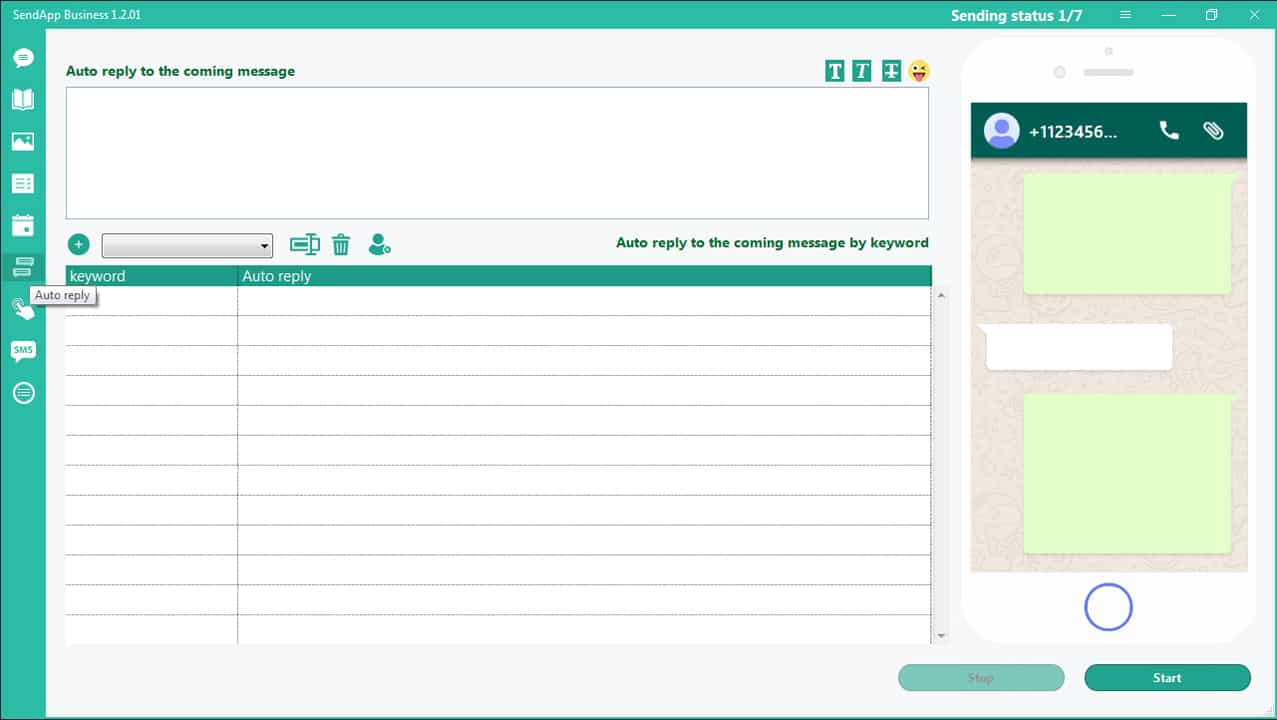
Write a generic message that will be used as the reply to all messages coming in the box above.
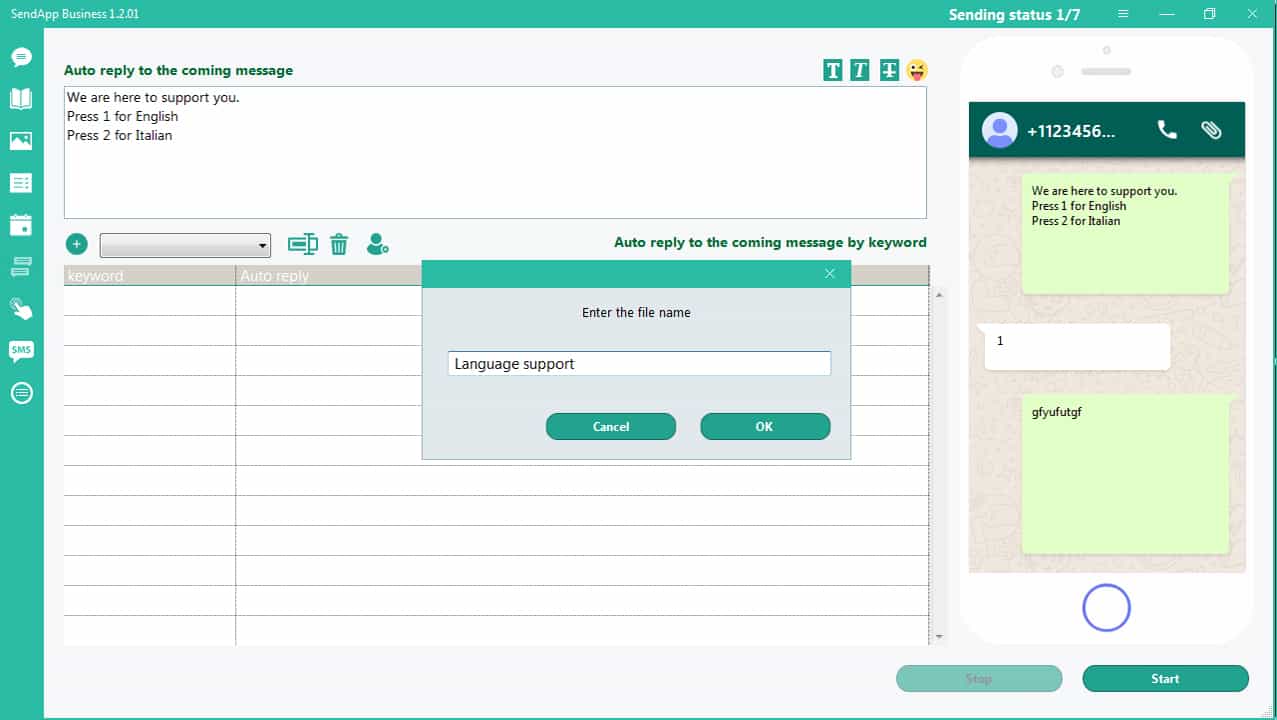
Click on the + icon and give a name for the keyword group.
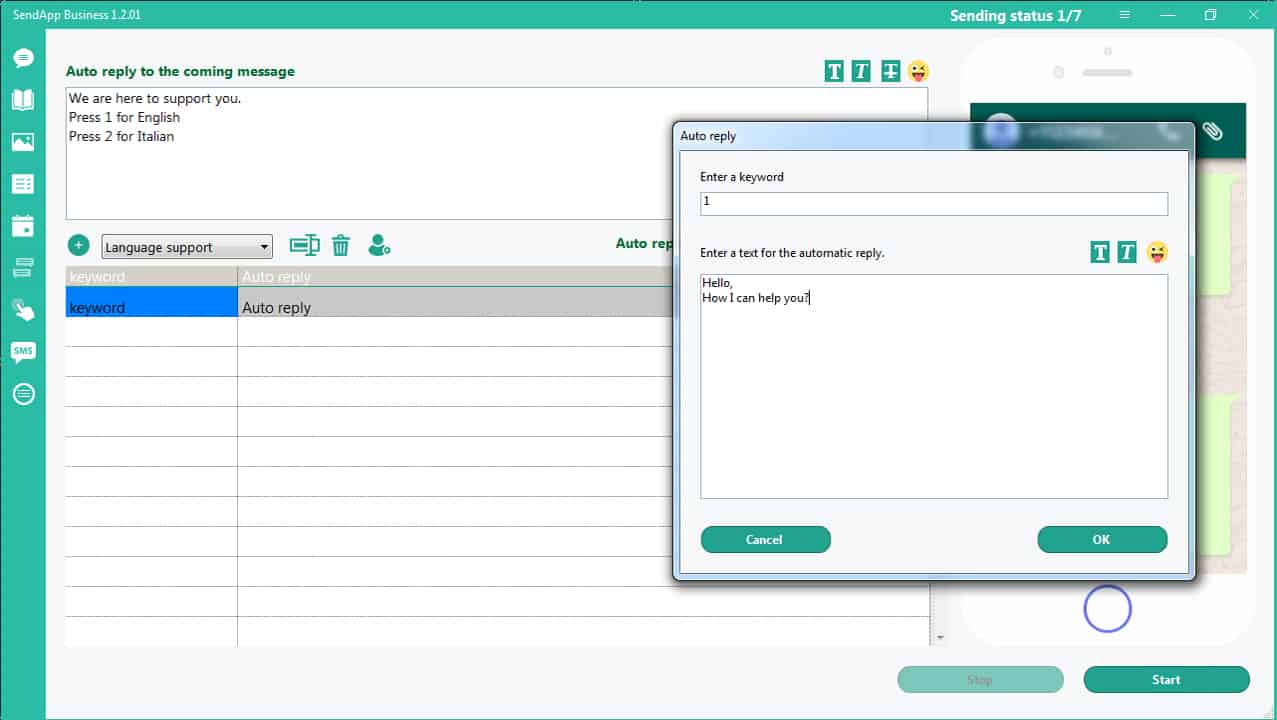
Click on the icon: Add Keyword
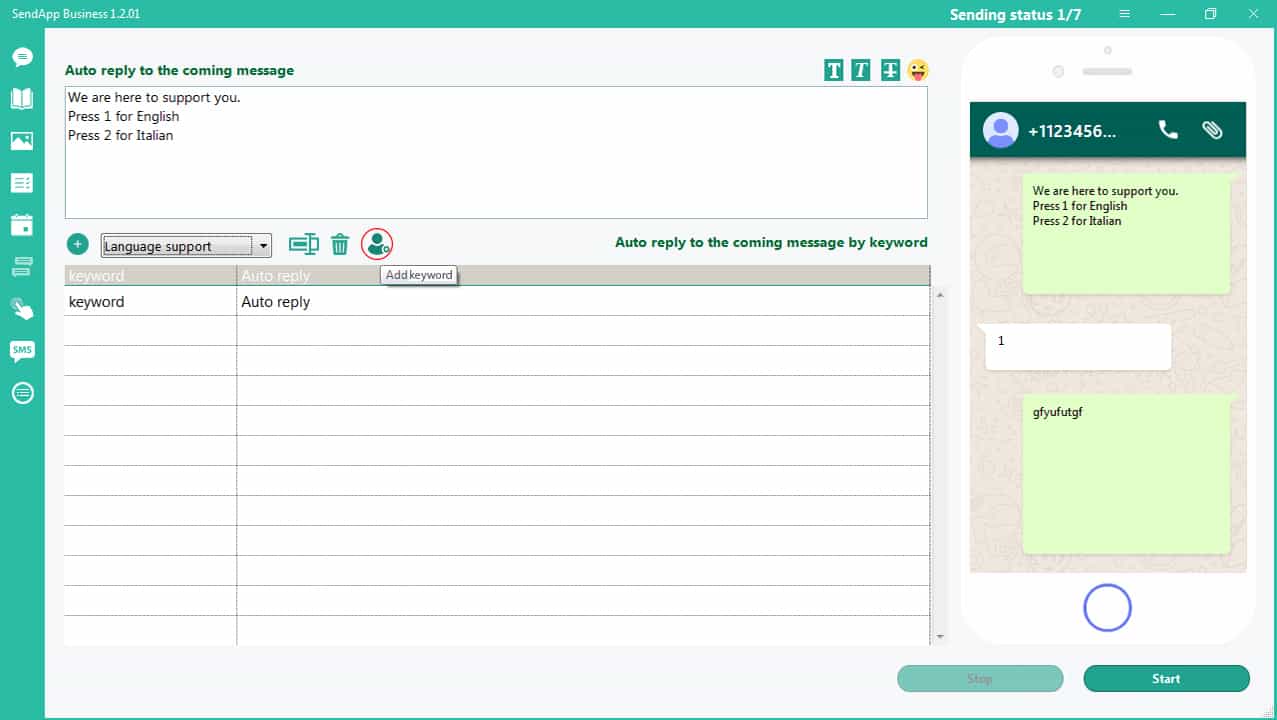
First line opens.
Double-click on the line – a window opens to enter the keyword and the corresponding answer.
How to obtain customer consent to send messages. To obtain customer consent to send messages, we create a welcome message with a request for information.
Click icon: Click to Chat Generator
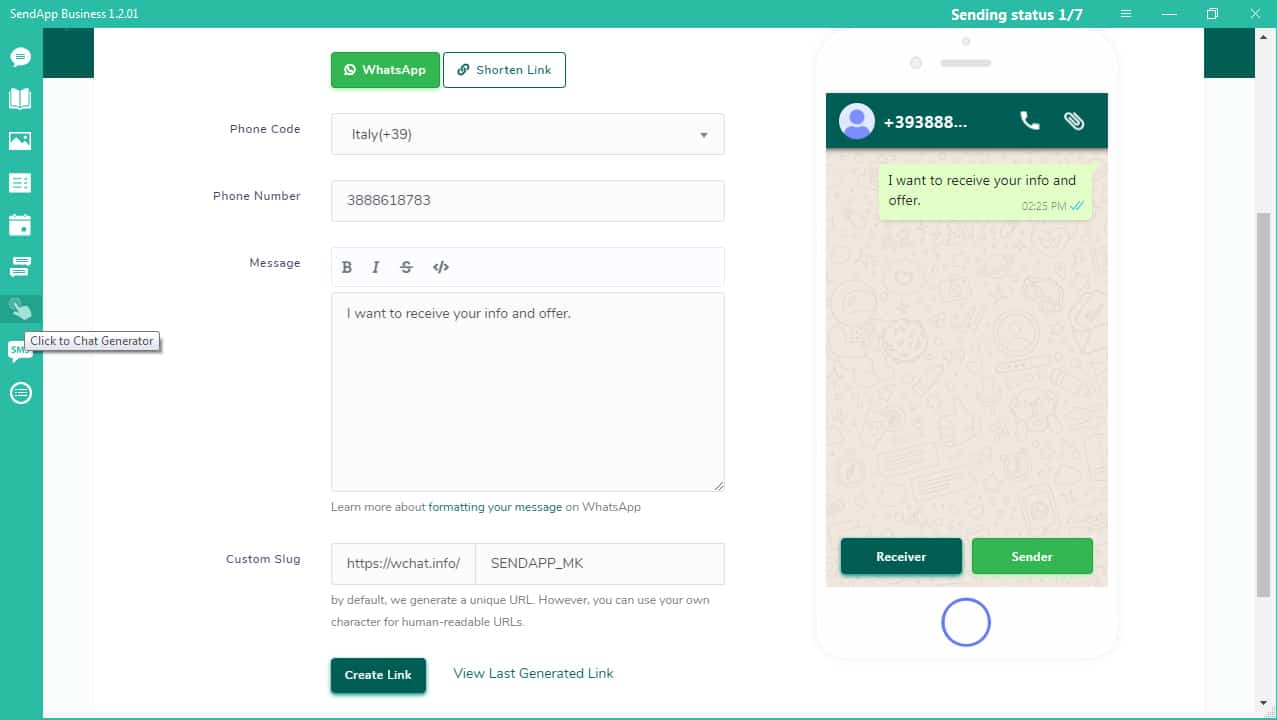
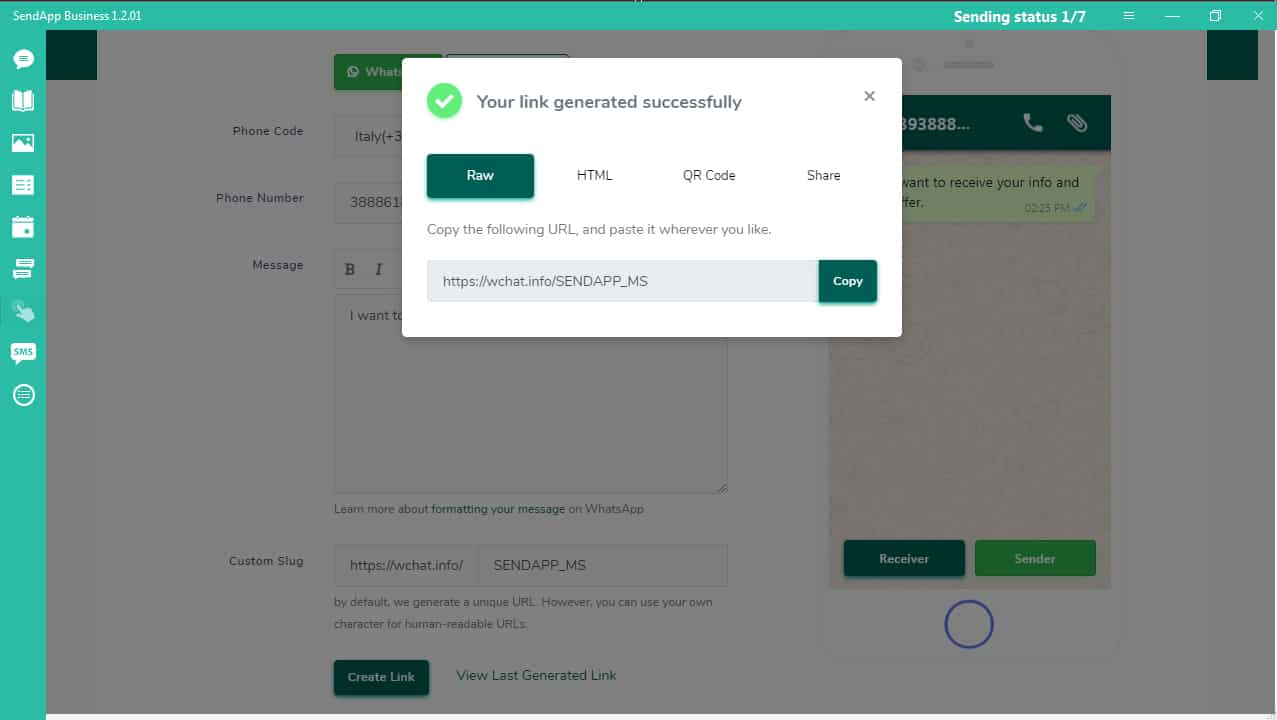
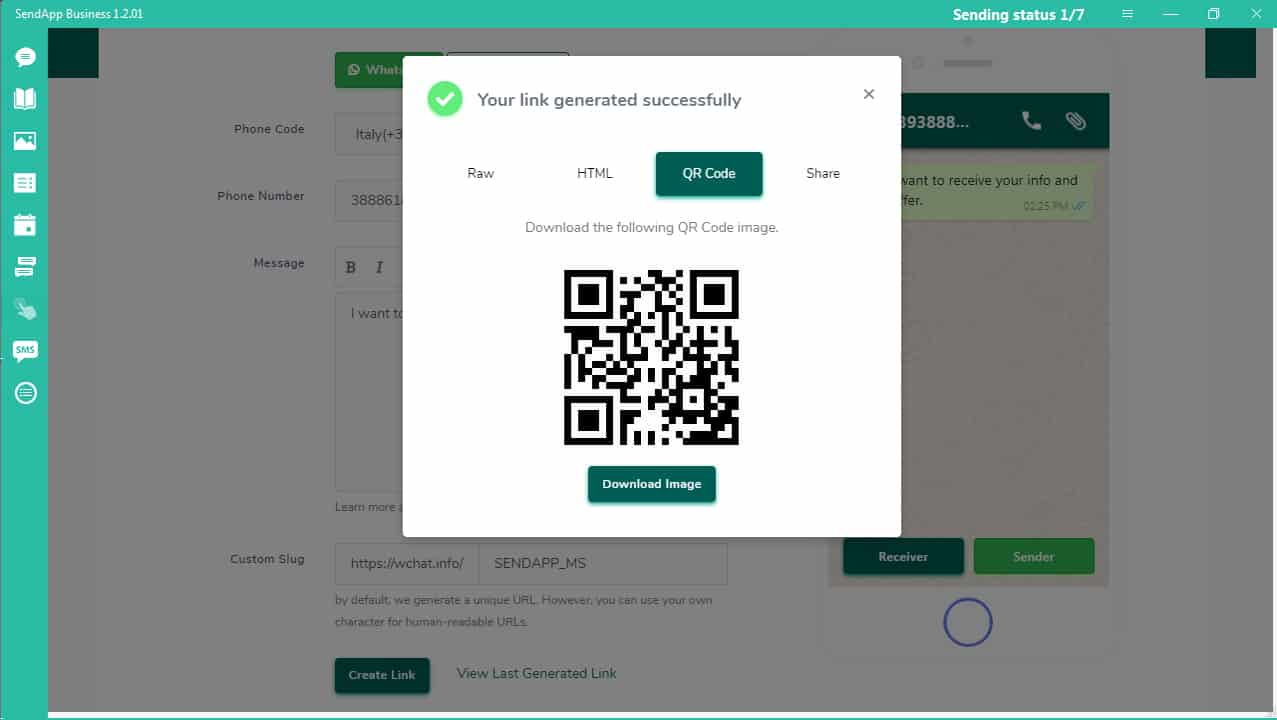
The Welcome message can be used as a link, in HTML format, or as a QR Code image.
Post the generated link on social media. Customers clicking this link automatically request information by contacting you via WhatsApp.
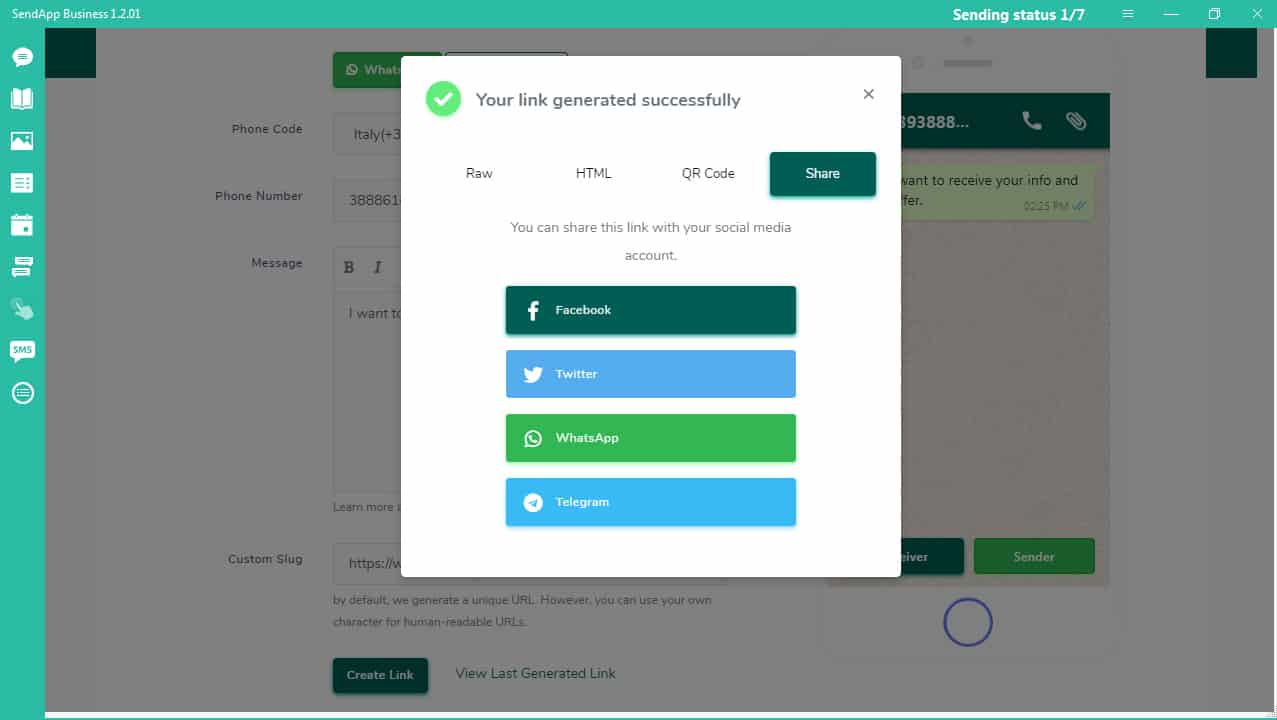
When the customer (or any other person) clicks this link, it's transferred to your WhatsApp account and automatically sends the preset message. The message should include a request to be added to your contacts, a request for information, news, etc. By contacting the customer first, they automatically give their consent to be contacted again. This complies with WhatsApp's privacy policy.
If the customer has added their name to their WhatsApp account, importing this new contact into SendApp will add their mobile number and name to your address book. This will allow you to send a personalized message to this new customer.
If you have set up an automatic reply, this message from a new customer will be sent with a welcome, informational, or advertising response.
How to set up auto-reply: Features – Instructions for use – Automatic Reply
Make a simple registration
After registration, you will receive an email with the data for configuration and access to the server:
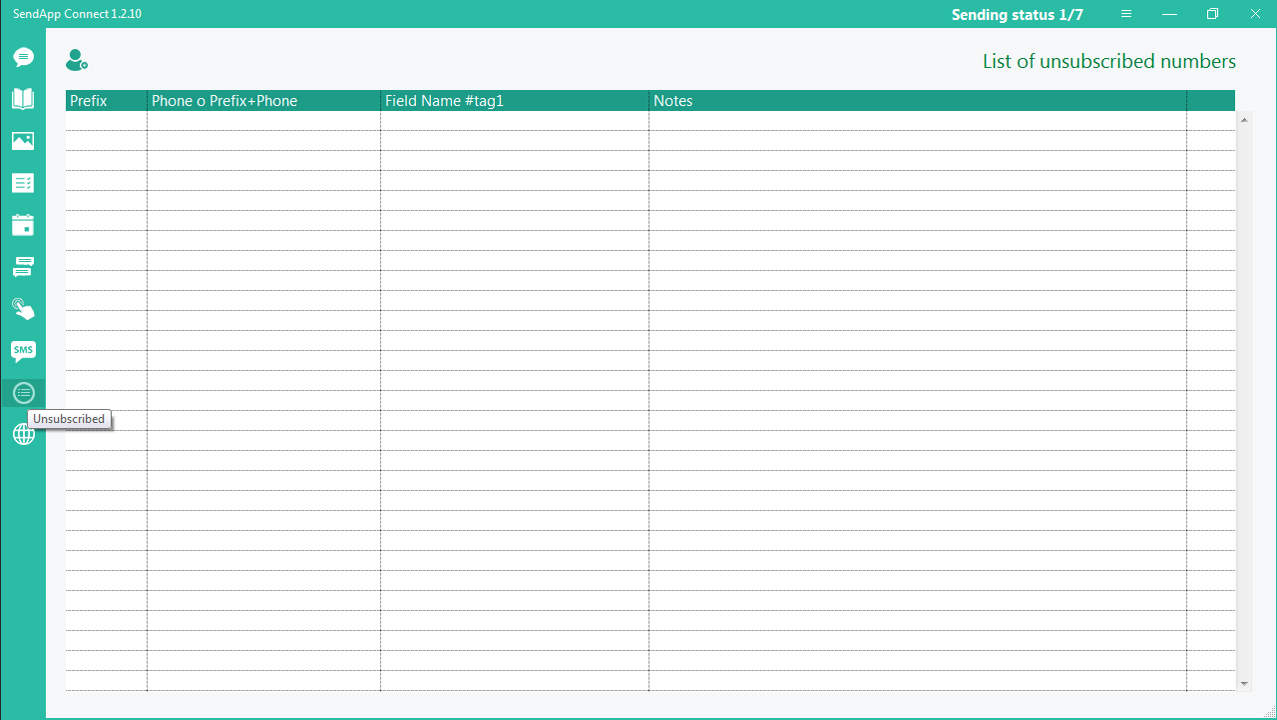
To unsubscribe from any customer, you need to go to the Unsubscribe list.
Paste (or type) the customer's phone number with the international prefix here.
You can also add some information about this unsubscribe.
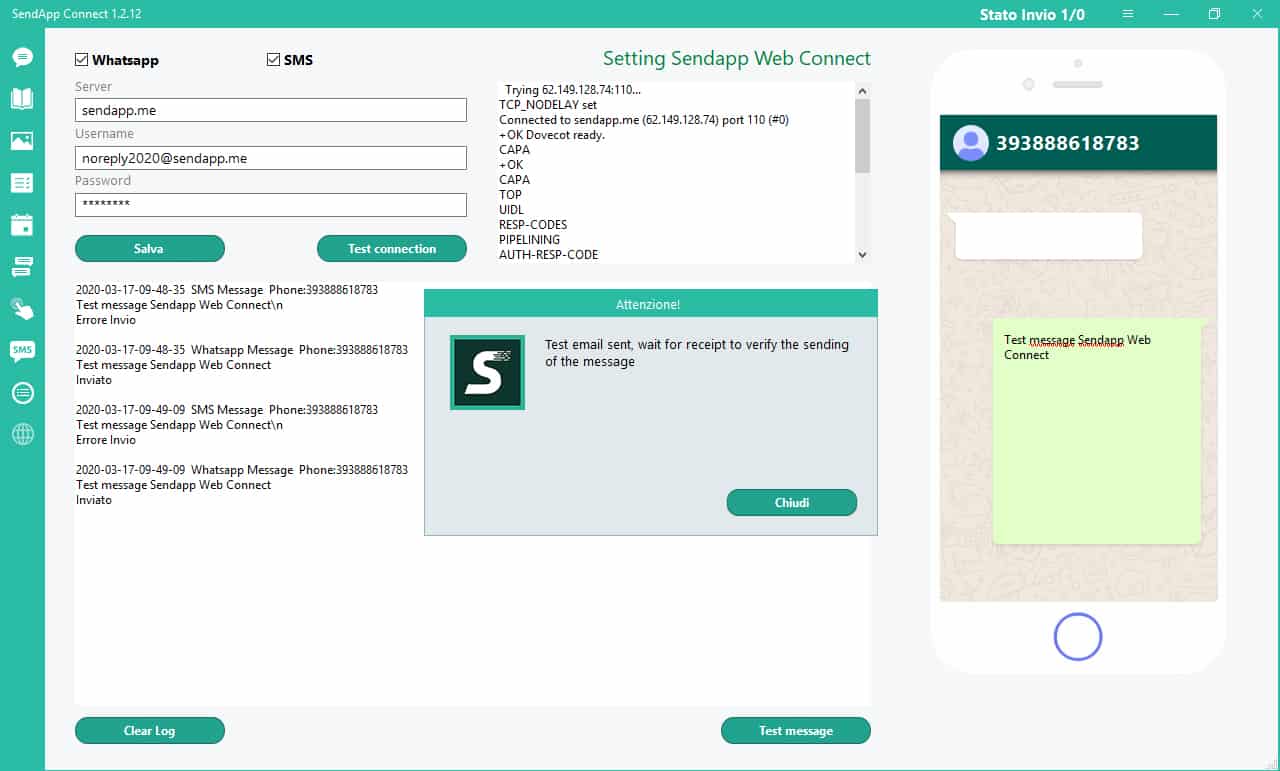
SendApp Connect allows you to send automatic notification messages from your WordPress platform to customers and the administrator.

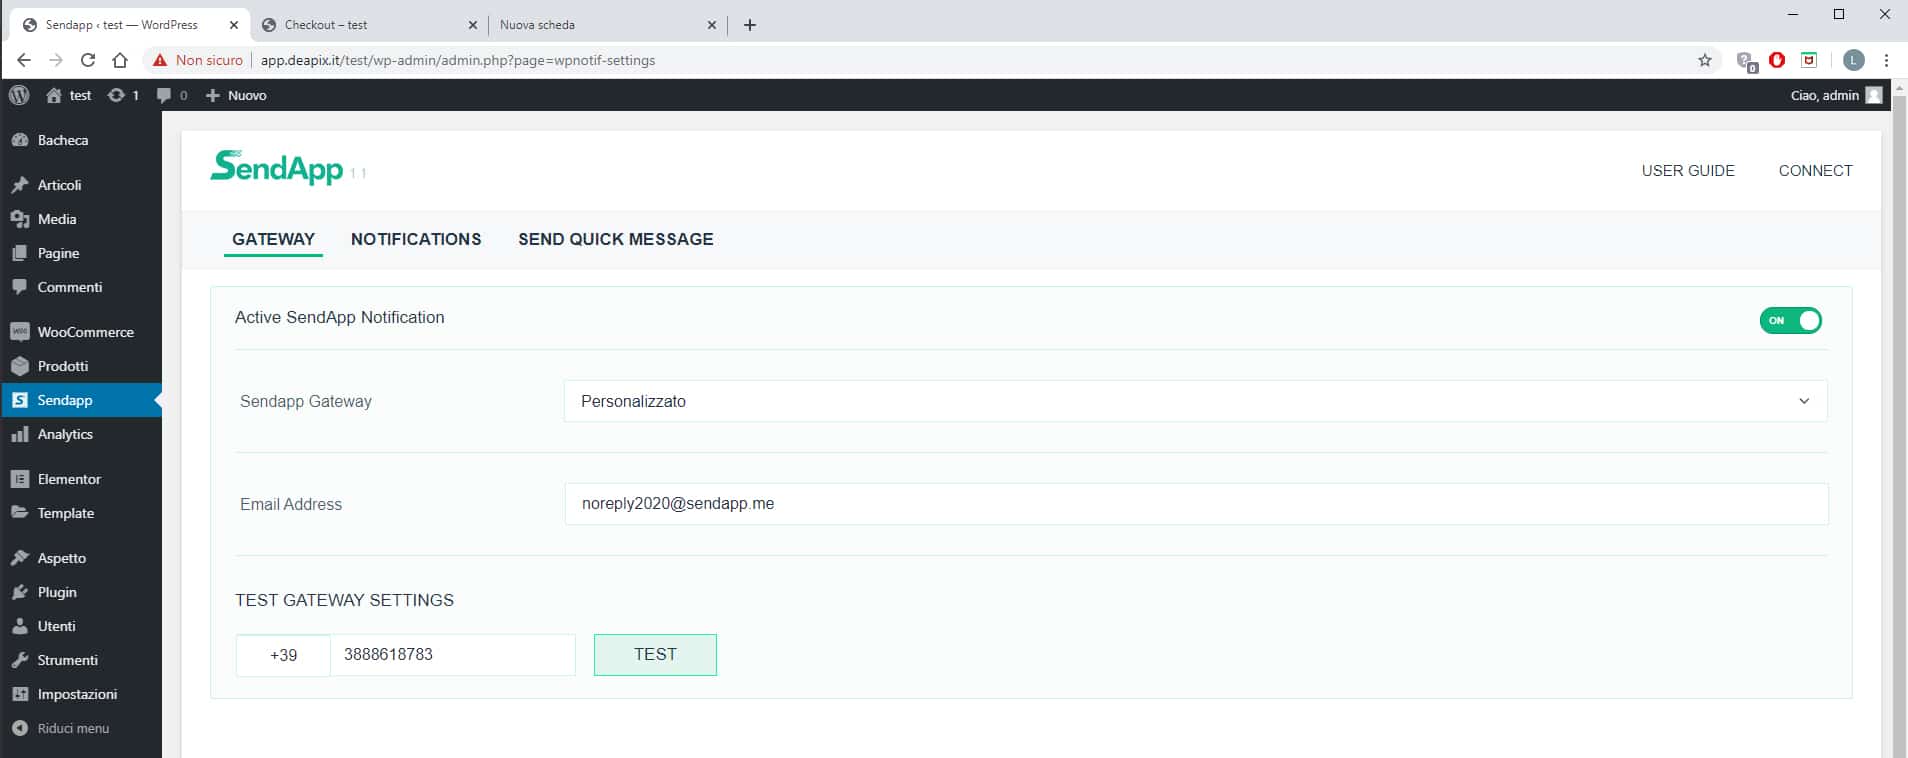
Use to access data server, email and password received with the Sendapp activation license.
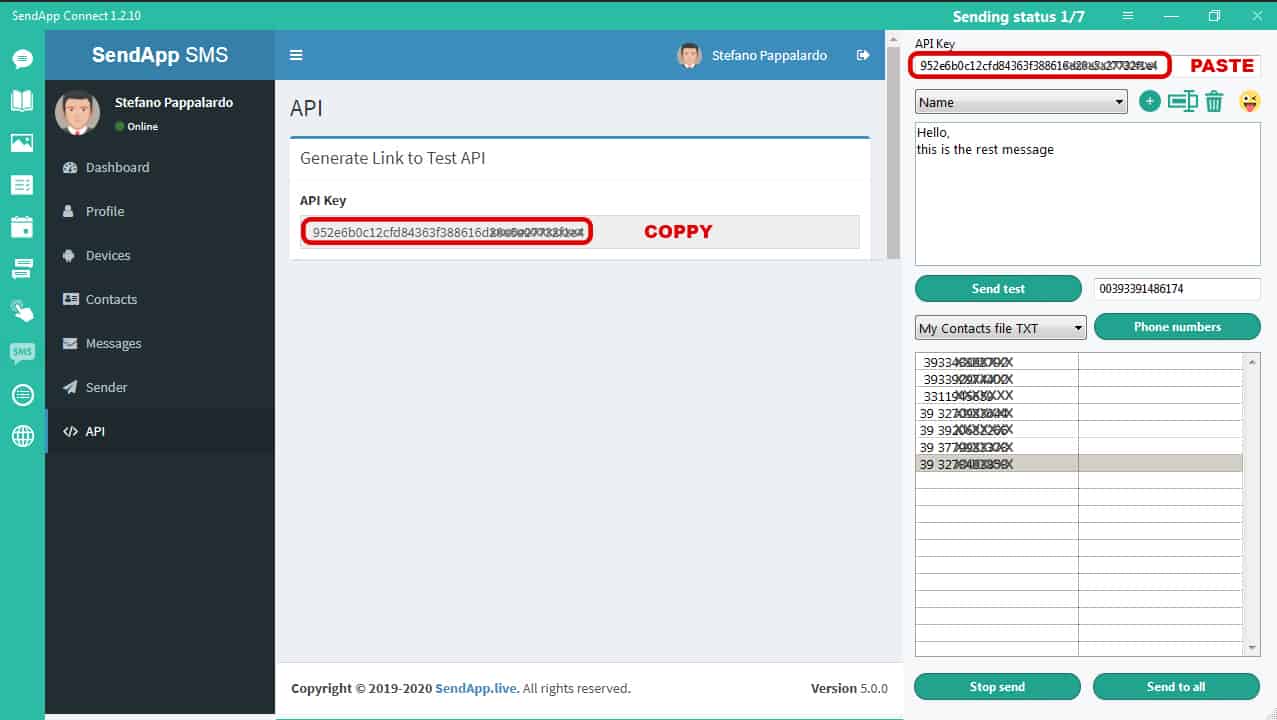
To test the connection, click the Test Connection button.
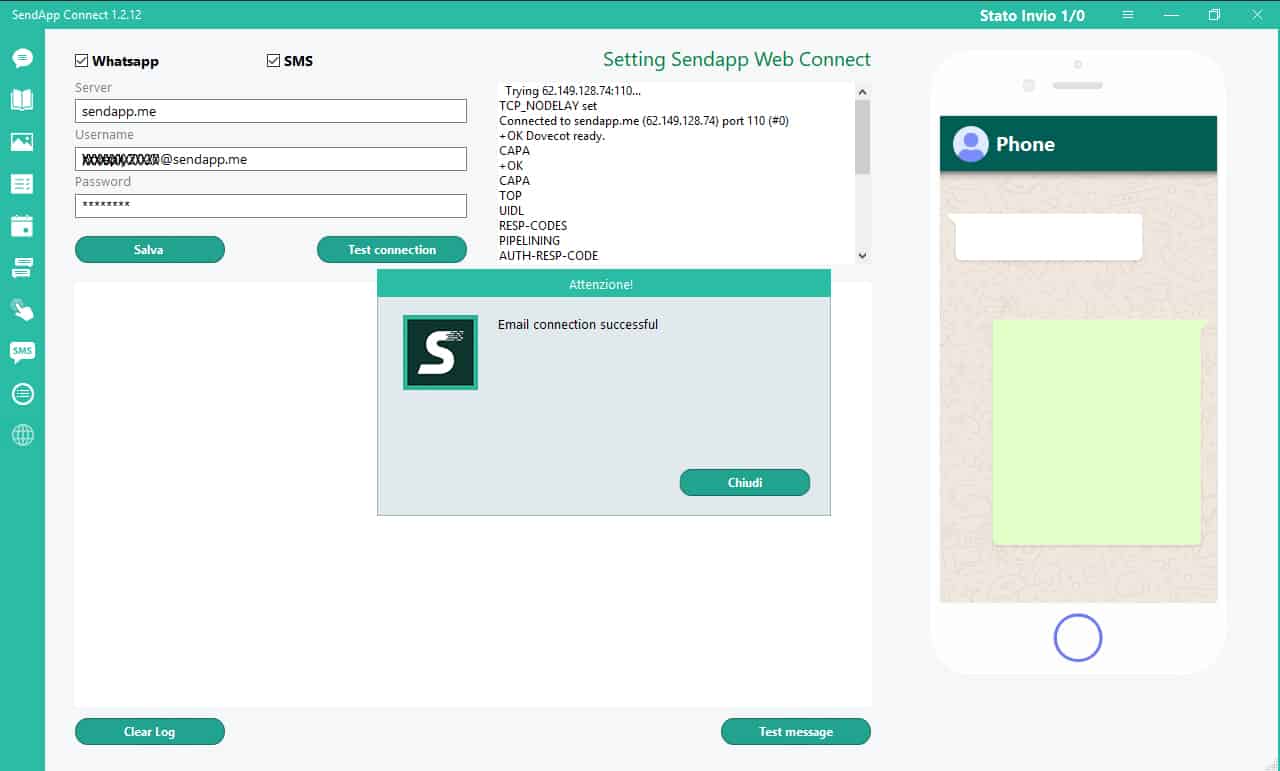
Enable voice: WhatsApp and SMS (top left). You can enable one or both.
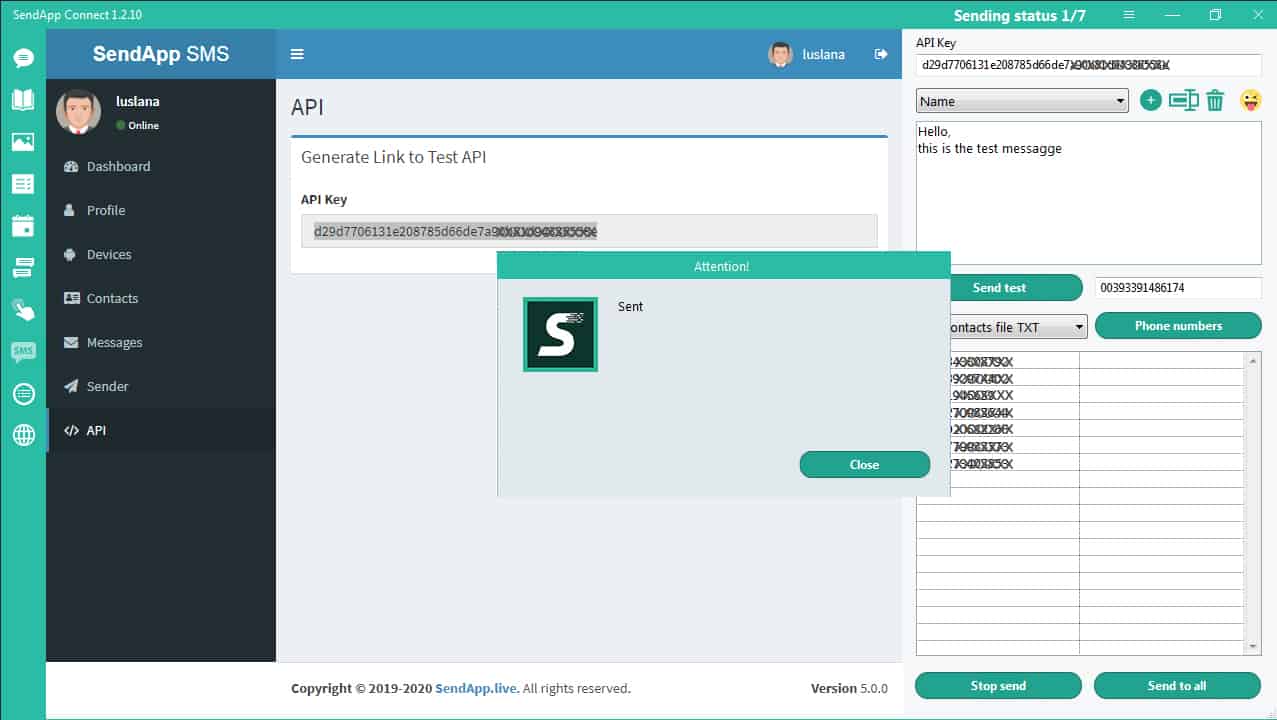
To try sending a test message – click the Test Message button (at the bottom of the window)
the message will be sent to the test number.
The submission report is displayed in the space on the left.
Download and install the free SendApp Plugin for Word Press.
SendApp plugin – Gateway:
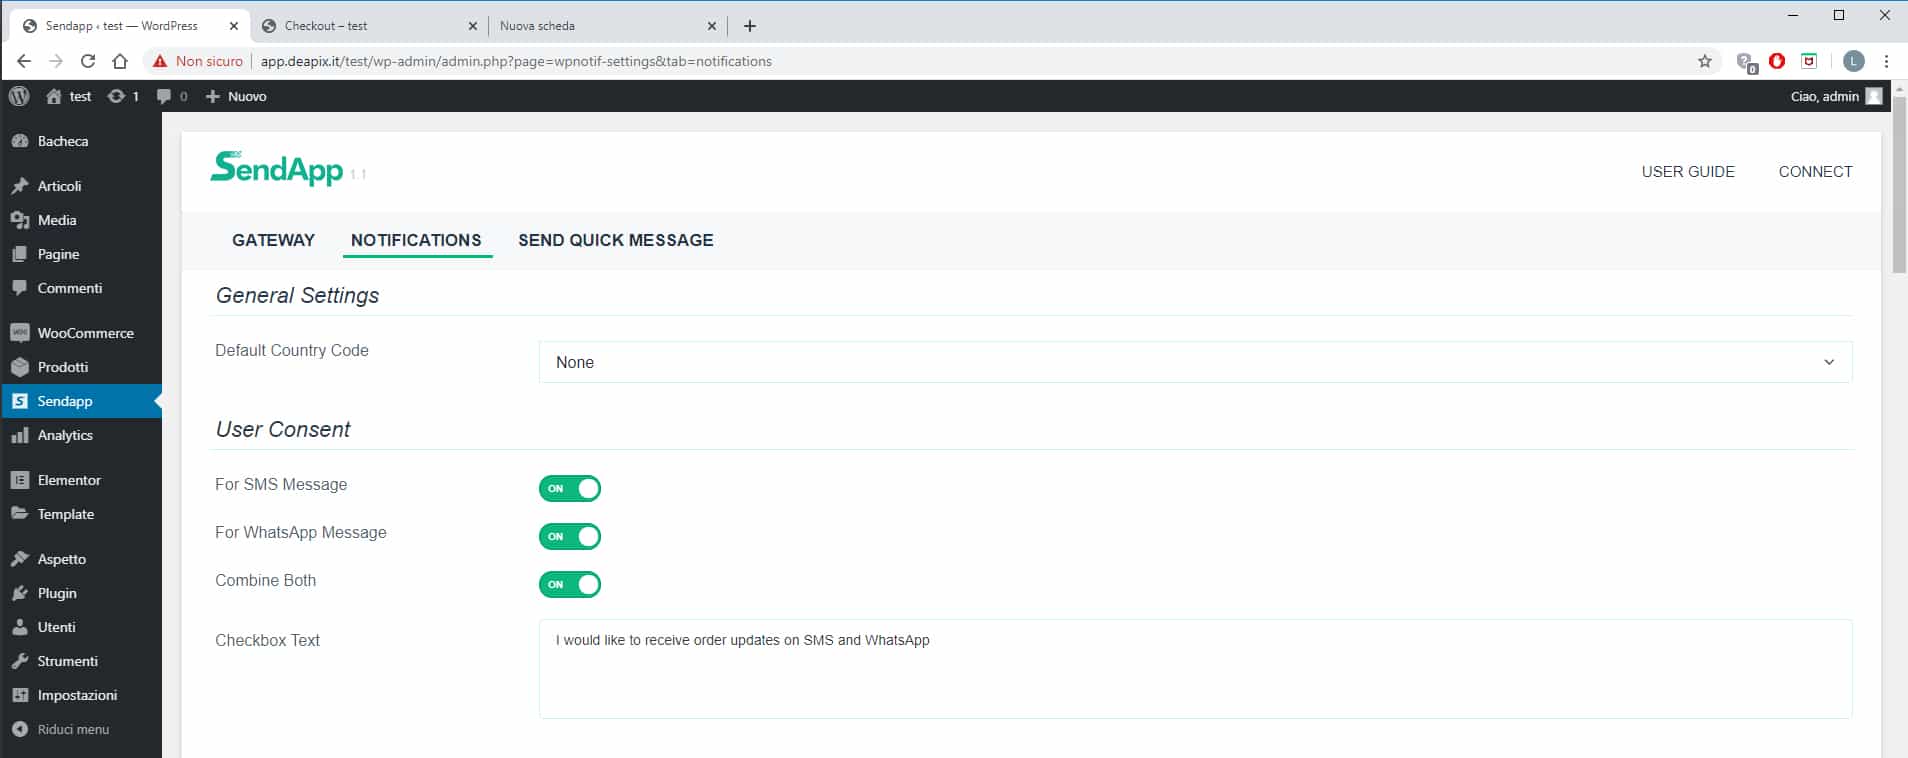
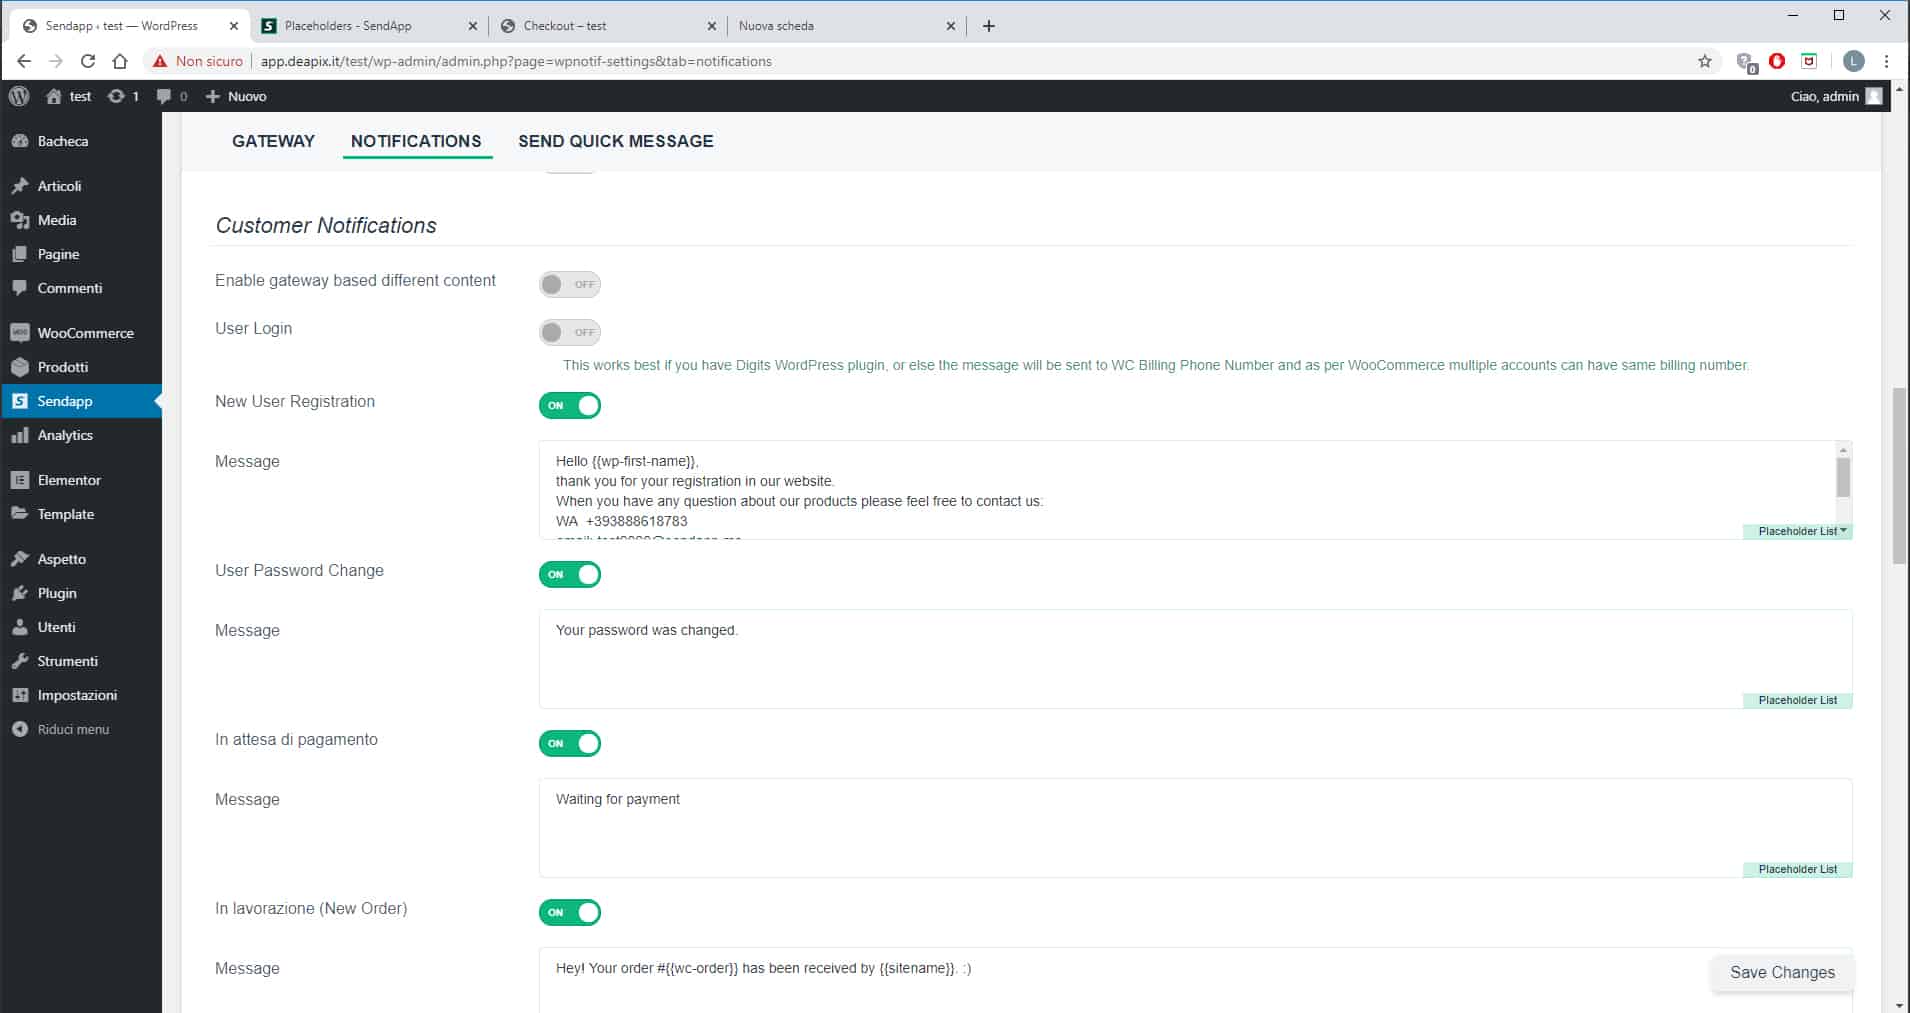
SendApp Plugin – Notifications
Here you can activate WhatsApp and SMS – this is how customers and administrators receive notifications.
One or both can be activated.
Write a message for the customer.
This block appears in the customer order.
By activating one or both of the two, the customer will give consent to receive WhatsApp messages and SMS notifications.
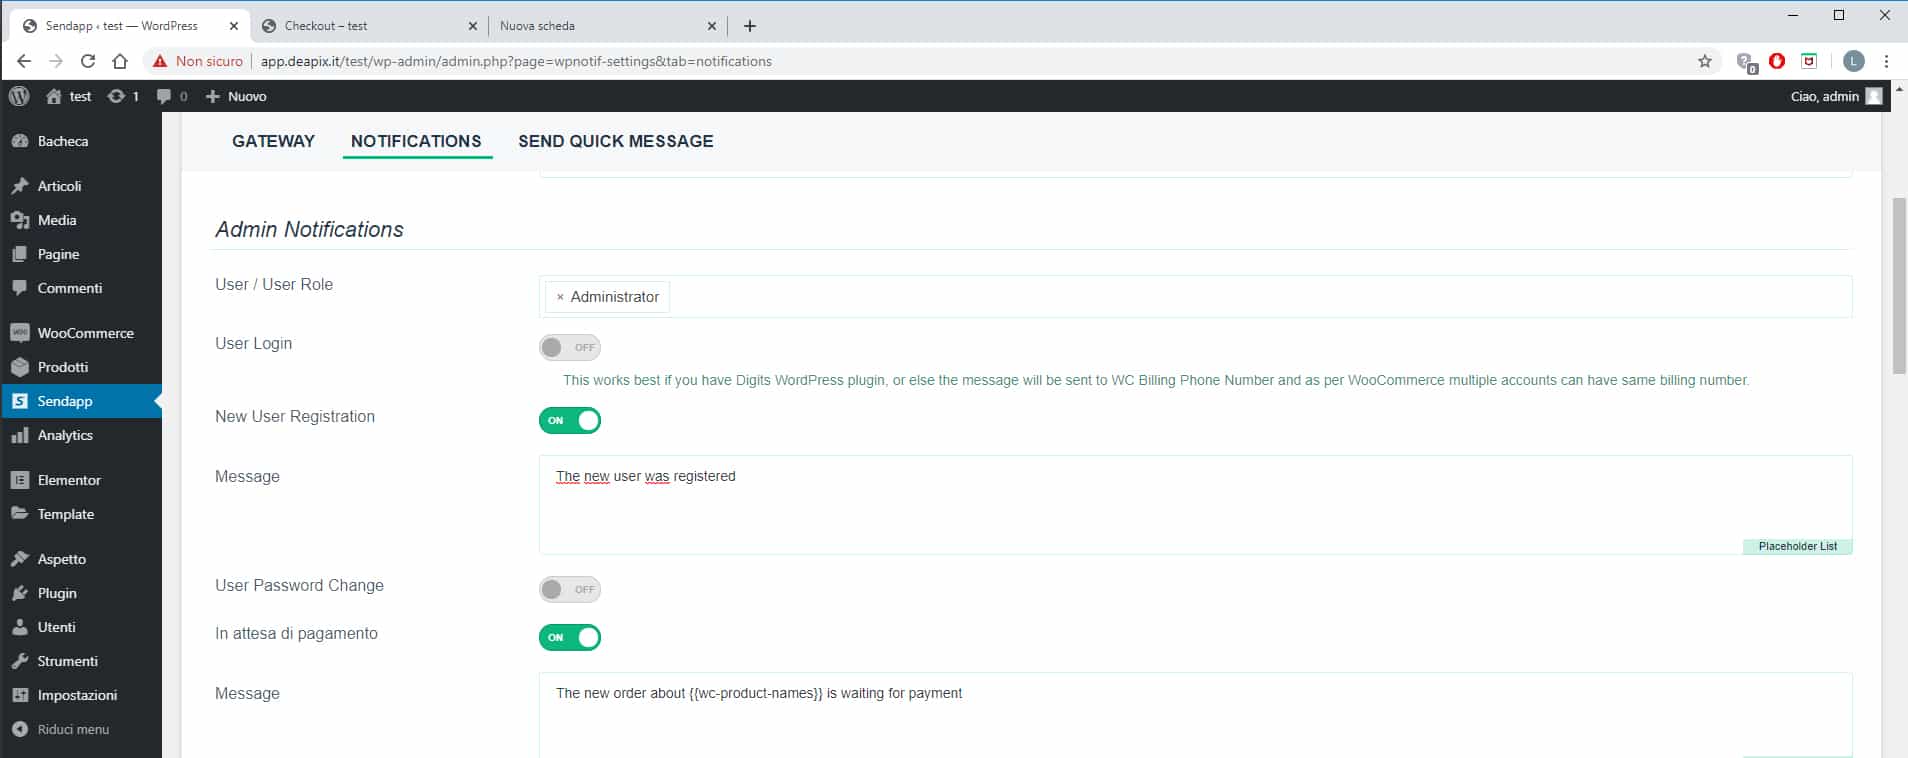
SendApp plugin – Notification
In the Admin notification block, activate the items to receive the necessary notifications.
Set notification messages.
To set up admin account:
Set the email and phone number you used to connect SendApp.
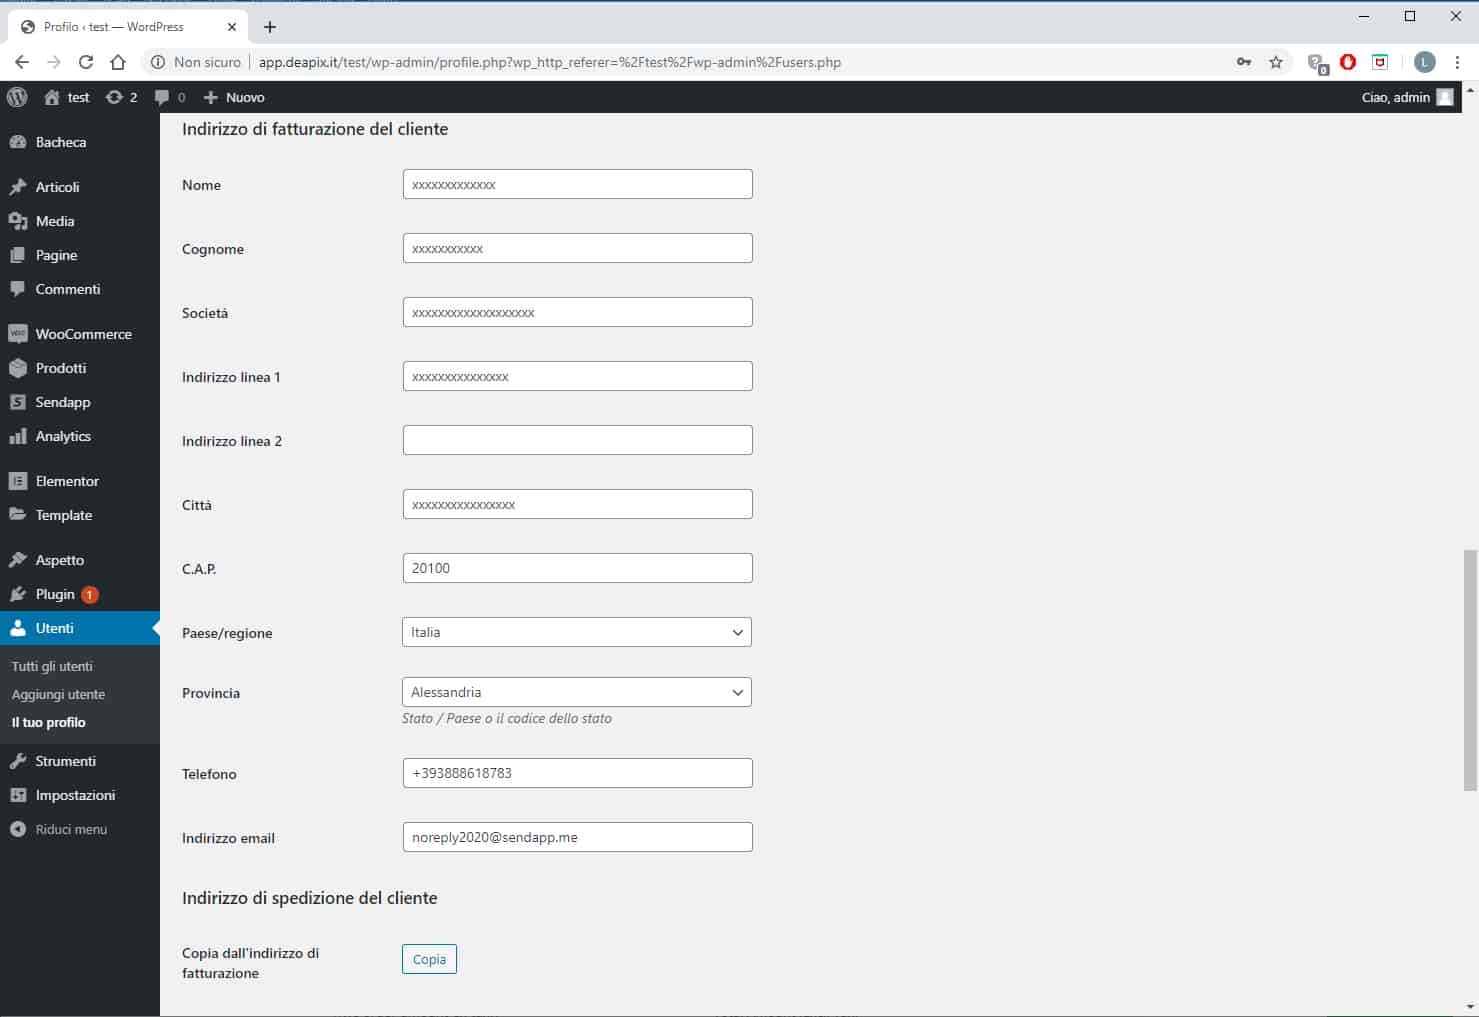
SendApp – Notifications
In the Customer Notifications block, enable the necessary notifications for customers and set the default messages for each notification.
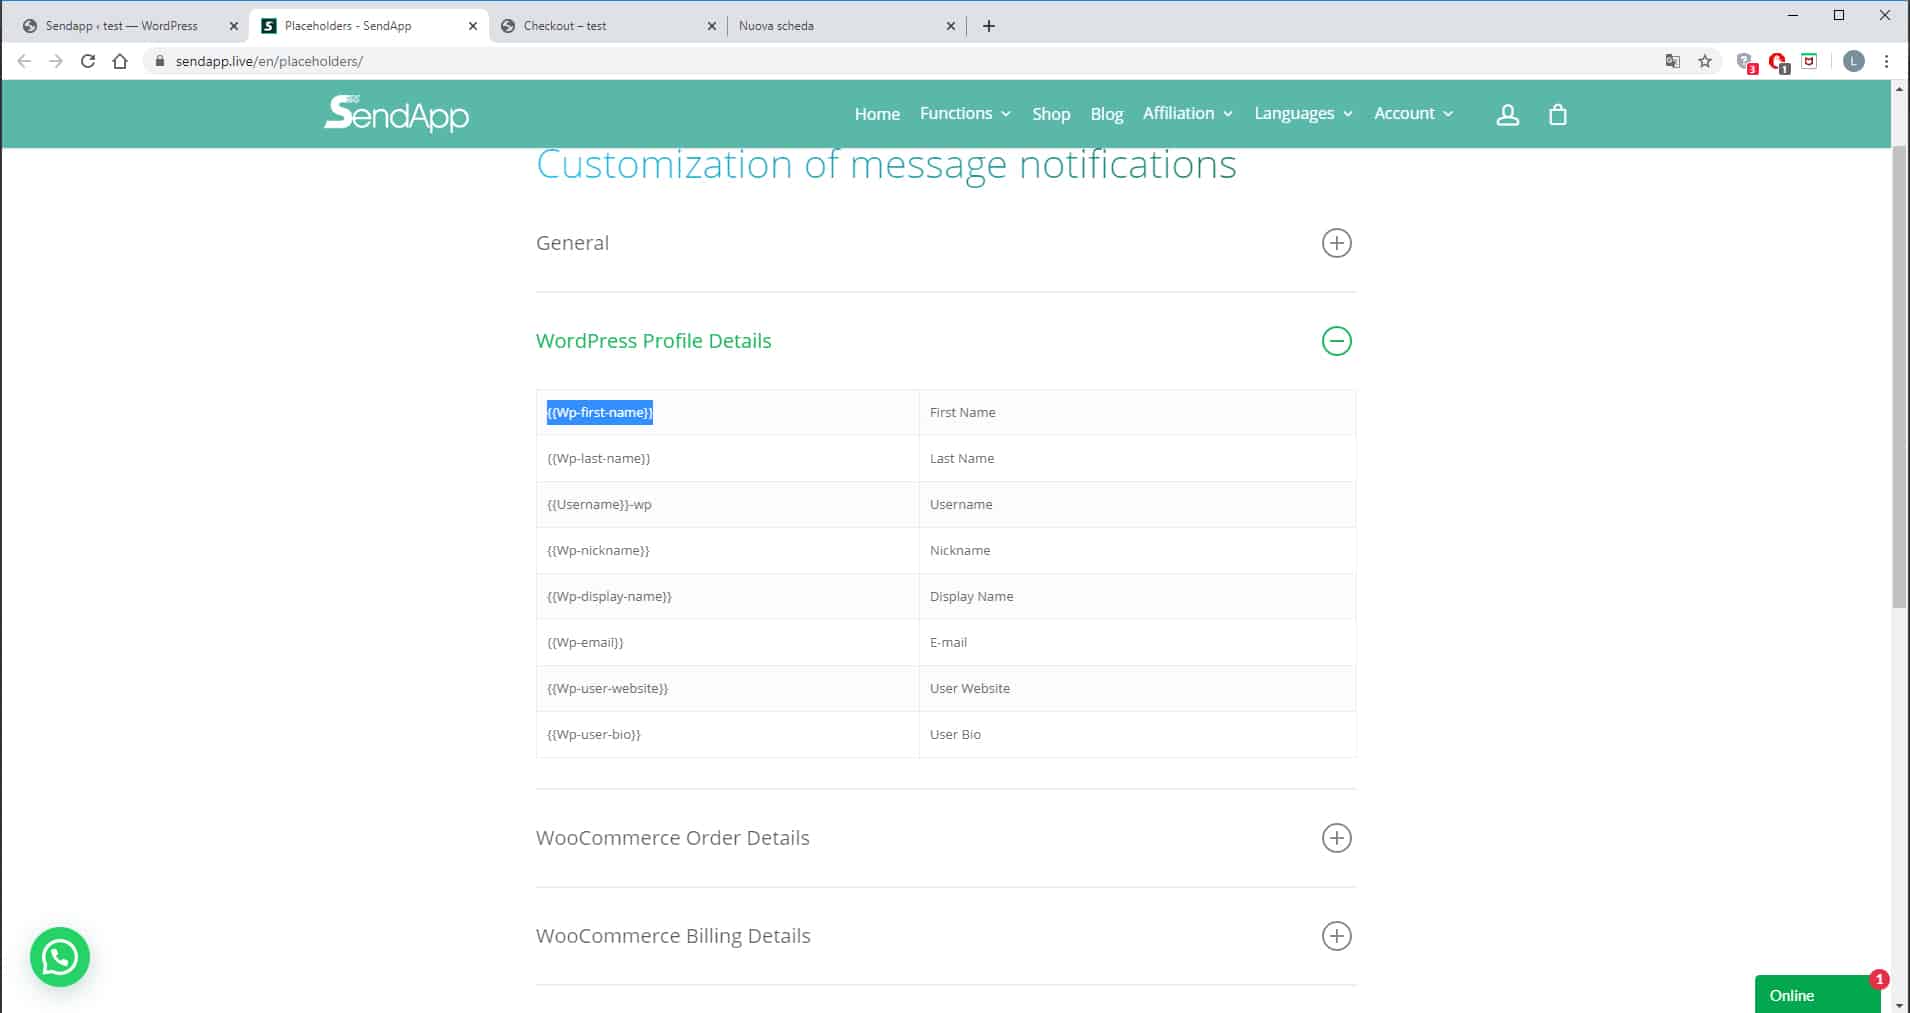
To customize the message, click on the Placeholder list item (on the right of the window)
Another window will open where you can copy the entries to personalize the message.
Warning: Must be copied from bracket to bracket: {{wc-product-names}}
The SendApp Activation License is transferable.
The software can be installed on multiple computers using license transfer.
How to transfer the License from one computer to another:
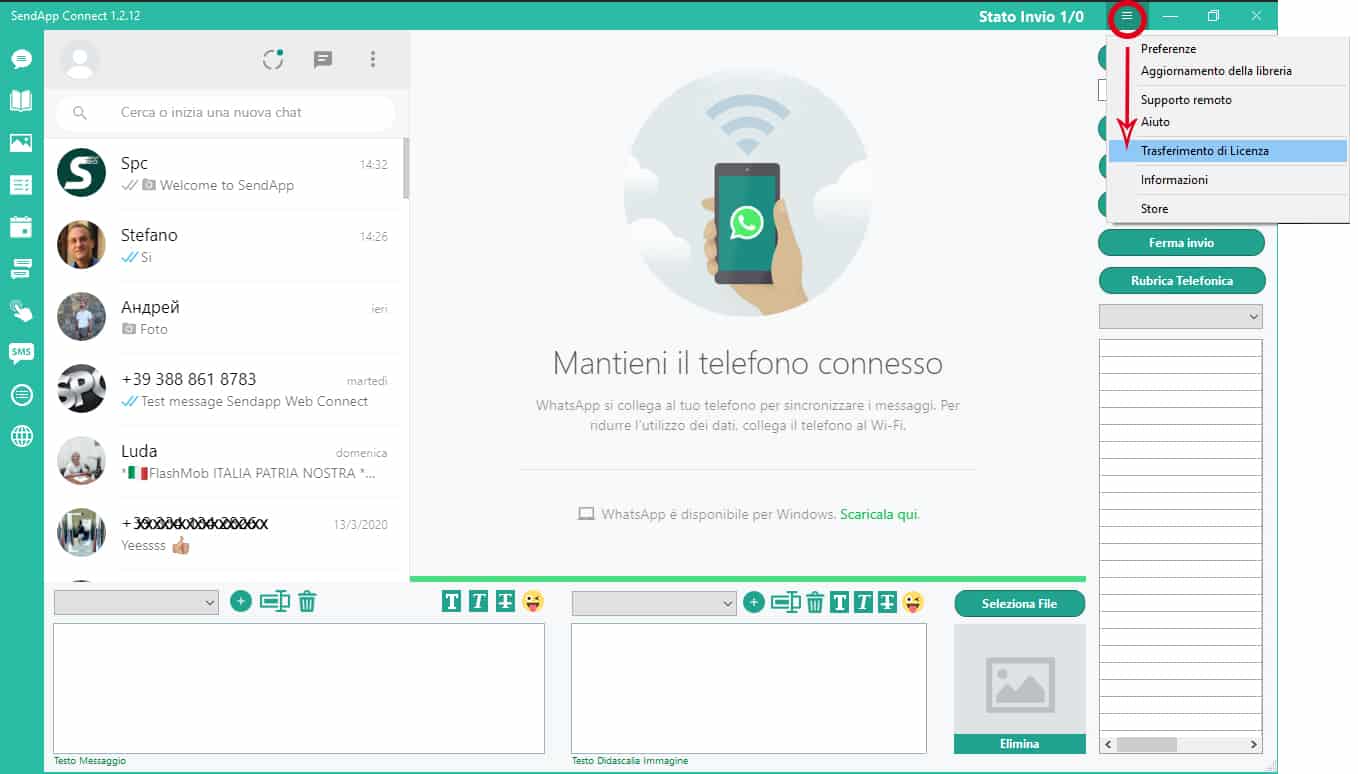
The window opens to confirm the transfer of the SendApp license to this computer.
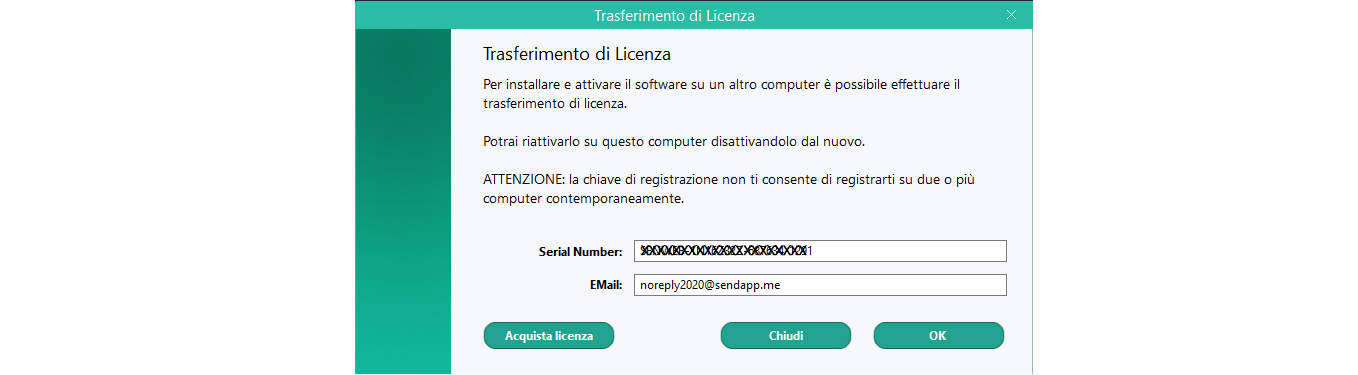
To confirm the operation – click OK.
SendApp can now be opened and activated on another computer.
